Organizando nodes (nós)
Atração para elementos
Snapping aligns the position and size of nodes to the background grid. This feature allows nodes to snap to a grid, ensuring that node layouts remain clean and visually aligned. Snapping can be toggling the snap icon (/) in the editor’s headers or toggled temporarily while transforming nodes by holding Ctrl.
Auto-Offset
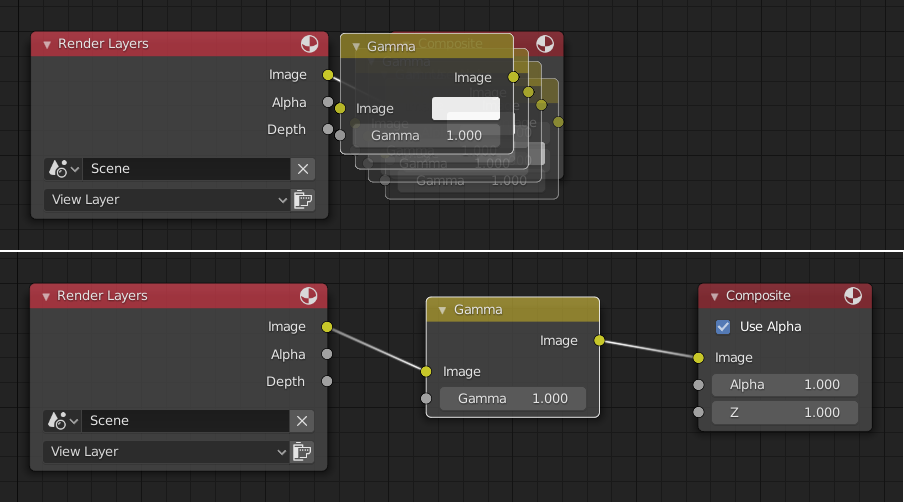
Quando você soltar um nó com pelo menos uma entrada e uma tomada de saída em uma conexão existente entre dois nós, o Auto-offset (deslocamento) irá ocorrer, dependendo da configuração de direção, mover automaticamente o nó à esquerda ou à direita para criar espaço para o novo nó. Auto-offset é um recurso que ajuda a organizar os layouts dos nós interativamente sem interromper o fluxo de trabalho do usuário.

Auto-offset is enabled by default, but it can be disabled in the Preferences.
You can toggle the offset direction while you are moving the node by pressing T.
The offset margin can be changed using the Auto-offset Margin setting in the Editing section of the Preferences.