Sobreposições
The Overlays pop-over.
In the header, there is a button to turn off all overlays for the UV Editor. This option also toggles the visibility of UDIM tile information.
The drop-down button opens a pop-over with more detailed settings. The following categories are available:
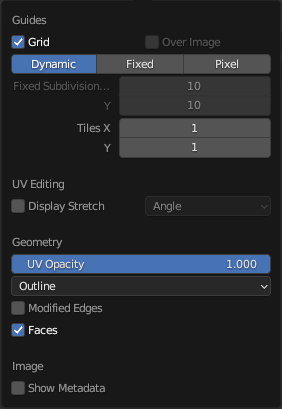
Guides
- Grade
Show the grid.
- Over Image
Show the grid on top of the image rather than behind it.
- Grid Shape Source
How the row and column counts are determined.
- Dinâmico:
The grid starts at 8×8 cells that are automatically subdivided further as you zoom in.
- Fixo:
The row and column counts are fixed and can be configured manually.
- Pixel:
Each grid cell matches one image pixel.
- Fixed Subdivisions X, Y
Number of columns/rows in the grid.
- Tiles X, Y
The number of UDIM tile grids to display in each cardinal direction.
UV Editing
- Display Stretch
Show how much of a shape difference there is between UV space and 3D space. Blue means low distortion, red means high. You can choose whether to display the distortion based on Angle or Area.
Geometria
- UV Opacity
Opacity of edges and faces.
- Display As
Control how edges are shown.
- Outline:
Display edges in gray with a black outline.
- Dash:
Display edges as dashed black-gray lines.
- Black:
Display edges in black.
- White:
Display edges in white.
- Modified Edges
Additionally show the edges as they look after applying modifiers (in gray).
- Faces
Display faces over the image.
Imagem
- Show Metadata
Display metadata about the selected Render Result. See the Output tab’s Metadata panel to change what metadata to include.