Apagando e dissolvendo
Referência
- Mode:
Edit Mode
- Menu:
Estas ferramentas podem ser usadas para remover componentes.
Apagar
Referência
- Atalho:
X, Delete
Apaga vértices, arestas ou faces selecionados(as). Esta operação também poderá ser limitada para os seguintes elementos:
- Vértices
Apaga todos os vértices na seleção atual, removendo quaisquer faces ou arestas aos quais eles estão conectados.
- Arestas
Apaga quaisquer arestas na seleção atual. Remove quaisquer faces que as arestas estiverem compartilhando entre si.
- Faces
Remove quaisquer faces na seleção atual.
- Somente arestas e faces
Limita as operações para ser efetuadas somente nas arestas selecionadas e faces adjacentes.
- Somente faces
Removes faces, but edges within the face selection are retained.
Dissolver
As operações de dissolução também são acessíveis através do menu para apagar elementos. As dissoluções irão remover a geometria e ao mesmo tempo preencherão a geometria circundante ao invés de simplesmente remover a geometria, o que poderia acabar deixando lacunas (orifícios) as quais você teria de preencher novamente.
Remove a geometria selecionada, mas sem criação de lacunas (orifícios), efetivamente transformando a seleção em um multilátero (n-gon). A dissolução funciona de maneira ligeiramente diferente em relação ao tipo de seleção, sejam vértices, arestas ou faces, ou a combinação da seleção. Você pode adicionar detalhes onde necessitar, ou removê-los rapidamente onde não os desejar.
Dissolver vértices
Referência
- Mode:
Edit Mode
- Menu:
Remove the vertex, merging all surrounding faces. In the case of two edges, merging them into a single edge.
- Dividir faces
Durante a dissolução dos vértices em faces circundantes, você poderá muitas vezes terminar com multiláteros muito grandes e com uma distribuição muito irregular. A opção de dividir faces limita a dissolução a utilizar somente as adjacências (cantos) das faces conetadas aos vértices.
- Tear Boundaries
Split off face corners instead of merging faces.
Examples
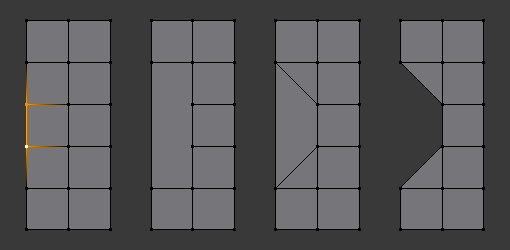
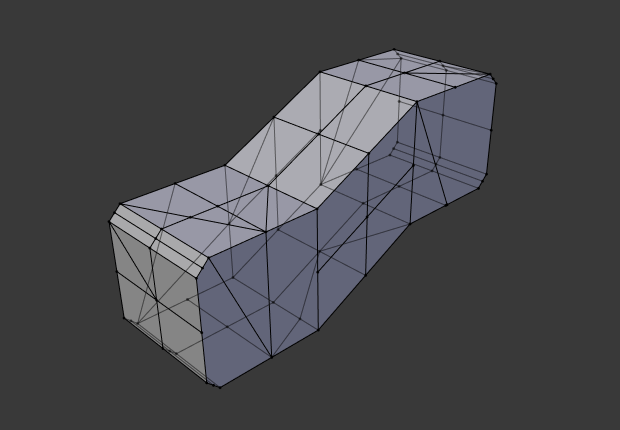
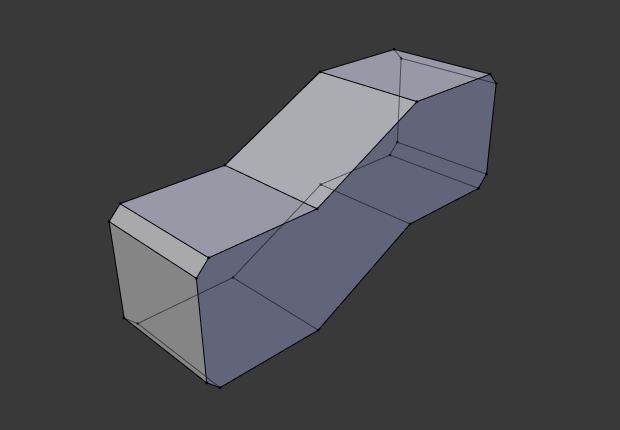
1) Original mesh. 2) Face Split: Off, Tear Boundaries: Off. 3) Face Split: On, Tear Boundaries: Off. 4) Face Split: On/Off, Tear Boundaries: On.
Dissolve Edges
Referência
- Mode:
Edit Mode
- Menu:
Removes edges sharing two faces (joining those faces).
The options are the same as for the Dissolve Vertices tool.
Dissolve Faces
Referência
- Mode:
Edit Mode
- Menu:
Merges regions of faces that share edges into a single face.
Nota
This can be accessed quickly using the F key, see: Dissolve Existing Faces.
Dissolve (Context-Sensitive)
Referência
- Atalho:
Ctrl-X
This is a convenient shortcut that dissolves based on the current selection mode (vertex, edge, face).
Dissolução limitada
Referência
- Mode:
Edit Mode
- Menu:
This tool can simplify your mesh by dissolving vertices and edges separating flat regions.
- Ângulo máximo
Reduces detail on planar faces and linear edges with an adjustable angle threshold.
- Todas as margens
Always dissolve vertices that have two edge users at boundaries.
- Delimitar
Prevent faces from joining when they don’t share certain properties (material for e.g.).
Collapse Edges & Faces
Referência
- Mode:
Edit Mode
- Menu:
- Atalho:
X,
Collapse each isolated edge and face region into single vertices, with support for face data such as UVs and vertex colors.
This is useful for taking a ring of edges and collapsing it, removing the face loop it ran through.
Dica
This can be useful as a general way to remove detail, it has some advantages over:
- Delete Vertices:
Leaves holes.
- Collapse Vertices:
Doesn’t correct UVs, vertex colors, etc.
- Dissolver vértices:
Often creates n-gons.
Anéis de arestas
Referência
- Mode:
Edit Mode (Vertex or Edge select modes)
- Menu:
- Atalho:
X or Delete,
Edge Loop allows you to delete a selected edge loop if it is between two other edge loops. This will create one face loop where two previously existed.
Nota
The Edge Loop option is very different to the Edges option, even if you use it on edges that look like an edge loop. Deleting an edge loop merges the surrounding faces together to preserve the surface of the mesh. By deleting a chain of edges, the edges are removed, deleting the surrounding faces as well. This will leave holes in the mesh where the faces once were.
Exemplo
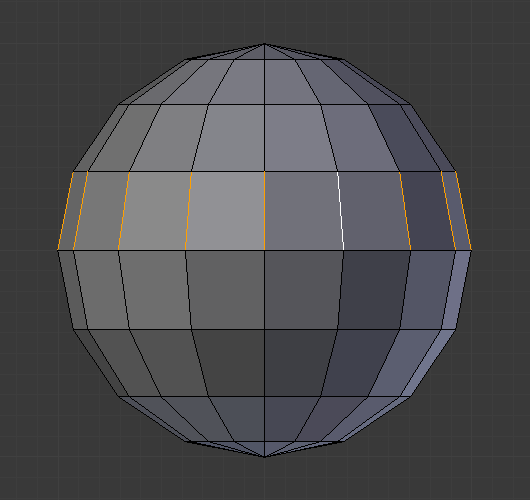
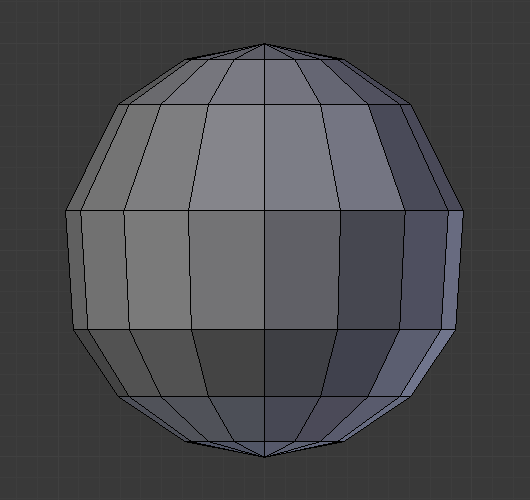
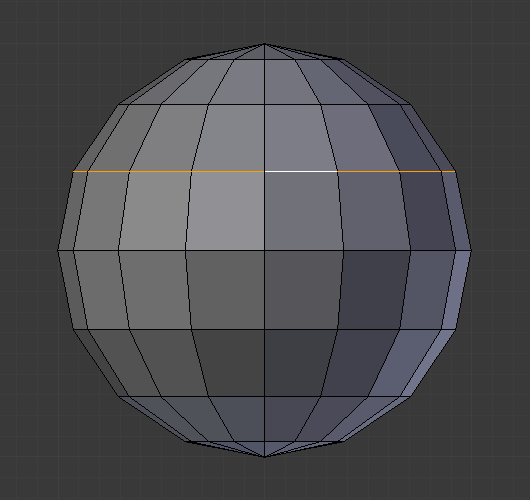
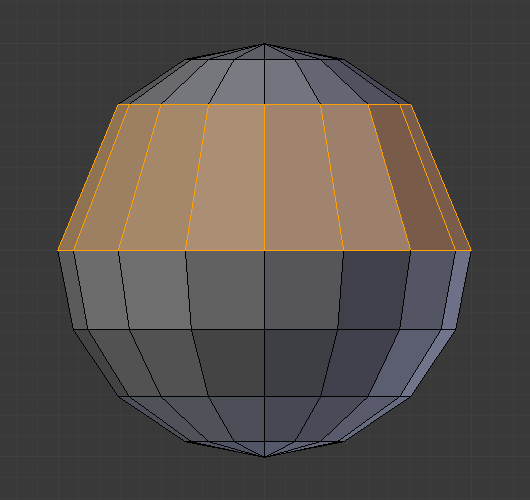
The selected edge loop on the UV Sphere has been deleted and the faces have been merged with the surrounding edges. If the edges had been deleted by choosing Edges from the Delete menu there would be an empty band of deleted faces all the way around the sphere instead.
Veja também
