Editing Text Objects
Editing text is quite different from other object types in Blender, and happens mainly in two areas. First, the 3D Viewport, where you type your text, and have a few shortcuts, e.g. for applying styles (see Font) – note however, that most Blender shortcuts you know in Edit Mode do not exist for texts. The second place is the Properties, especially the Font tab.
텍스트 개체를 편집하는 것은 표준 텍스트 편집기를 사용하는 것과 비슷하지만 완전한 기능을 갖추고 있지 않으며 몇 가지 차이점이 있어요. 3D 뷰포트 헤더의 메뉴는 몇 가지 옵션을 제공해요. 변형이나 미러링 도구등이 없어요. 편집 모드를 나가려면 Tab 을 사용하세요. 텍스트에 탭 문자를 삽입하지 않고 다른 개체 유형과 마찬가지로 편집 모드를 시작하고 종료해요.
Cut
Reference
- Editor:
3D Viewport
- Mode:
Edit Mode
- Menu:
- 단축키(hotkey):
Ctrl-X
텍스트를 잘라내어 버퍼로 복사하려면 바로가기 또는 편집 메뉴에서 일치하는 항목을 사용하세요.
Copy
Reference
- Editor:
3D Viewport
- Mode:
Edit Mode
- Menu:
- 단축키(hotkey):
Ctrl-C
텍스트를 버퍼에 복사하려면 단축키 또는 Edit 메뉴에서 일치하는 항목을 사용하세요.
Paste
Reference
- Editor:
3D Viewport
- Mode:
Edit Mode
- Menu:
- 단축키(hotkey):
Ctrl-V
버퍼에서 텍스트를 붙여 넣으려면 단축키 또는 Edit 메뉴에서 일치하는 항목을 사용하세요.
파일 붙여넣기
Reference
- Editor:
3D Viewport
- Mode:
Edit Mode
- Menu:
외부 텍스트 파일에서 텍스트를 삽입해요. 유효한 UTF-8 파일을 탐색 할 수있는 File Browser 가 나타날 거에요. 파일이 너무 많은 문자를 가지고 있지 않은지 주의하세요. 파일을 불러오는데 느려지니까요.
대문자변환
Reference
- Editor:
3D Viewport
- Mode:
Edit Mode
- Menu:
선택된 문자를 대문자로 변환시켜요.
소문자로 변환
Reference
- Editor:
3D Viewport
- Mode:
Edit Mode
- Menu:
선택된 문자를 소문자로 변환시켜요.
Insert Unicode
Reference
- Editor:
3D Viewport
- Mode:
Edit Mode
- Menu:
Opens a dialog box to input the entry of any Unicode character by entering its hexadecimal code point value.
See Wikipedia for a List of Unicode characters which list there respective hexadecimal code point values.
특수문자
Reference
- Editor:
3D Viewport
- Mode:
Edit Mode
- Menu:
이것은 키보드에서 사용 할 수없는 문자를 삽입하기위한 제한된 문자 표에요. 다른 많은 특수문자를 “compose” 할 수 있어요 Accent Characters 를 참조하세요. 만약 다른 특수 문자가 필요하다면, 외부 편집기 또는 문자표 프로그램에서 복사하여 붙여넣기 해야해요.
참고
텍스트 버퍼는 데스크탑 클립 보드와 동기화 되요. 그러나 블렌더 내에서 사용되는 경우 텍스트 서식도 복사가 되요. 텍스트를 삽입하는 다른 방법은 Inserting Text 를 참조하세요.
굵은 글꼴, 이탤릭체, 밑줄, 소문자
Reference
- Editor:
3D Viewport
- Mode:
Edit Mode
- Menu:
굵은 글꼴 , 이탤릭체 , 밑줄 , 소문자 를 문자에 적용하려면, 문자를 입력하기전에 관련 설정을 켜거나 기존 텍스트를 선택한 다음 원하는 스타일을 메뉴에서 선택하세요.
경고
Blender’s Bold and Italic buttons do not work the same way as in other applications, as they also serve as placeholders for you to load up other fonts manually.
Kerning
Reference
- Editor:
3D Viewport
- Mode:
Edit Mode
- Menu:
Font kerning is the space between individual characters.
- Decrease Kerning Alt-Left
Decreases the spacing between the characters on either side of the cursor.
- Increase Kerning Alt-Right
Increase the spacing between the characters on either side of the cursor.
- Reset Kerning
Sets the spacing between the characters on either side of the cursor to their initial value.
Delete
Reference
- Editor:
3D Viewport
- Mode:
Edit Mode
- Menu:
- Previous/Next Character
Deletes the character before or after the cursor.
- Previous/Next Word
Deletes the word before or after the cursor.
텍스트 삽입하기
You can insert text in two ways: from the internal text buffer or from a text file.
기존 텍스트 데이터 블록을 사용하여 텍스트 편집기의 헤더에서 개체로 변환 할 수 있어요. , One Object or One Object per Line 을 필요에 따라 선택하세요.
It is also possible to paste from the clipboard or a file, while editing 3D text.
악센트 문자
많은 특수 문자 (예 : 키보드에서 직접 사용할 수 없는 악센트 부호가 있는 문자)는 다른 두 문자의 조합을 사용하여 “작성” 할 수 있어요. 이렇게 하려면 기본 문자를 입력하고 Alt-Backspace 를 누른 다음 원하는 “수정자”를 눌러 특수 문자를 생성하세요. 다음은 몇 가지 예에요:
|
|
메쉬 또는 곡선으로 변환
개체 모드에서는 텍스트 개체를 메쉬 또는 곡선 개체로 변환 할 수 있어요. 참조 Convert.
팁
결과의 형상이 일반적으로 지저분하므로, 제한된 디졸브 삭제를 사용하는것이 유용할 수 있어요, 또는 메쉬를 깔끔하게 하기위해 Remesh modifier 를 낮은 threshold 에서 적용하세요.
재질 할당
Reference
- Mode:
Edit
- 패널:
Each character can have a different Material index in order to have different materials on different characters.
입력 할 ㄸ 또는 텍스트 블록을 선택 한 후 Materials 패널에서 Assign 버튼을 클릭하여 인덱스를 할당 할 수 있어요.

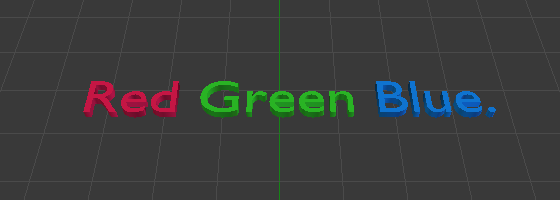
Red Green Blue text example.