Texture & Texture Mask
This page covers both the Texture and Texture Mask panels. Add a Texture to the brush to control the color of the brush. A Texture Mask is used to control the strength of the brush. Both the Texture and Texture Mask offer the same settings.
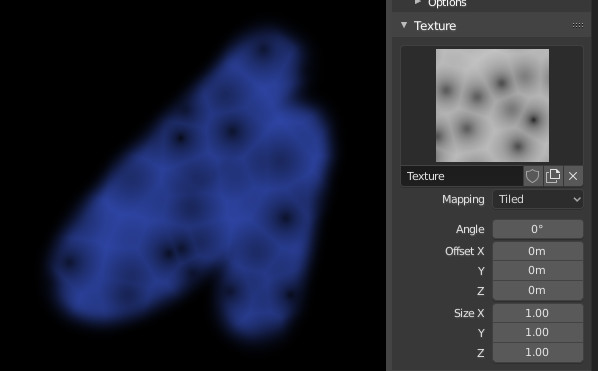
Example of the Texture panel and a textured brush in use.
- Texture
In paint modes the texture is used as a color source, while for sculpting it is used to determine the strength of the brush.
Any image texture or procedural texture can be assigned in the texture and texture mask panels. Textures can be further edited in the properties editor (Click the properties icon for quick access)
팁
It’s recommended to load all needed images ahead of time as image textures into Blender. Then they can be easily selected by clicking on the texture and picking it from the data-block popup. Textures can also be appended/linked from other Blender files.
- Mapping & Mask Mapping
How the texture is applied to the brush stroke.
팁
It is recommended to set this to Area Plane or View Plane for the most common behavior. Ideally match this setting with the Sculpt Plane setting if in sculpt mode.
- View Plane:
If View Plane is enabled, the current viewing angle is used to project the brush texture onto the model. This is especially useful for projection painting.
- Area Plane:
Projects the brush texture along the local surface normal, which keeps the texture from stretching on steep angles. This is an ideal default for most brushes.
- Tiled:
The Tile option repeats the texture across the screen, so moving the brush will not change where the texture is applied. The Tile option is most useful with tileable images, rather than procedural textures.
- 3D:
The 3D option allows the brush to take full advantage of procedural textures. This mode uses vertex coordinates rather than the brush location to determine what area of the texture to use.
This option is not available for the Texture Mask.
- Random:
Picks a random texture coordinate to sample from for each step of the stroke.
- Stencil:
This is the ideal option for stamping textures for projection painting. Stencil mapping works by projecting the texture from the camera space on the mesh or canvas. Painting is applied only inside the boundaries of the stencil. The stencil is displayed as a screen space overlay on the viewport. To transform the stencil texture use the following shortcuts (Hold Alt for the Texture Mask):
Move RMB
Scale Shift-RMB
Rotate Ctrl-RMB
While using stencil scaling, X and Y are used to constrain the scaling to one axis. Pressing one of the buttons twice reverts to unconstrained scaling.
- Image Aspect
Restore the aspect ratio of the original image to reset stretching introduce by scaling, (Image textures only.) This operator can use the tiling and scale values of the brush texture if the relevant are enabled in Adjust Last Operation panel.
- Reset Transform
Restores the position of the stencil.
- Pressure Masking
Only available for the Texture Mask. It allows to clip the mask result based on pressure.
- Off:
Disabled.
- Ramp:
Fades out the mask effect on higher pressure.
- Cutoff:
Expands the used values from the image based on stylus pressure.
- Angle Ctrl-F
This is the rotation angle of the texture brush. It can be changed interactively via Ctrl-F in the 3D Viewport. While rotating the angle via the hotkey you can enter a value numerically as well.
- Rake
Texture angle follows the direction of the brush stroke. Useful for stamping textures repeatedly along the stroke. Not available with 3D, Tiled, or Stencil Mapping types. The shortcut is not available in Sculpt mode.
- Random
Angle is randomized on each step of the stroke. Not available with 3D, Tiled, or Stencil Mapping types. The shortcut is not available in Sculpt mode.
- Random Angle
Constraints the random deviation to a range.
- Offset X, Y, Z
Offset the texture map placement in X, Y, and Z axes.
- Size X, Y, Z
Set the scale of the texture in each axis.
- Sample Bias Sculpt Mode
Value added to texture samples. This can be used if the mid-level of a height map is not correct.
- Vector Displacement Sculpt Mode
Use the color channels to displace geometry in 3 vectors.
참고
This is only supported for the Draw brush with Area Plane mapping enabled.