Introduction
The 2D video stabilization is a feature built on top of Blender’s image feature tracking abilities: You can use some tracking points to remove shakiness, bumps and jerks from video footage. Typically, image stabilization is part of a 2D workflow to prepare and improve footage prior to further processing or modeling steps. This page helps to understand how it works, introduces related terms and concepts, describes the available interface controls in detail and finally gives some hints about usage in practice.
Typical usage scenarios of the stabilizer:
Fix minor deficiencies (shaky tripod, jerk in camera movement).
“Poor man’s steadycam” (when a real steadycam was not available, affordable or applicable).
As a preparation for masking, matching and rotoscoping.
It is not uncommon for 2D stabilization to have to deal with somewhat imperfect and flawed footage.
방법
To detect spurious movement in a given shot, we’ll assume a simplified model about this movement. We then try to fit the movement of tracked features with this simplified model to derive a compensation. Of course, this works only to the degree our model is adequate – yet in practice, this simplified approach works surprisingly well even with rather complicated shots, where our basic assumption was just an approximation of much more elaborate movements.
This simplified model underlying the 2D stabilization as implemented here assumes movement by an affine-linear transform:
The camera is pushed up/down/sideways by some translation component.
The image is then tilted and scaled around a pivot point (rotation center).
To compensate movement according to this simplified model, the 2D stabilizer proceeds in two steps. First we try to detect the translation offset from the weighted average of all translation tracking points. After compensating this translation component, we then use additional rotation/scale tracking points to detect rotation around a given pivot point. Again, we detect rotation and scale changes through a weighted average of all the rotation/scale tracking points given.
In the current version, the pivot point is anchored to the weight center of the translation tracking points. So effectively the detected translation is already factored out. In some cases this is not optimal, especially when tracks have gaps or do not cover the whole duration of the footage – we plan further options to better control the pivot point in future releases.
Stabilization Tracks
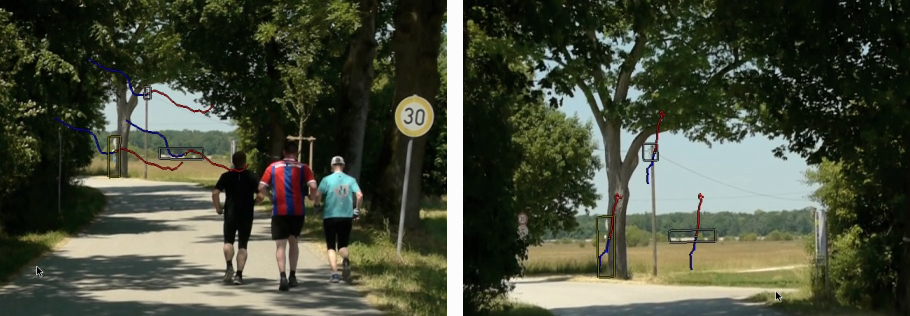
Thus, as foundation for any image stabilization, we need tracked image features to derive the movements. These tracking points or “tracks” can be established with Blender’s image feature tracking component The right choice of points to track is somewhat tricky, yet crucial for successful image stabilization. Often, we’re here because we’ll have to deal with imperfect footage. In such cases, the averaging of tracks helps to work around image or tracking errors at some point. Moreover, when the footage contains perspective induced movements, symmetrically placed tracking points above and below the horizon can be used to cancel out spurious movement and get stabilization to the focal area in between.

Diverging movements caused by perspective.
Tracks can be added in two groups:
First of all is the list of tracks to be used to compensate for jumps in the camera location. From all the tracking points added to this group, we calculate a weighted average. We then try to keep this average location constant during the whole shot. Thus it is a good idea to use tracking markers close to and centered around the most important subject.
A second selection of tracks is used to keep the rotation and scale of the image constant. You may use the same tracks for both selections. But usually it is best to use tracking points with large distance from the image center, and symmetrically, on both sides, to capture the angular movements more precisely. Similar to the “location” case, we calculate an average angular contribution and then try to keep this value constant during the whole shot.
Footage, Image & Canvas
When talking about the movement stabilization of video, we have to distinguish several frames of reference. The image elements featured by the footage move around irregularly within the footage’s original image boundaries – this is the very reason why we are using the stabilizer. When our attempt at stabilization was successful, the image elements can be considered stable now, while in exchange the footage’s image boundaries have taken on irregular movement and jump around in the opposite way. This is the immediate consequence of the stabilizer’s activity.
Since the actual image elements, i.e. the subject of our footage can be considered stable now, we may use these as a new frame of reference: we consider them attached to a fixed backdrop, which we call the canvas. Introducing this concept of a “canvas” helps to deal with deliberate movements of the camera. And beyond that, it yields an additional benefit: It is very frequent for the pixels of video footage to be non-square. So we have to stretch and expand those pixels, before we’re able to perform any sensible rotation stabilization. Thus the canvas becomes, by definition, the reference for an undistorted display of the image contents.
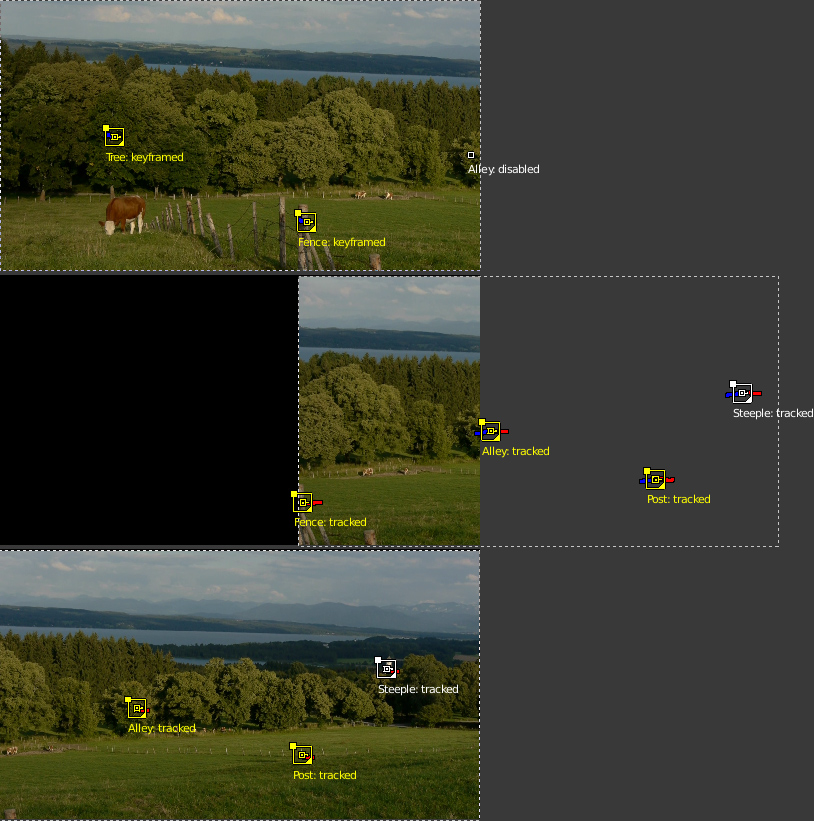
But when the camera was moved intentionally, we have to consider yet another frame of reference beyond the canvas: namely the frame (or “cadre”) of the final image we want to create. To understand this distinction, let’s consider a hand-held, panning shot to the right: Since our camera was turned towards the right side, the actual image contents move towards the left side within the original image frame. But let’s assume the stabilizer was successful with “fixing” any image contents relative to the canvas – which in turn means, that the original image boundaries start to move irregularly towards the right side, and the contents of the image will begin to disappear gradually behind the left boundary of the original image. After some amount of panning, we’ll have lost all of our original contents and just see an empty black image backdrop. The only solution to deal with that problem is to move the final image frame along to the right, thus following the originally intended panning movement. Of course, this time, we do want to perform this newly added panning movement in a smooth and clean way.

Stabilizing a panning shot.

Restoring the expected camera movement.
To allow for such a compensation and to reintroduce deliberate panning, or tilting and zoom of the resulting image, the stabilizer offers a dedicated set of controls: Expected position, Expected rotation and Expected scale. These act like the controls of a virtual camera filming the contents we have fixed onto the canvas. By animating those parameters, we’re able to perform all kinds of deliberate camera movements in a smooth fashion.
The “Dancing” Black Borders
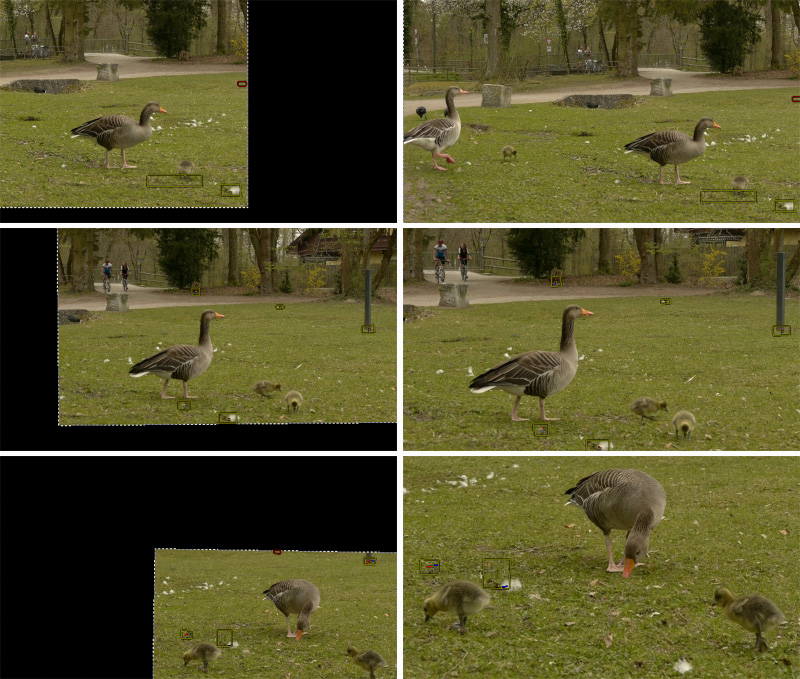
As explained above, when we succeed with stabilizing the image contents, the boundaries of the original footage start to jump around in the opposite direction of the movements compensated. This is inevitable – yet very annoying, since due to the irregular nature of these movements, these “dancing black borders” tend to distract attention from the actual subject and introduce an annoying restlessness. Thus our goal must be to hide those dancing borders as good as possible. A simple solution is to add a small amount of zoom. Sometimes we’ll also need to animate the parameter Expected position in order to keep the image centered as good as we can – this helps to reduce the amount of zoom necessary to remove those annoying borders.
The Autoscale function can be used to find the minimal amount of zoom just sufficient to remove those black borders completely. However, if the camera jumps a lot, the autoscale function often zooms in too much, especially since this calculation aims at finding a single, static zoom factor for the whole duration of the footage. When this happens, you’ll typically get overall better results with animating both the zoom factor and the expected position manually.