Brushes(ブラシ)#
参照
- Mode(モード):
Sculpt Mode(スカルプトモード)
- Panel(パネル):
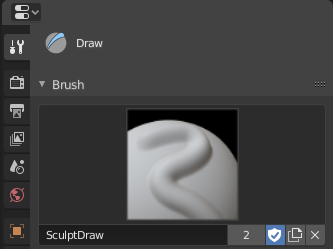
For painting/sculpting modes each brush type is exposed as a tool in the toolbar. The brush on the other hand is a saved preset of all the brush settings, including a name and thumbnail.
All these settings can be found and changed here in the tool setting (brush, texture, stroke, falloff & cursor).

Brush panel in the tool settings.#
- Brushes(ブラシ)
Clicking on the brush thumbnail will open the データブロックメニュー to select a brush.
- Add Brush (Duplicate icon)
When you add a brush, the new brush is a duplicate of the current one.
- Fake User (Shield icon)
Enabling this button will ensure that the brush will not be deleted, even if it is not used by any tool.
- Unlink Data-Block (Cross icon)
Unassign the brush from the active tool. Hold Shift to remove the brush from all users, so it will be deleted upon reloading the file or purging orphan data.
- Brush Specials (Arrow button)
- Enabled Modes
Enable the brush to be used in different (even multiple) modes. For example, the exact same brushes are used in both Weight Paint and Vertex Paint mode.
- Tool Selection
Transfer the brush preset to be used by a different brush type.
- Reset Brush
Reset all brush settings to the default values of the current brush type.
- Custom Icon
Define a custom brush thumbnail from an image file.