Toolbar(ツールバー)#
The amount of tools in sculpt mode is very extensive. This is an overview of all of them, categorized by their general functions.
Add/Subtract Brushes#
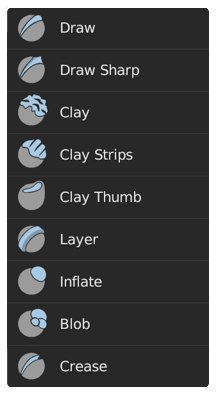
Recognizable by their blue icon and cursor. These brushes generally push vertices outwards and inwards.
- Draw(ドロー)
The standard brush for pushing vertices inwards and outwards from the surface direction.
- Draw Sharp
Same as Draw but with a much sharper Falloff. Useful for creating creases and sharp angles.
- Clay
Similar to the Draw brush but with a flattening effect and subtle smoothing. Useful for polishing and building volumes.
- Clay Strips
The same as the Clay brush, but more aggressive with a square falloff. A common standard for building rough volumes.
- レイヤー
Draw with a fixed height. Useful for adding flat layers to a surface.
- Inflate
Moves the mesh in multiple direction. Useful for inflating or shrinking surfaces and volumes.
- Blob
Magnifies the mesh as you draw. Useful for an additional inflation effect on the stroke.
- Crease(クリース)
Same as Blob but with a pinching effect. Useful for creating and polishing sharp creases.
Contrast Brushes#
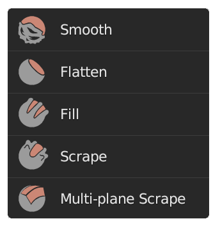
Recognizable by their red icon and cursor. These brushes generally flatten or heighten the contrast of the surface.
- Smooth(スムーズ)
Smooths out irregularities in the surface and shrinks volumes by averaging the vertices positions. An essential brush that is frequently used.
- Flatten
Pushes vertices to an average height to create a flat plateau.
- Fill(フィル)
Pushes surfaces outwards. Useful for filling in holes and crevices.
- Scrape
Pushes surfaces inwards. This is the most common brush for flattening meshes.
- Multiplane Scrape
Scrapes the mesh with two angled planes at the same time, producing a sharp edge between them.
Transform Brushes#
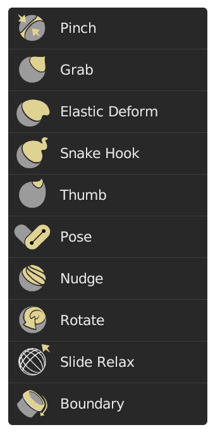
Recognizable by their yellow icon and cursor. These brushes generally move, pinch and magnify the mesh.
- Pinch(ピンチ)
Pulls vertices towards the center of the brush. Useful for polishing angles and creases.
- Grab(グラブ)
Moves vertices along with the mouse. An essential brush for building shapes and adjusting proportions.
- Elastic Deform
Used to simulate realistic deformations such as grabbing or twisting of Elastic objects.
- Snake Hook
Pulls vertices along with the stroke to create long, snake-like forms.
- Thumb
Same as Grab but moves vertices along the surface direction. Useful for preserving specific surfaces.
- Pose
Simulating an armature-like deformations. Useful for quick posing and transformations.
- Nudge
Similar as Thumb but dynamically picks up vertices like the Snake Hook. Useful for nudging something along the mesh surface.
- Rotate(回転)
Rotates vertices within the brush in the direction mouse.
- Slide Relax
Slides the topology of the mesh in the direction of the stroke while preserving the geometrical shape of the mesh. Also useful for redistributing topology where it is needed.
- Boundary(境界)
Transform mesh boundaries specifically with various deformations.
General Brushes#
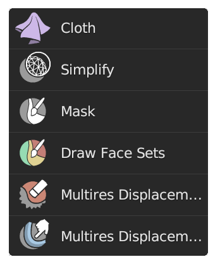
No clear color assignment. These brushes are general purpose brushes or specific.
- Cloth
Simulates cloth to create folds and draping, which can be sculpted further.
- Simplify
Cleans up geometry by collapsing short edges.
- Mask(マスク)
Paints a selection on parts of the mesh to be unaffected by other brushes.
- Draw Face Sets
Paint new or extend existing face sets.
- Multires Displacement Eraser
Remove displacement information on a Multiresolution modifier.
- Multires Displacement Smear
Smear displacement information on a Multiresolution modifier.
Painting Brushes#

Recognizable by their green icon. These brushes are used for painting color attributes within sculpt mode.
- Paint(ペイント)
Paint on the vertices of your mesh via color attributes.
- Smear
Smears the vertex colors via color attributes.
Gesture Tools#
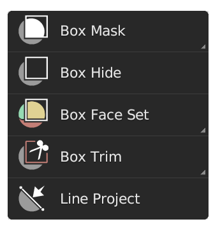
General gesture tools to apply an operation via box, lasso, line and polyline shapes. See Gesture Tools for more information.
- Mask Gesture Tools
Create a mask via a gesture.
- Hide Gesture Tools
Hides/Shows geometry via a gesture.
- Face Set Gesture Tools
Create a face set via a gesture.
- Trim Gesture Tools
Perform a Boolean operation via a gesture.
- Line Project
Flatten the geometry towards a drawn line.
Filter Tools#
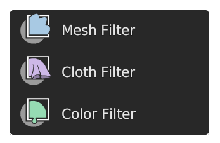
Tools for applying effects on the entire unmasked and visible mesh.
- Mesh Filter
Apply a deformation to all unmasked vertices.
- Cloth Filter
Applies a cloth simulation to all unmasked vertices.
- Color Filter
Changes the active color attribute on all unmasked vertices.
Single Click Tools#
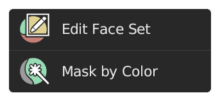
Simpler tools that apply an operation on surfaces that are clicked on.
- Edit Face Set
Modifies the face set under the cursor.
- Mask by Color
Create a mask from any color from the color attribute by clicking on it.
General Tools#
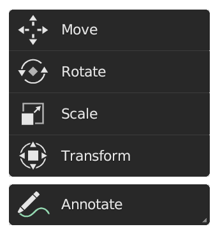
General transform and annotate tools like in other modes.
- Move
移動ツール。
- Rotate
回転ツール。
- Scale
スケールツール。
- Transform
Adjust the objects translation, rotations and scale.
- Annotate(アノテート)
フリーハンドのアノテーションを描画します。
- Annotate Line(アノテートライン)
直線のアノテーションを描画します。
- Annotate Polygon(アノテートポリゴン)
ポリゴンのアノテーションを描画します。
- Annotate Eraser(アノテート消しゴム)
書いたアノテーションを消します。