Weighted Normal Modifier
This modifier changes the custom normals of a mesh, using various selectable methods. This can be useful to make some faces appear very flat during shading, among other effects. See Normals for a description of normals and custom normals.
Options
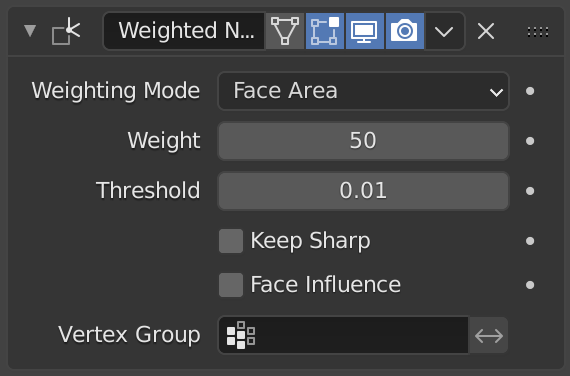
- Weighting Mode
The normals around a vertex will be combined to create a custom (per face corner) normal using various weights for each. The Weighting Mode defines how to compute the weights.
- Face Area
Weight according to the area of the face that the normal originates. A larger area means that the normal from that face will get a higher weight in final result.
- Corner Angle
Weight according to the angle each face forms at the vertex. This is the method Blender uses by default when combining face normals to compute a vertex one.
- Face Area and Angle
Weights are obtained by multiplying the face area and corner angle ones.
- Weight
Determines how strongly the weights are biased according to the face areas and/or corner angles, a bit like a contrast setting for a picture.
A value of 50 means all faces are weighted uniformly. More than 50 means faces with higher area or angles are given even more weight (more “contrast”). Less than 50 means faces with higher area or angles are given lesser weights (less “contrast”).
- Threshold
A weight-rounding threshold which means that, if two angles or areas differ by less than that threshold, they will get equal weights.
- Keep Sharp
Preserve sharp edges, though smoothing will still happen if there are multiple faces between any two sharp edges.
- Face Influence
Use face weights (weak, medium, or strong) as assigned by the Set Strength tool or by the Set Strength mode of a Bevel modifier.
For example, if three faces meet at a vertex and have the face weights weak, medium, and strong, then only the normal associated with the strong face will be used to set the final result.
- 버텍스 그룹
If a vertex group is specified, the modifier will only affect those vertices. The “arrow” button to its right will invert the selection (only affect the vertices not in the vertex group).