Introductie
Blender bevat verschillende op nodes gebaseerde editors met verschillende doeleinden, dus dit onderdeel legt alleen uit hoe je in het algemeen met nodes werkt. De onderstaande lijst toont de verschillende soorten nodes en waar ze gedocumenteerd zijn.

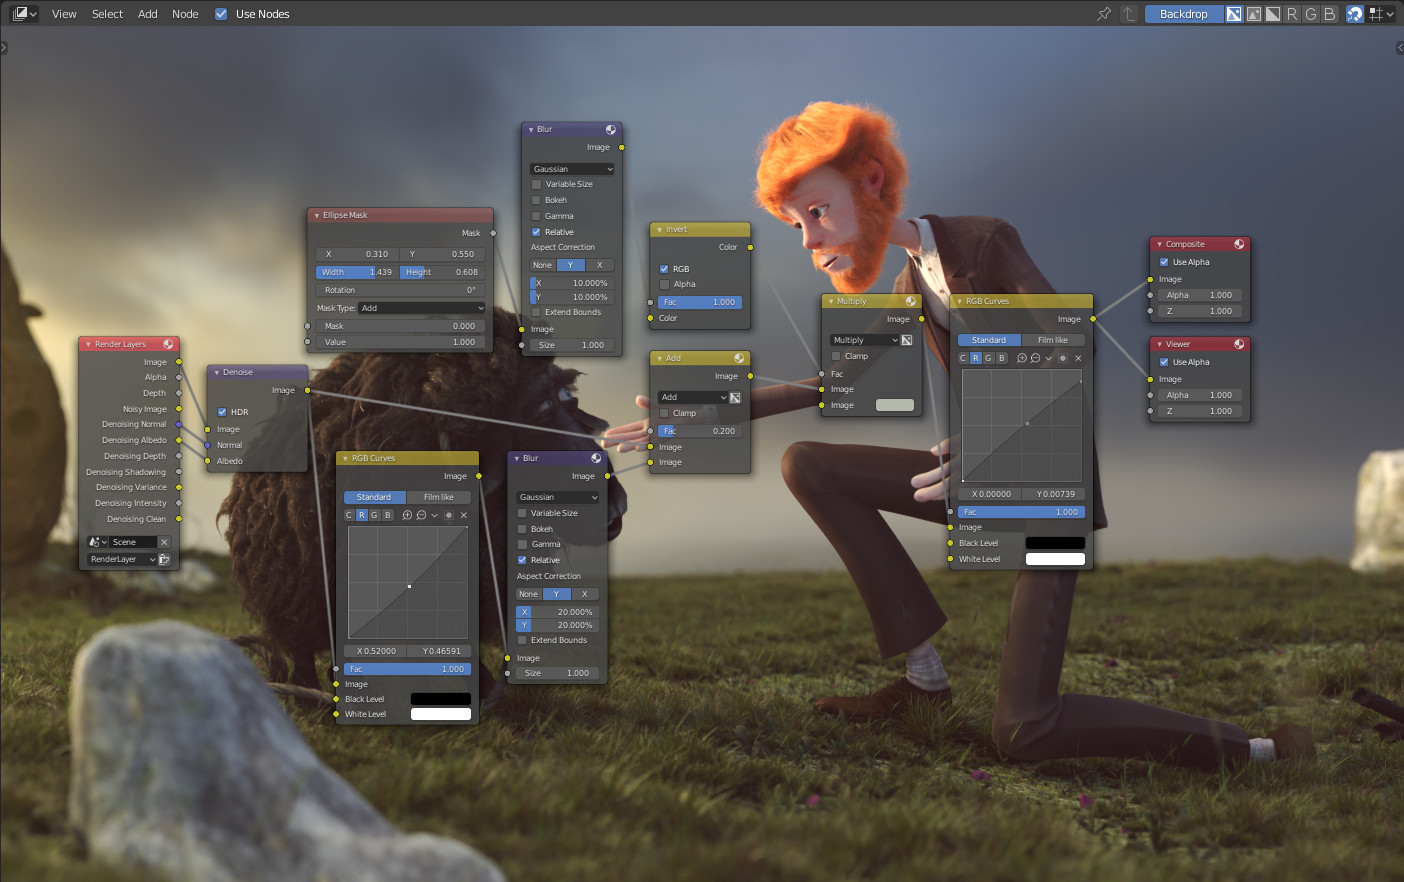
Een voorbeeld van een node editor.
Icon (Pictogram) |
Name (Naam) |
Description (Omschrijving) |
|---|---|---|
Gebruikt voor procedurele modellering. |
||
Gebruikt om materialen voor objecten te maken. |
||
Wordt gebruikt om gerenderde afbeeldingen te bewerken. |
||
Outliner rechtsboven |
Gebruikt om aangepaste texturen te maken. |
Editor Interface
Header (Hoofdbalk)
De Header bevat verschillende menu’s, knoppen en opties, die gedeeltelijk zijn gebaseerd op het huidige type node tree (nodeboom).

Veelvoorkomende opties in de header van de node editor.
- View (Beeld)
Dit menu verandert je weergave van de editor.
- Select (Selecteren)
Dit menu stelt je in staat om een node of nodegroepen te selecteren.
- Add (Toevoegen)
Dit menu stelt je in staat om nodes toe te voegen.
- Node (Node)
Dit menu stelt je in staat om dingen te doen met de geselecteerde nodes.
- Use Nodes (Gebruik Nodes)
Geeft de render-engine de opdracht om de node tree te gebruiken bij het berekenen van de materiaal kleur of het renderen van de uiteindelijke afbeelding, of niet. Als dat niet het geval is, wordt de tree genegeerd. Voor materialen is dit meestal een verouderde optie, omdat in het verleden materialen niet met node trees konden worden gemaakt.
- Pin (Vastpinnen)
Wanneer ingeschakeld, behoudt de editor het materiaal of de textuur, zelfs wanneer de gebruiker een ander object selecteert. Een node tree kan dan onafhankelijk van de objectselectie in de 3D-viewport worden bewerkt.
- Parent Node Tree
Verlaat de huidige nodegroep en keert terug naar de bovenliggende nodegroep/tree.
- Snapping (Magnetisch Uitlijnen)
Wijzig opties voor het snapping (vastklikken) van nodeposities om een nettere indeling van de node tree te maken. Zie Arranging Nodes.
Overlays
Overlays zijn informatie die bovenop de nodes en node trees wordt weergegeven. Er is een schakelaar om alle overlays voor de node-editor in of uit te schakelen, naast de overlay-popover.
- Wire Colors (Draad kleur)
De Kleur van nodeverbindingen op basis van hun aangesloten sockets.
- Reroute Auto Labels
Label Reroute Nodes gebaseerd op het label van aangesloten reroute-nodes.
- Context Path
Toon breadcrumbs (broodkruimels) in de linkerbovenhoek die de hiërarchische locatie aangeven van de knoopboom/groep die momenteel wordt weergegeven.
- Annotations (Aantekeningen)
Toont annotaties in de preview region.
- Previews (Voorbeelden)
Toon de Preview (Voorvertoning) van elke knoop als de preview van de knoop ook is ingeschakeld.
- Timings (Tijdbeheer)
Toon de laatste uitvoeringstijd van elke knoop. Deze optie is alleen beschikbaar voor compositing en geometry nodes.
In de context van geometry nodes, zie Node Timings Overlay.
Toolbar (Werkbalk)
De Toolbar bevat een set tools (gereedschappen) die gebruikt kunnen worden in de node editor.
Adding Nodes (Nodes Toevoegen)
Refence (Referentie)
- Menu:
- Shortcut (Sneltoets):
Shift-A
Nodes worden toegevoegd via het Toevoegen-menu in de bovenste header (balk) van de editor of met een sneltoets.
Nodes kunnen ook worden toegevoegd door een verbinding te slepen vanaf een bestaand node-invoerkanaal of -uitgangskanaal en de verbinding boven een lege ruimte los te laten in plaats van deze aan een ander kanaal te verbinden. Deze actie opent een zoekmenu met een lijst van compatibele nodes en hun inputs (kanalen) die toegevoegd kunnen worden en verbonden kunnen worden met de bestaande node. Het bevestigen van de menu-selectie zal de node toevoegen, die vervolgens verplaatst en geplaatst kan worden.


