Areas (Velden)
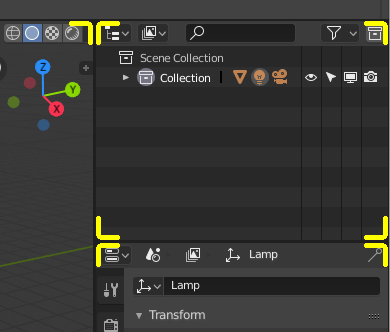
De grenzen van een Area (Veld) worden aangegeven door afgeronde hoeken (gele markeringen).
Het Blender-venster is verdeeld in verschillende rechthoeken die Areas worden genoemd. Deze Areas reserveren schermruimte voor Editors, zoals de 3D Viewport of de Outliner. Elke editor biedt specifieke functionaliteit.
Areas worden gegroepeerd in Workspaces, die zijn afgestemd op specifieke taken (modelleren, animeren, enzovoort).
Notitie
Hoewel sommige sneltoetsen in Blender altijd dezelfde functies aansturen (zoals Ctrl-S voor opslaan), zijn er veel die afhankelijk zijn van de editor waar de muiscursor zich boven bevindt.
Als voorbeeld, stel dat je zojuist twee objecten in de Outliner hebt geselecteerd en ze wilt samenvoegen. Als je de sneltoets hiervoor indrukt (Ctrl-J) terwijl de cursor nog steeds in de Outliner staat, gebeurt er niets omdat de sneltoets daar niet geldig is; je moet eerst je cursor naar de 3D Viewport verplaatsen.
Tip
The size of the border around areas can be adjusted in the user preferences with Border Width.
Handles can be enabled to always remain visible, which can help with area management on touch-enabled devices. See Show – Corner Handles:.
Formaat aanpassen

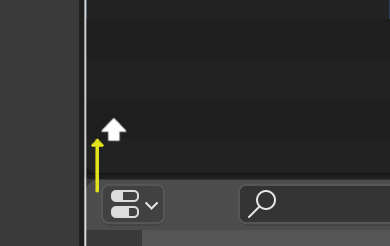
Areas can be resized by dragging their borders with LMB. Move the cursor over the border between two areas so that the cursor changes to a double-headed arrow, then click and drag.
Hold Ctrl to snap the size of areas to convenient sizes.
Hold Shift to move nearby aligned borders together while resizing.
Docking
Docking describes several ways an area a user can interactively manipulate the size and location of areas along with splitting an area into new areas.
To start the interactive process, placing the mouse cursor in an area corner will change the cursor to a cross (+). Once the cursor is a cross, press and hold LMB to perform any of the following actions:
If you press Esc or RMB before releasing the mouse, the operation will be canceled.
Samenvoegen
Properties wordt samengevoegd met de Outliner.
Dragging from an area corner into the space of a second area will join two areas. The areas that will be joined will be displayed brighter.
Opsplitsen
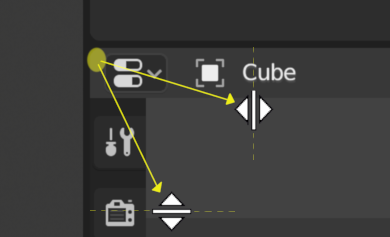
Splitting an area will create a new area. Dragging from an area corner left/right will split the area vertically, to split the area horizontally drag up/down.
You can split and join areas at once by dragging a split operation into a separate area.
Dragging an area into the middle of a second area will replace the second area with the first area.
Area Options (Gebied Opties)
Met de rechtermuisknop (RMK) op de rand opent de Area Options.
- Vertical/Horizontal Split
Toont een indicatorlijn waarmee je de area en de positie kunt selecteren waar je wilt splitsen. Tab schakelt tussen verticaal en horizontaal.
- Join Up/Down/Left/Right
Toont de overlay voor de samenvoegrichting.
- Swap Areas
Wisselt dit area om met de aangrenzende area.
Inhoud Verwisselen
Je kunt de inhoud van twee areas omwisselen door Ctrl-LMK in te drukken op een van de hoeken van het oorspronkelijke area, slepen naar het doelgebied en daar de muisknop loslaten. De twee areas hoeven niet naast elkaar te liggen, maar moeten zich wel in hetzelfde venster bevinden.
Maximalizeer Gebied
Reference (Referentie)
- Menu:
- Shortcut (Sneltoets):
Ctrl-Spatie
Expands the editor area so it fills the whole window, keeping only the editor’s menu bar and status bar visible. This is useful for focusing on a single editor (e.g. 3D Viewport, Shader Editor) without changing your workspace layout.
Unlike Focus Mode, the editor’s menu bar and status bar remain visible.
To return to normal size, use the shortcut again or click the Back to Previous button in the Topbar.
Restore Area
Reference (Referentie)
- Menu:
- Shortcut (Sneltoets):
Ctrl-Spatie
Returns the maximized area back to its original size and restores the previous screen layout.
Focus Mode
Reference (Referentie)
- Menu:
- Shortcut (Sneltoets):
Ctrl-Alt-Spacebar
Expands the editor area so it fills the entire window, hiding:
The Topbar
The Status Bar
Secondary regions (such as toolbars, sidebars, headers, etc.) of the editor itself.
This mode gives the maximum possible screen space for the active editor.
To return to normal size, use the shortcut again or click the icon in the top-right corner of the editor (visible only when hovering over the area).
Duplicate Area into New Window
Reference (Referentie)
- Menu:
Creates a new floating window containing a duplicate of the current editor area. The new window is fully functional and part of the same Blender instance.
This is especially useful when working with multiple monitors.
Tip
You can also create a new window by holding Shift-LMB on an area corner and dragging outward slightly.