Viewport Display(ビューポート表示)
参照
- Mode(モード):
Object, Pose, and Edit Mode
- Panel(パネル):
This panel lets you customize the look of your bones.
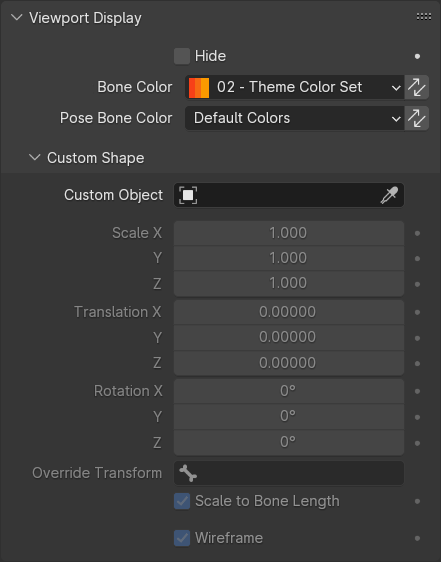
Viewport Display panel in Object/Pose mode.
Viewport Display panel in Edit mode.
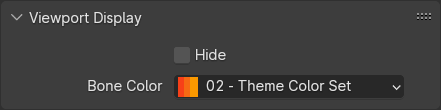
全般
- Hide(隠す)
Hides the bone in the 3D Viewport. When this is unchecked, the bone's visibility is determined by the visibility of its bone collections.
Bone Colors
Bones can be individually colored. You can either choose a color set from the predefined theme list or define a custom one.
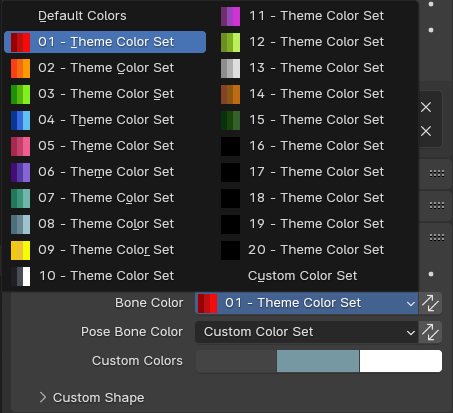
When selecting Custom Color Set, you need to define three colors: Regular (for when the bone is not selected), Selected, and Active.
You can temporarily disable all the color assignments by unchecking Bone Colors in the armature's Viewport Display panel.
- Bone Color
The bone's primary color, affecting both Edit Mode and Pose Mode.
This color is stored on the armature data-block, so that if you have multiple armature objects that share this data-block, they will all use the same color.
- Copy Bone Color to Selected
Copy the bone color of the Active bone to all selected bones.
- Pose Bone Color Pose Mode
Lets you optionally override the above Bone Color in Pose Mode (by setting it to something else than Default Colors).
This color is stored on the Pose Bone, meaning it can be different in every armature object -- even ones that reference the same data-block.
- Copy Bone Color to Selected
Copy the bone color of the Active bone to all selected bones.
Custom Shape
Apart from custom colors, bones can also have custom shapes (in Object Mode and Pose Mode), using another object as a "template."
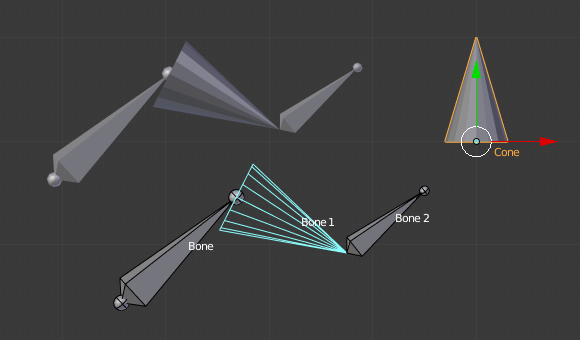
A bone referencing a cone as its Custom Shape.
You can temporarily disable these shapes by unchecking Shapes in the armature's Viewport Display panel.
- Custom Object(カスタムオブジェクト)
Object that defines the custom shape of the selected bone.
- Scale(スケール) X, Y, Z
Additional scaling factor to apply to the custom shape.
- Translation X, Y, Z
Additional translation to apply to the custom shape.
- Rotation X, Y, Z
Additional rotation to apply to the custom shape.
- Override Transform
Bone that defines the display transform of the custom shape.
- Scale to Bone Length
Whether the custom shape should be scaled by a factor equal to the bone's length.
- Wireframe(ワイヤーフレーム)
When enabled, the bone is displayed in wireframe mode regardless of the viewport's shading mode.
- Wire Width
The line thickness of the wireframe for the custom shape.
注釈
Custom shapes will never be rendered. Like regular bones, they are only visible in the 3D Viewport.
The transforms of the template object are ignored. Moving, rotating, or scaling it will have no effect on its appearance in the armature.
The origin of each instanced shape object is at the root of the bone.
The rotation of each shape object is such that its Y axis lies along the direction of the bone.
For best results when Scale to Bone Length is enabled, make sure the template object is 1 unit in size along its Y axis. This will make it perfectly match the size of each bone.