Properties(プロパティ)
Active F-Curve(アクティブFカーブ)
参照
- Panel(パネル):
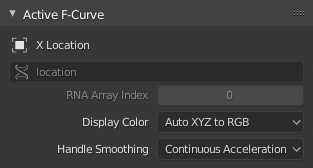
Active F-Curve(アクティブFカーブ) パネル。
This panel displays properties for the active F-Curve.
- チャンネル名
The name of the property that's animated by the curve.
- Data Path(データパス)
The programmatic path to the property.
- RNA Array Index(RNA配列インデックス)
The index into the property, for multi-value properties. As an example, the Location property has three values (X, Y and Z), which means it can have three different curves with indices 0, 1 and 2.
- Display Color(表示カラー)
How to determine the color of the F-Curve in the Graph editor.
- Auto Rainbow(自動で虹色に)
Assigns a unique color to each curve that uses this setting.
- Auto XYZ to RGB(自動でXYZをRGB色に)
Detects curves that animate an X/Y/Z coordinate and colors them red/green/blue accordingly.
- User Defined(ユーザー定義)
Lets you choose the color yourself.
- Handle Smoothing(ハンドルスムージング)
How to compute the Bézier handles when using the Automatic or Auto Clamped handle type.
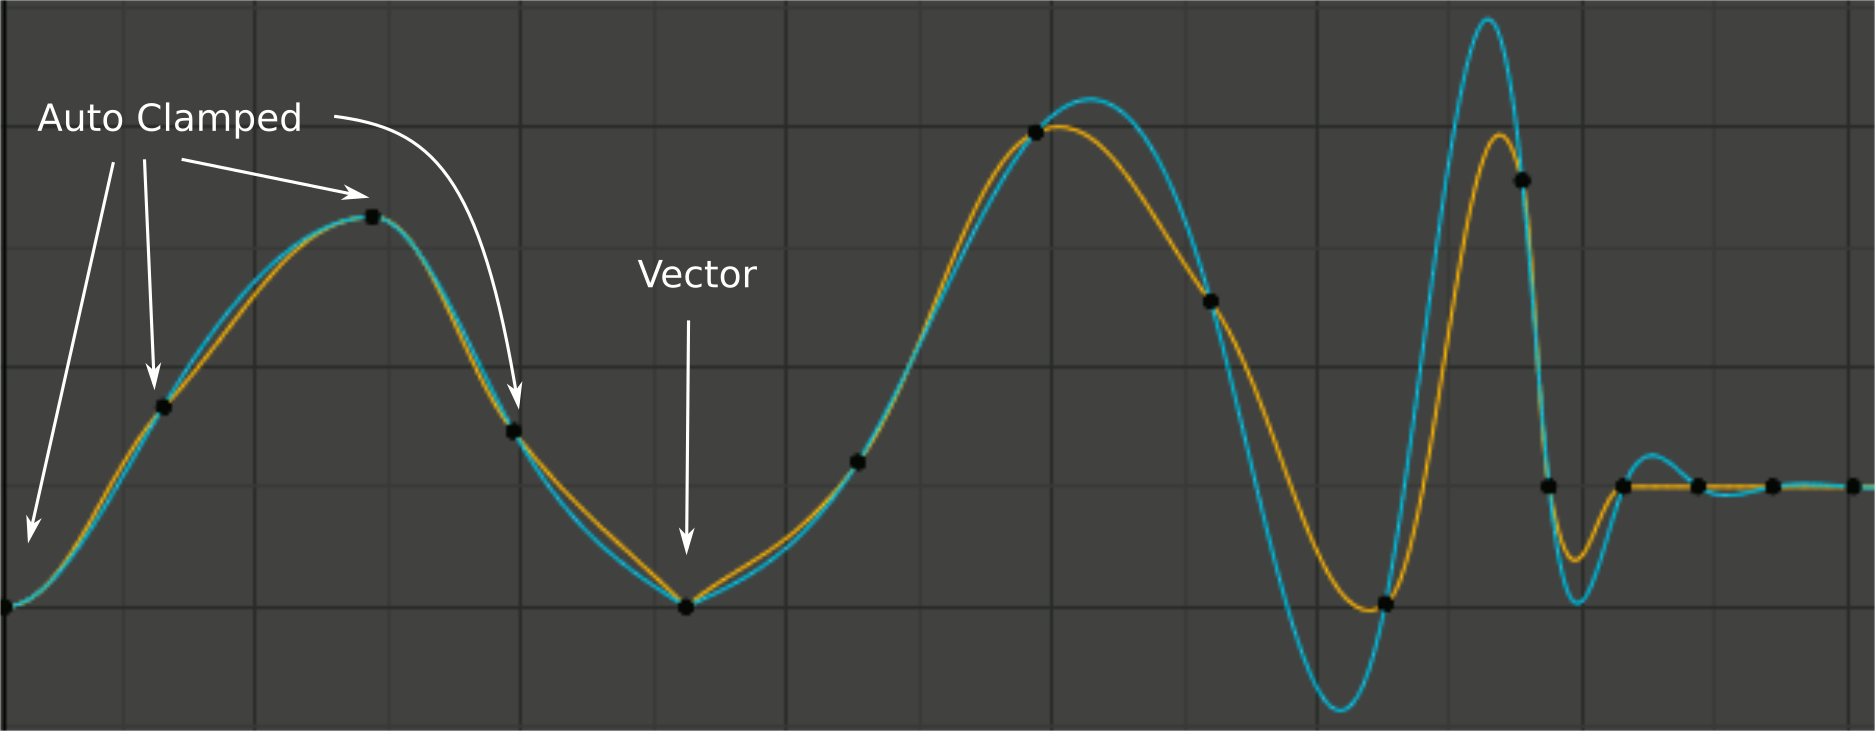
ハンドルスムージングモードの比較。
- None(なし)
Only directly adjacent key values are considered when computing the handles.
This older method is very simple and predictable, but it can only produce truly smooth curves in the most trivial cases. Notice that the red curve in the image above has a few kinks in the middle.
- Continuous Acceleration(連続的な加速)
A system of equations is solved in order to avoid or minimize jumps in acceleration at every keyframe.
それはボックスから出して滑らかなカーブを生成しますが、必然的に、キーの値の変更がカーブのかなりの範囲にわたる補間に影響を与える可能性があることを意味します。ただし、変化の量は距離とともに指数関数的に減衰します。この変更の伝播は、 Free(フリー) 、 Aligned(整列) 、または Vector(ベクトル) ハンドルを使用するキー、および Auto Clamped(自動固定) ハンドルを使用する極端なキーによって停止します。
The mode also tends to overshoot and oscillate more with fully Automatic handles in some cases (see the image above). So it is recommended to use Auto Clamped by default, and only switch to Automatic handles in places where this is desired behavior. That effect can also be reduced by adding in-between keys.
Tip
各モードの長所と短所を考慮すると、 Continuous Acceleration(連続的な加速) は、最小限の手間で少数の補間キーを使用するリミテッド・アニメーションに適しています。高度に洗練された高キーレートのアニメーションの場合、スムージングの利点は、より広範な変更の伝播によるワークフローの中断を上回らない場合があります。
Active Keyframe(アクティブキーフレーム)
参照
- Panel(パネル):
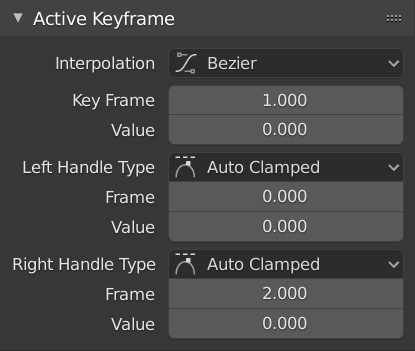
Active Keyframe(アクティブキーフレーム) パネル。
- Interpolation(補間)
The interpolation to use between the active keyframe and the next.
Interpolation(補間)
- Constant(一定):
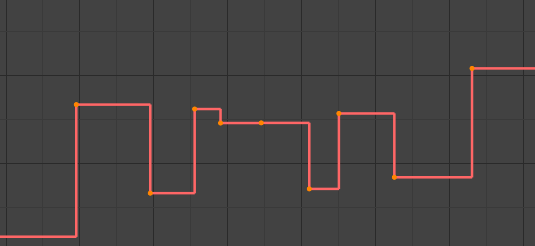
Constant(一定) 。
The curve holds the value until the next keyframe, producing a stair step effect with very abrupt changes. Normally only used during the initial "blocking" stage in pose-to-pose animation workflows.
- Linear(リニア):
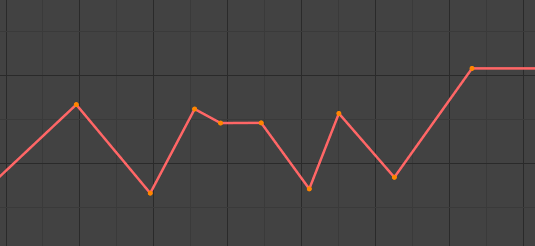
Linear(リニア) 。
The curve goes from one keyframe to the next in a straight line, which prevents abrupt changes in value but not in speed. By creating two keyframes with Linear interpolation and extrapolation, you can easily make a straight line curve that goes on forever.
- Bézier(ベジエ):

Bézier(ベジエ) 。
The default interpolation, which is smooth in both values and speed.
注釈
F-Curves for properties that only accept discrete values will always have a stair step pattern, no matter which option you chose.
Easing (by strength)(イージング(強さ準拠))
A set of interpolations that specialize in accelerating or decelerating an value, "easing" it from a stationary into a moving state or vice versa.
参考
For more info and a few live demos, see easings.net and Robert Penner's Easing Functions.
Dynamic Effects(ダイナミックエフェクト)
These additional easing types imitate (fake) physics-based effects like bouncing.
- Back(後)
With Ease In, the value first moves away from the target and then shoots towards it. With Ease Out, it goes towards the target, overshoots it, and then returns.
- Back(後)
The size and direction (i.e. above/below the curve) of the overshoot.
- Bounce(バウンス)
Makes the value bounce a few times with exponential decay, like a tennis ball that was dropped on the floor.
- Elastic(ゴム状)
Makes the value overshoot the target, then rebound and undershoot it, then overshoot it again... with ever-decreasing intensity until it eventually settles.
- Amplitude(振幅)
How far the value initially overshoots its target.
- Period(期間)
How much time there is between each oscillation.
- Easing(イージング)
This option only applies to the Easing and Dynamic Effects categories above.
- Automatic Easing(自動イージング)
Automatically pick the most commonly used type: Ease In when using one of the Easing interpolations, and Ease Out when using one of the Dynamic Effects.
- Ease In(イーズイン)
The value accelerates, moving slowly at the beginning of the curve segment and speeding up towards the end.
- Ease Out(イーズアウト)
The value decelerates, moving quickly at the beginning of the curve segment and slowing down towards the end.
- Ease In Out(イーズイン・アウト)
The value moves slowly in the beginning, speeds up towards the middle, and slows down again towards the end.
- Key Frame(キーフレーム)
The frame of the active keyframe.
- Value(値)
The value of the active keyframe.
- Left/Right Handle Type(左/右ハンドルタイプ)
When the keyframe's interpolation is set to Bézier, the shape of the curve around it is influenced by its handles. Each handle has its own type which determines if (and how) Blender positions it automatically, and if not, how much freedom you have in positioning it manually.
You can change the handles' types in multiple ways: using these dropdowns in the Sidebar; through the menu ; or by pressing V and selecting from the popup menu.
If you want to change an automatic handle's position, just drag it; you don't need to manually change its type first.
- Automatic(自動):
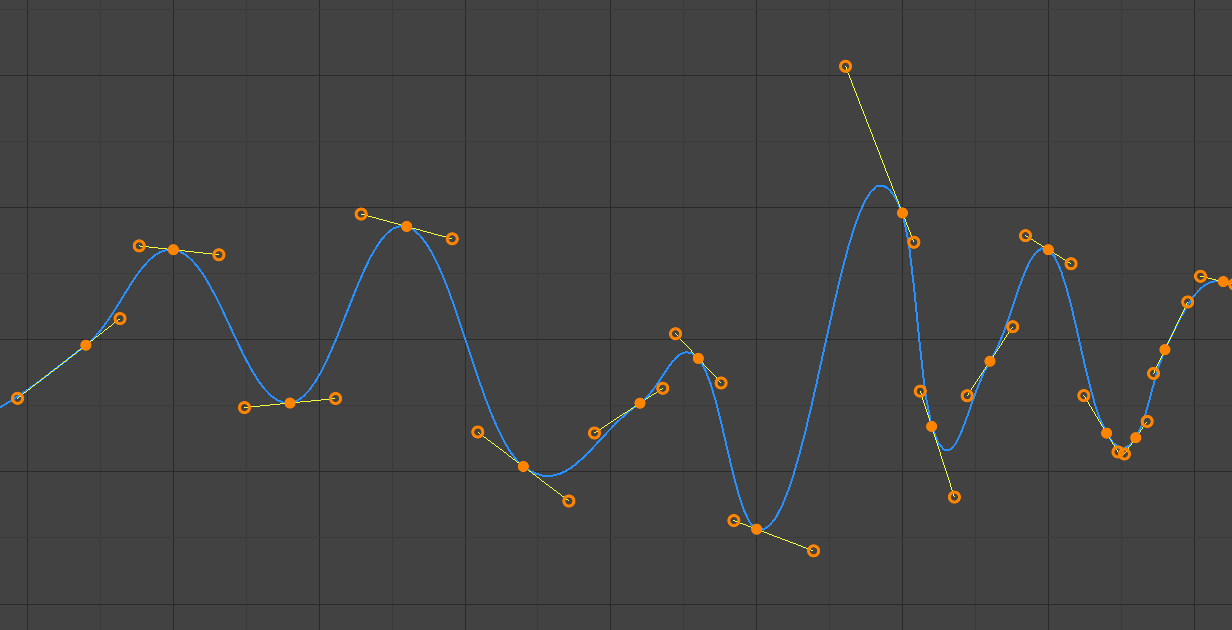
自動ハンドル。
Automatic handles that produce smooth curves.
- Auto Clamped(自動固定):
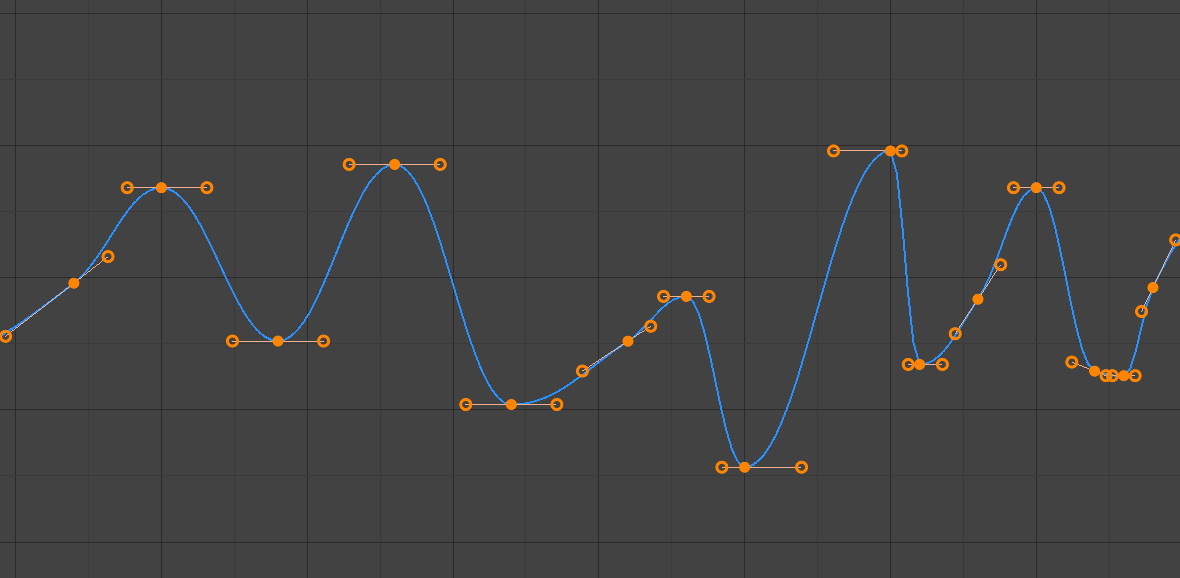
自動固定ハンドル。
キーフレーム(S字型)間の行き過ぎやカーブ方向の変化を防ぐために固定された自動ハンドル。
- Vector(ベクトル):
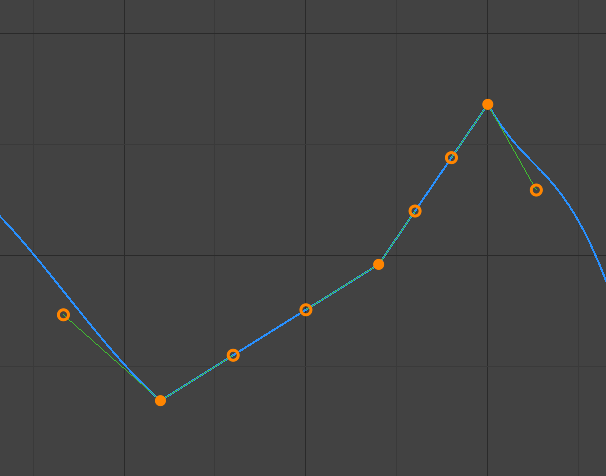
ベクトルハンドル。
Automatic handles that produce straight curve segments (like linear interpolation).
- Aligned(整列):
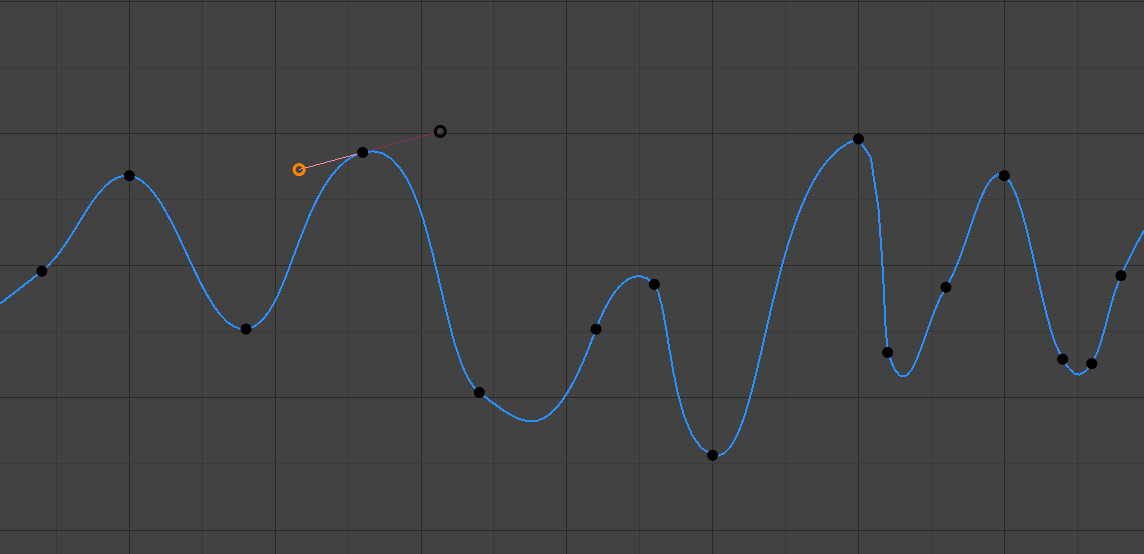
整列ハンドル。
Manual handles, which are however locked together to always point in opposite directions. This results in a curve that is always smooth at the control point.
- Free(フリー):
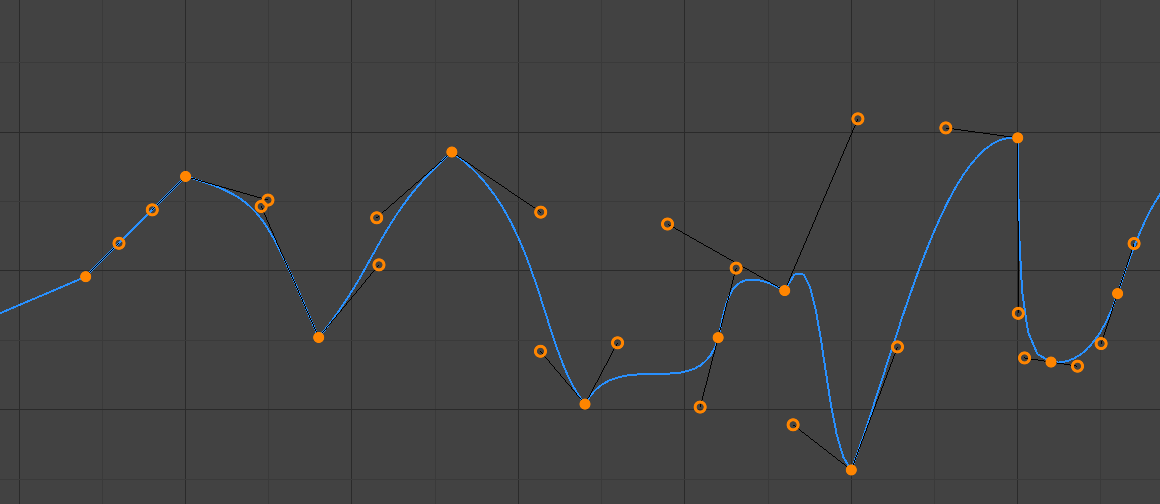
フリーハンドル。
Manual handles that can be moved independently, and thus can result in a sharp change of direction.
- Frame(フレーム)、Value(値)
The frame and value for the left/right handle of the active keyframe.