Linha do tempo
The Timeline editor is used to jump to different frames, manipulate keyframes, and control animation playback.
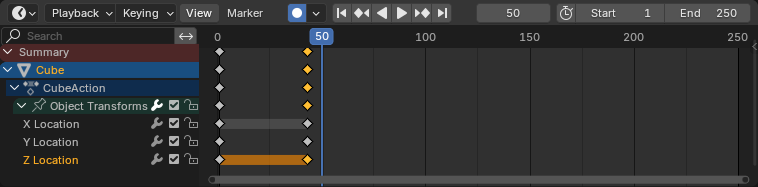
The Timeline.
Main View
The X axis represents time, with the numbers 0/50/100/… being frame numbers. The blue line is the Playhead indicating the current frame, and the diamond shapes are Keyframes, points where you specified a certain value for a certain property at a certain time.
Ajustando a visualização
Panning is done by dragging MMB.
Zooming is done by dragging Ctrl-MMB, rolling the mouse Wheel, or pressing NumpadMinus/NumpadPlus.
You can also use the scrollbars located at the bottom and the right of the editor.
Frame Range
The Frame Range determines the length of the scene’s animation. By default, it’s set to start at frame 1 and end at frame 250. You can change this using the Start/End inputs in the Timeline header, or in the Output Properties.
Quadros-chave
By default, the timeline only shows keyframes for selected items. You can make it show all keyframes by unchecking .
You can click a keyframe to select it (and deselect all others), or click it while holding Shift to add it to the selection (or remove it if it was already selected). You can also drag a box to select multiple keyframes in one go.
To move the selected keyframes, simply drag one of them. Alternatively, you can press G, move the mouse, and click LMB to confirm (or RMB to cancel). You can also press S to scale the keyframes in relation to the Playhead.
Marcadores
See the Markers page for more information.
Header

Popovers for Playback and Keying; transport controls; and frame controls
Marker Menu
Markers are used to denote frames with key points or significant events within an animation. Like in most animation editors, they’re shown at the bottom of the Timeline.

Markers in an animation editor.
For descriptions of the different marker tools, see Editing Markers.
- Playback Popover
Properties for how animations are played. See Playback for more information.
- Keying Popover
Properties for how keyframes are added. See Keying for more information.
- Auto Keying
Options for automatically adding keyframes. See Auto Keying for more information.
- Transport Controls
These buttons are used to control playback. See Transport Controls for more information.
- Frame Controls
Used to set the current frame and the start/end frame. See Frame Controls for more information.