Configurando periféricos
Monitores
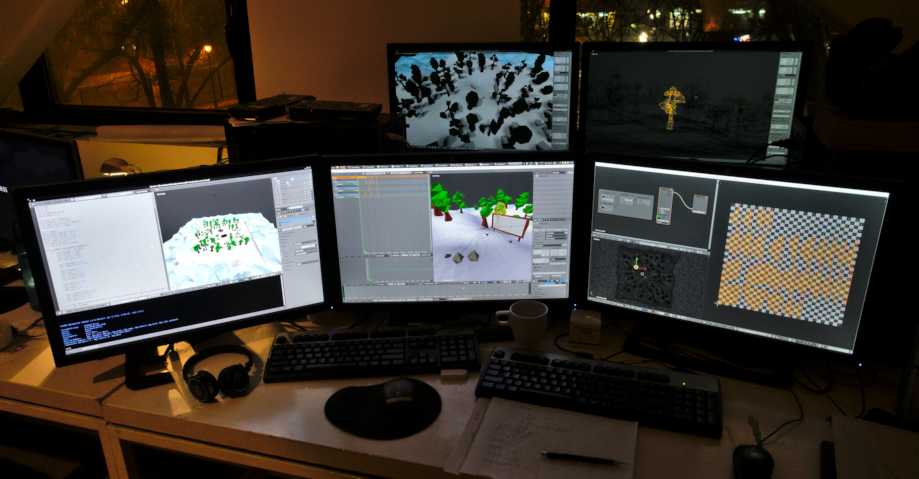
A full HD display (1920x1080) or higher is recommended. Multi-monitor setups are supported, and workspaces can be configured to span multiple monitors.

Exemplo de suporte multi-monitores do Blender.
Dispositivos de entrada
O Blender suporta diversos tipos de dispositivos de entrada:
Teclado (recomendado: teclado com teclado numérico, layout em inglês funciona melhor)
Mouse (recomendado: mouse de três botões com roda de scroll)
Tablets gráficos
Touchpad
Dispositivo NDOF (também conhecido como 3D Mouse)
Nota
If you don’t have a middle mouse button or numeric keypad, you can emulate these in the Input Preferences. However, be aware that these emulations may cause the loss of some shortcut keys. Where possible, it is suggested to use the recommended hardware.
Mouse
A number of Blender interactions utilize the middle button (clicking the scroll wheel), or the use of the scroll wheel. This is why the recommendation for a mouse is a two-button mouse with an added scroll wheel that acts as a middle button (effectively a 3-button mouse). This will allow for the most efficient workflow within all of Blender’s modules.
Teclado
A number of Blender interactions utilize the keyboard’s number pad (or numpad). This is the set of 10 numeric keys plus mathematical functions that appears on the right side of a traditional 104-key full-sized keyboard. This will allow for the most efficient workflow within all of Blender’s modules.
Numpad Emulation
If you do not have a number pad on the side of your keyboard, you may want to emulate one. You can then use the number row at the top of the keyboard instead, but will no longer have access to these keys” original functions (such as switching between vertex/edge/face selection in Edit Mode).
Veja também
Leia mais sobre Numpad Emulation no menu Preferences.
Teclados que não seguem a norma inglesa
If you use a keyboard with a non-English layout, you may still benefit from switching to the UK or US layout while working with Blender.
Nota
You can also change the keymap from the Preferences. However, this manual assumes you are using the default keymap.
Tablets gráficos
Os tablets gráficos podem ser usadas para fornecer um método mais tradicional de controlar o cursor do mouse usando uma caneta. Isto pode ajudar a proporcionar uma experiência mais familiar para artistas que estão acostumados a pintar e desenhar com ferramentas semelhantes, bem como proporcionar controles adicionais, como a sensibilidade à pressão.
Nota
If you are using a graphic tablet instead of a mouse and pressure sensitivity does not work properly, try to place the mouse pointer in the Blender window and then disconnect/reconnect your graphic tablet. This might help.
Touchpad
Touchpad controls are available on Windows, macOS and Linux with Wayland. If you are working from a laptop without a mouse, you can emulate controls using multi-touch gestures with the trackpad from Preferences.
Gesture |
Effect |
|---|---|
Panorama |
Hold the Shift key while dragging two fingers on the pad. |
Zoom |
Hold the Ctrl or OSKey key while dragging two fingers on the pad. |
Órbita |
Drag two fingers on the pad. |
Emulate right-click |
Tap two fingers on the pad. |
NDOF (3D Mouse)
3D mice or NDOF devices are hardware that you can use to navigate a scene in Blender. Currently only devices made by 3Dconnexion, such as the SpaceMouse™, are supported. These devices allow you to explore a scene, and make Fly/Walk Navigation easier to control. The NDOF device can be configured in the Preferences. These settings can also be accessed directly from the viewport using the NDOFMenu button on the NDOF device.
Veja também
Veja Preferência de entrada para mais informações sobre a configuração de periféricos.
Head-Mounted Displays (Virtual Reality)
abbr:HMDs (Head-Mounted Displays) tornam possível colocar os usuários em um ambiente virtual e interativo. Montados na cabeça, eles rastreiam os movimentos da cabeça para projetar um mundo aparentemente circundante em pequenas telas na frente dos olhos do usuário. Se o sistema funcionar bem, eles experimentam o ambiente virtual como se estivessem realmente dentro dele.
Supported Platforms
O suporte à realidade virtual no Blender é implementado através do padrão multiplataforma OpenXR. Este padrão é novo e, portanto, o suporte a ele ainda é limitado.
Platform |
Operating System |
Notas |
|---|---|---|
Windows |
||
Windows |
||
GNU/Linux |
Not recommended for general use yet. |
|
Meta (formerly Oculus) (Rift and Quest) |
Windows |
Requires Oculus v31 Software Update. Oculus Link required for Quest. |
Windows, GNU/Linux |
Requires SteamVR 1.16 or greater. |
|
Windows |
– |
|
Windows |
Requires Windows 10 May 2019 Update (1903). |
Getting Started
As subseções seguintes descrevem como um HMD pode ser configurado para ser utilizado com as plataformas suportadas. Se isso não for feito, o Blender irá reportar um erro ao tentar iniciar uma sessão de realidade virtual.
HTC Vive Cosmos
The dedicated platform for the HTC Vive Cosmos is currently targeted at developers and may lack features found in other platforms.
Follow the steps from the Vive Developer Forums.
Enable the VR Scene Inspection add-on in Blender.
HTC Vive Focus 3
The dedicated platform for the HTC Vive Focus 3 is currently targeted at developers and may lack features found in other platforms.
Follow the steps from the Vive Developer Forums.
Enable the VR Scene Inspection add-on in Blender.
Monado
Monado is a free and open source XR platform for Linux. It is not yet ready for production usage and should only be used for testing purposes.
Packages are available for the following distributions:
Ubuntu (Eoan, Focal)
For other systems, it has to be compiled from source, which in this case is not recommended for people with little experience in compiling software. Follow the Getting Started Guides from Monado to do so nevertheless.
Enable the VR Scene Inspection add-on in Blender.
Meta (formerly Oculus)
Meta (formerly Oculus) provides full support for OpenXR as of the Oculus v31 Software Update.
Download and install the Oculus Rift/Oculus Link software.
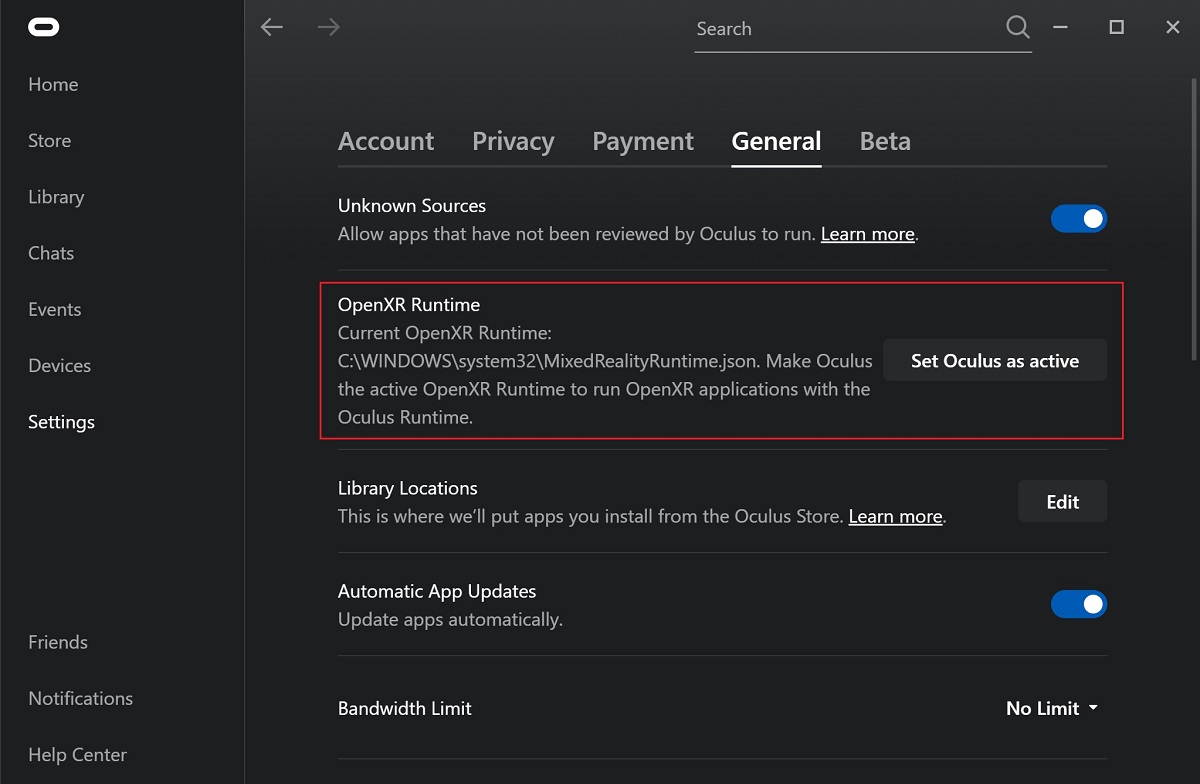
Set Oculus as the active OpenXR runtime via the General tab in the Oculus App Settings.

Enable the VR Scene Inspection add-on in Blender.
Passthrough Support
Currently, passthrough support over OpenXR is disabled by default in the Quest Link app, and must be manually enabled in it’s settings to use this feature.
The performance of the passthrough render varies with the quality of the connection between the headset and the computer. For better results, connecting the headset directly through USB to the PC, or at least connecting the computer to the local network over Ethernet, is recommended.
SteamVR
SteamVR provides full support for OpenXR as of SteamVR 1.16.
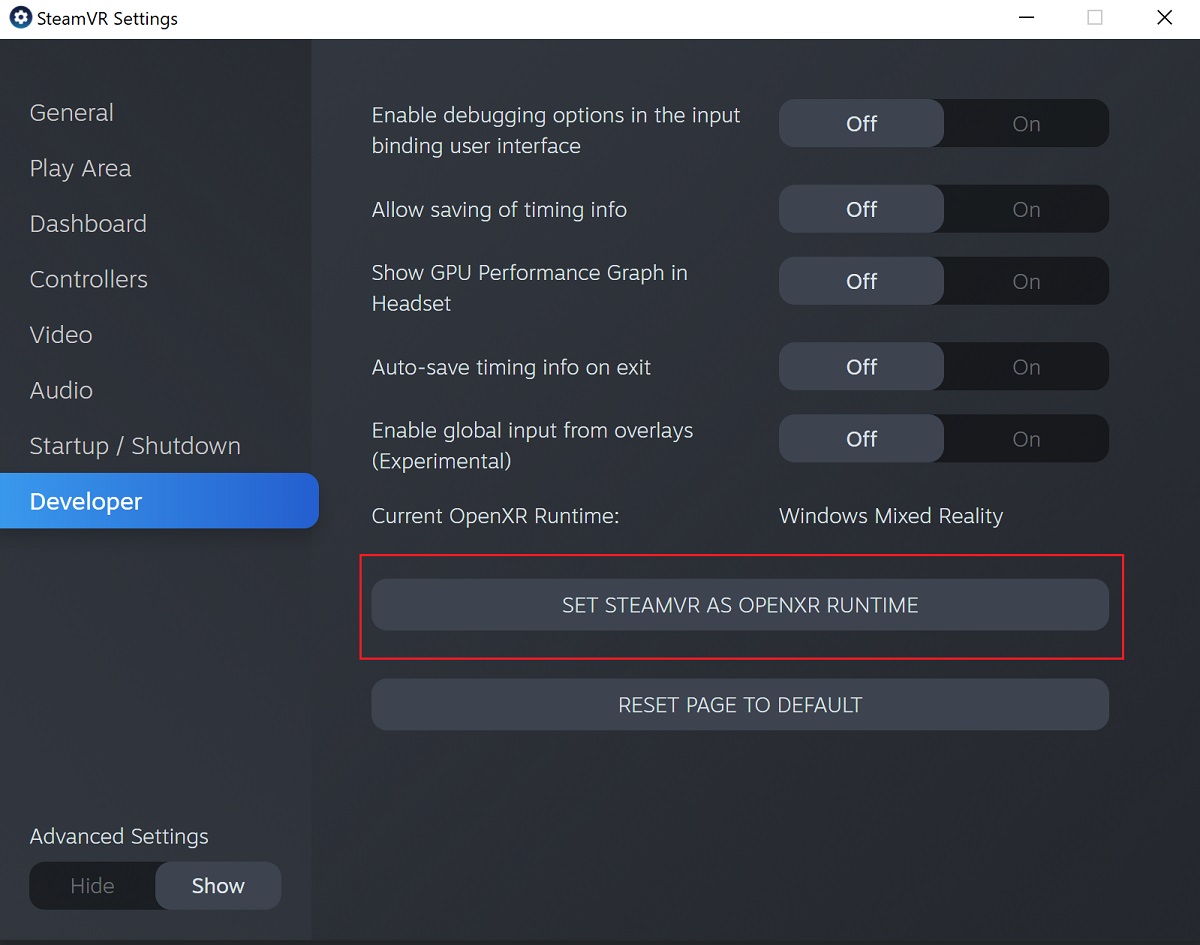
Set SteamVR as the active OpenXR runtime via the Developer tab in the SteamVR Settings.

Enable the VR Scene Inspection add-on in Blender.
Nota
The SteamVR runtime can also be used for HTC Vive Cosmos, Oculus, and Windows Mixed Reality HMDs.
Varjo
Varjo includes full OpenXR support with its required Varjo Base software.
Enable the VR Scene Inspection add-on in Blender.
Windows Mixed Reality
Windows Mixed Reality provides full support for OpenXR. To check if a PC meets the requirements to run the software, Microsoft offers the Windows Mixed Reality PC Check application.
Certifique-se de que a atualização do Windows 10 de maio de 2019 (1903) esteja instalada.
If the system meets all requirements, the Mixed Reality Portal should already be installed. It is also available in the Microsoft Store.
Launch the Mixed Reality Portal. Click the menu button
...in the lower left corner. In the menu it opens, select the Set up OpenXR.Enable the VR Scene Inspection add-on in Blender.
Nota
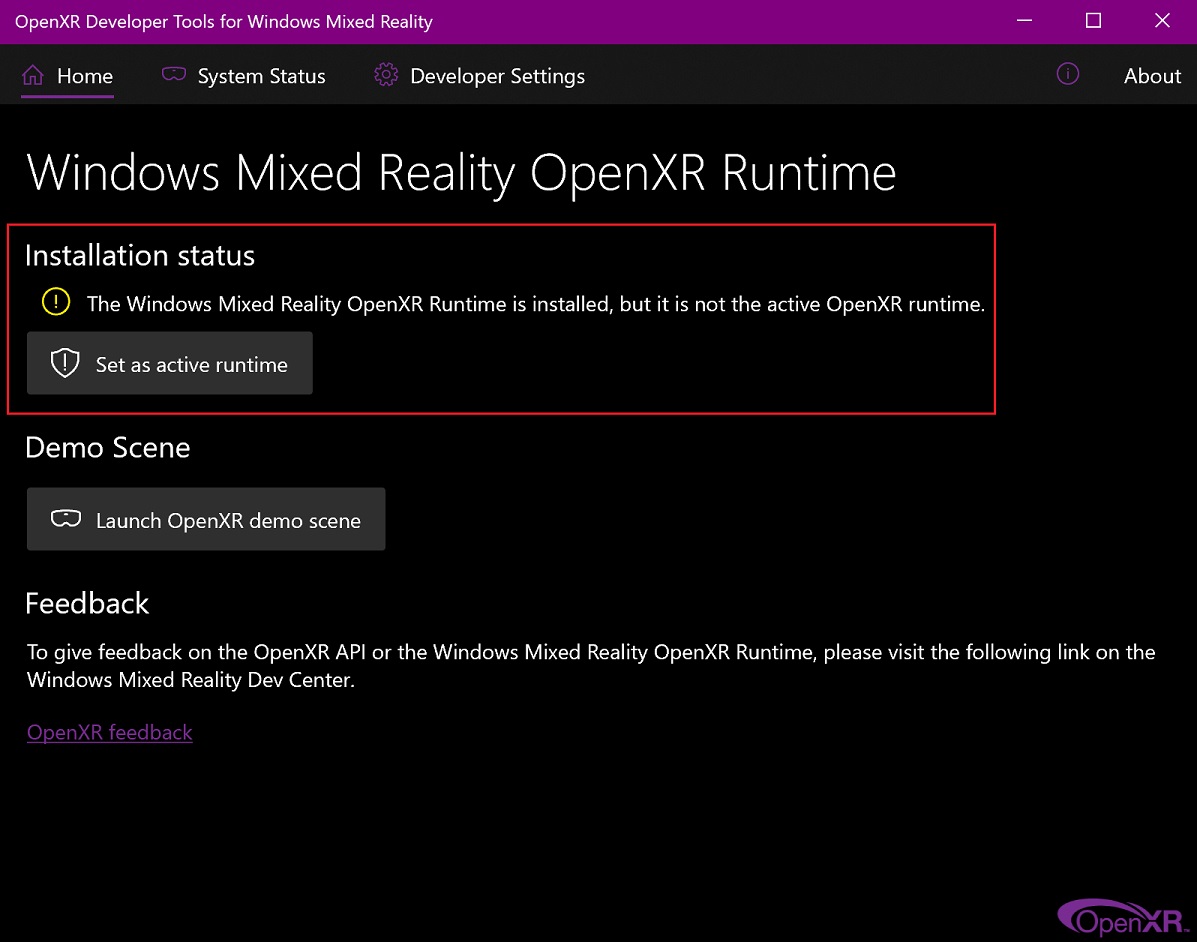
To switch to Windows Mixed Reality from another OpenXR runtime (e.g. SteamVR), download the OpenXR Developer Tools from the Microsoft Store and set Windows Mixed Reality as the active runtime.
