String to Curves Node

The String to Curves converts a string to curve instances. Each unique character used in the string is converted to a curve once, and further uses of that character are more instances of the same geometry.
This makes processing the output geometry very efficient, because each unique character only has to be processed once. However, it means that the result will be the same for every instance of the same character. To process each character individually, the Realize Instances Node can be used.
Dica
Socket inspection can be used to see the value of the string input used when the node was evaluated, by holding the mouse over the socket.
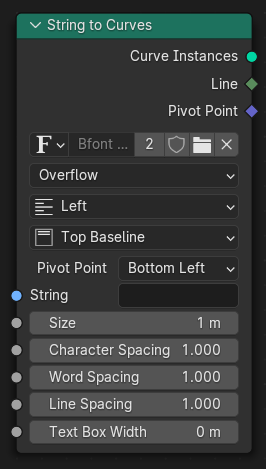
Inputs
- String
Standard string input.
- Tamanho
The size of each character. The values of the other inputs are scaled by this value.
- Caractere
A factor by which the space between each character (kerning) is scaled on the X axis.
- Espaçamento
A factor by which whitespace between words is scaled on the X axis.
- Espaçamento
The distance between separate lines in the output. Scaled by the Size input.
- Text Box Width
The maximum width of each line, though individual words will not be wrapped.
- Text Box Height
The maximum height for all the lines of the text.
Propriedades
- Font
Font glyph used to generate the curve.
- Overflow
- Overflow:
Wraps the text at the Text Box Width.
- Scale To Fit:
Scales the text size to fit the Text Box Width and Text Box Height.
- Truncate:
Only outputs text characters that fit within the width and height, based on the Size input. Any part of the string that did not fit is moved to the Remainder output.
- Alignment
- Esquerda:
Aligns the text to the left.
- Center:
Aligns the text to the center.
- Direita:
Aligns the text to the right.
- Justificar:
Aligns the text to the left and right.
- Fluir:
Aligns the text to the left and right with equal character spacing.
- Align Y
- Top:
Aligns the text to the top.
- Top Baseline:
Aligns the text to the top baseline.
- Middle:
Aligns the text to the middle.
- Bottom Baseline:
Aligns the text to the bottom baseline.
- Bottom:
Aligns the text to the bottom.
- Pivot Point
Controls where on each character the output Pivot Point is placed.
- Midpoint:
Place the pivot points at the center of each character’s bounds.
- Top Left:
Place the pivot points at the top left of each character’s bounds.
- Top Center:
Place the pivot points at the middle of the top of each character’s bounds.
- Top Right:
Place the pivot points at the top right of each character’s bounds.
- Bottom Left:
Place the pivot points at the bottom left of each character’s bounds.
- Bottom Center:
Place the pivot points at the middle of bottom of each character’s bounds.
- Bottom Right:
Place the pivot points at the bottom right of each character’s bounds.
Saídas
- Curve Instances
Curve instances geometry.
- Remainder
The part of the text that did not fit in the box described by the Text Box Height and Text Box Width inputs. Only used in the Truncate overflow mode.
- Linha
An attribute field containing the line index of each character (on the instance domain).
- Pivot Point
Outputs the position described by the Pivot Point drop-down in the local space of each instance.
Examples

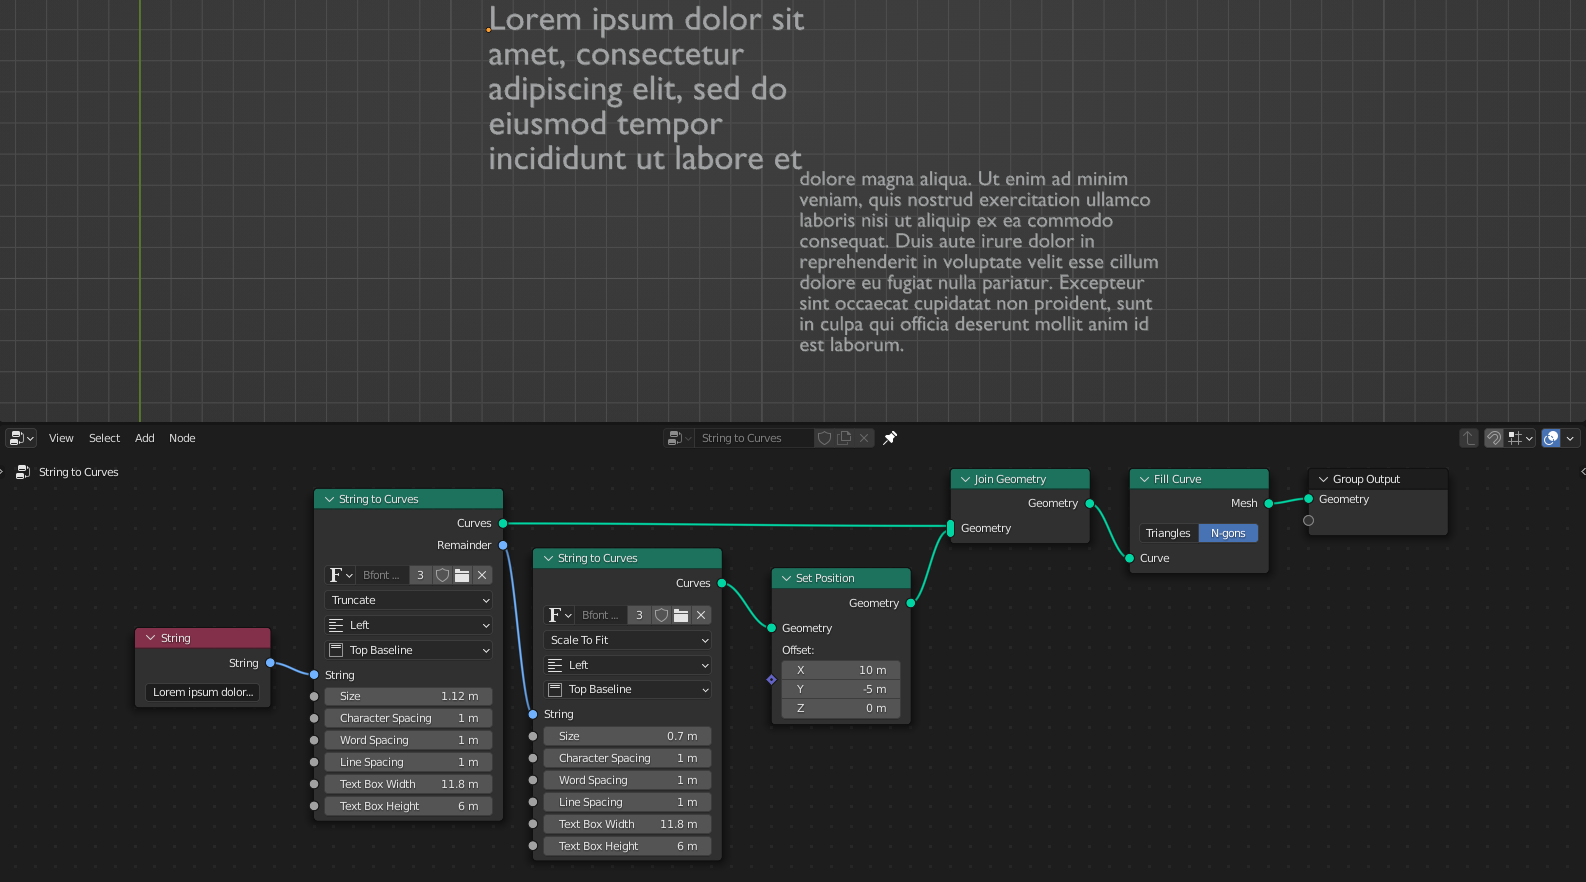
The node can be used to make overflowing text boxes. Here, the text that does not fit into the first node’s fix-sized text box is passed to a separate String to Curves node. And finally added with a Scale to Fit node.