Misturar
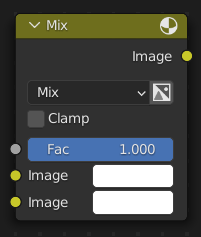
Blends two images together, much like how an image editing program blends two layers.
Importante
As of Blender 3.4, this node has been updated in the Shader and Geometry node editors. Files saved with the new node are not backward compatible.
Inputs
- Fator
The opacity of the foreground image.
- Image/A/Color1
The background image. Determines the dimensions of the output.
- Image/B/Color2
The foreground image.
Keep in mind that, unlike image editing programs where the foreground layer is on top, the foreground slot in Blender is on the bottom.
Properties
- Data Type Shader Editor Geometry Node Editor
The type of data to mix: Float, Vector, or Color.
- Factor Mode Shader Editor Geometry Node Editor
- Uniform
The same single Factor is applied to all three Vector coordinates.
- Non-Uniform
You can specify a different Factor for each Vector coordinate.
- Blending Mode
The blending mode to use.
- Misturar
Regular alpha blending. Typically called Normal in image editing programs.
- Darken
For each color component, takes the smallest of the two values being blended.
- Multiply
Multiplies the colors component by component. Blending with a white pixel (value 1.0) has no effect, while blending with a black one (0.0) always results in black.
- Color Burn
Inverts the background color, divides it by the foreground color, and inverts the result.
- Lighten
For each color component, takes the largest of the two values being blended.
- Screen
Inverts both colors, multiplies them, and inverts the result.
- Color Dodge
Divides the background color by the inverted foreground color.
- Add
Adds the two colors together.
- Overlay
Applies Multiply blending if the foreground color’s lightness is below 0.5, or Screen blending if it’s above.
- Soft Light
Like Overlay, but more subtle.
- Linear Light
Applies Linear Burn blending (background + foregound - 1) if the foreground color’s lightness is below 0.5, or Linear Dodge (background + foreground) if it’s above.
- Difference
For each component, subtracts the lower value from the higher value.
- Exclusion
Adds the two colors, then subtracts their multiple twice.
- Subtract
Subtracts the foreground color from the background color.
- Divide
Divides the background color by the foreground color.
- Hue
Combines the saturation and value of the background color with the hue of the foreground color.
- Saturation
Combines the hue and value of the background color with the saturation of the foreground color.
- Color
Combines the value of the background color with the hue and saturation of the foreground color.
- Value
Combines the hue and saturation of the background color with the value of the foreground color.
- Usar alfa
Whether to use the alpha channel of the foreground image during mixing. The alpha channel of the background image is always used.
- Clamp/Clamp Result
Clamp the output value to the [0.0, 1.0] range.
- Clamp Factor Shader Editor Geometry Node Editor
Clamp the Factor to the [0.0, 1.0] range.
Saídas
- Image/Result/Color
The result of the mixing operation.
Examples
Below are examples of blending modes, as well as some practical use cases.
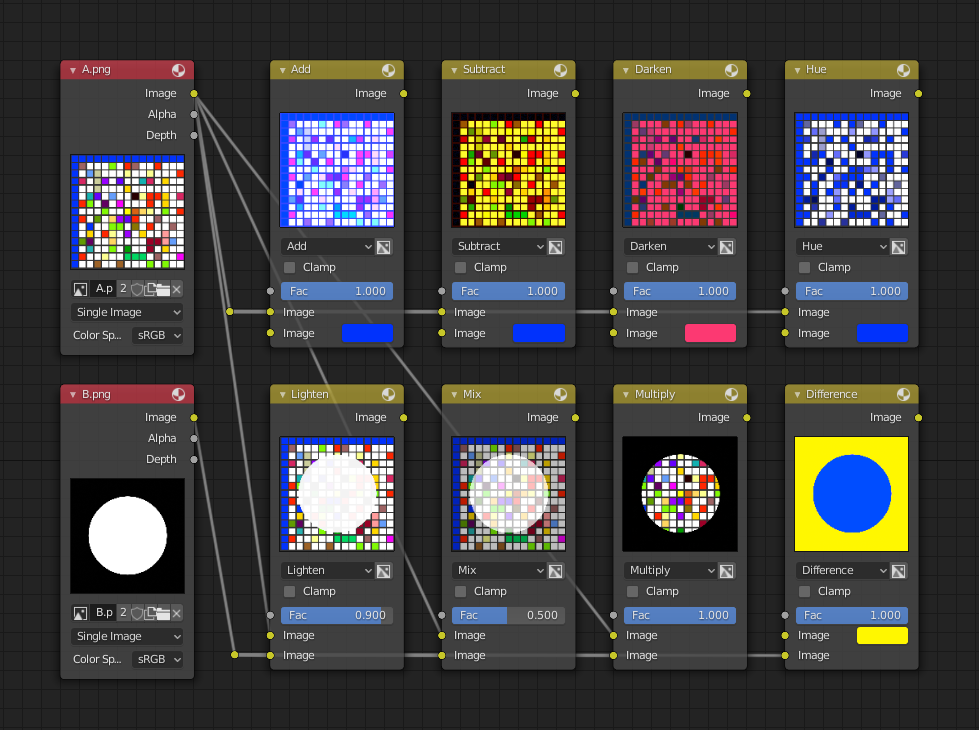
Blending a colored pattern with a flat color (top row) and a circular mask (bottom row).
Fixing overexposure
The Compositing setup below shows how to fix an overexposed render by darkening it and increasing contrast.
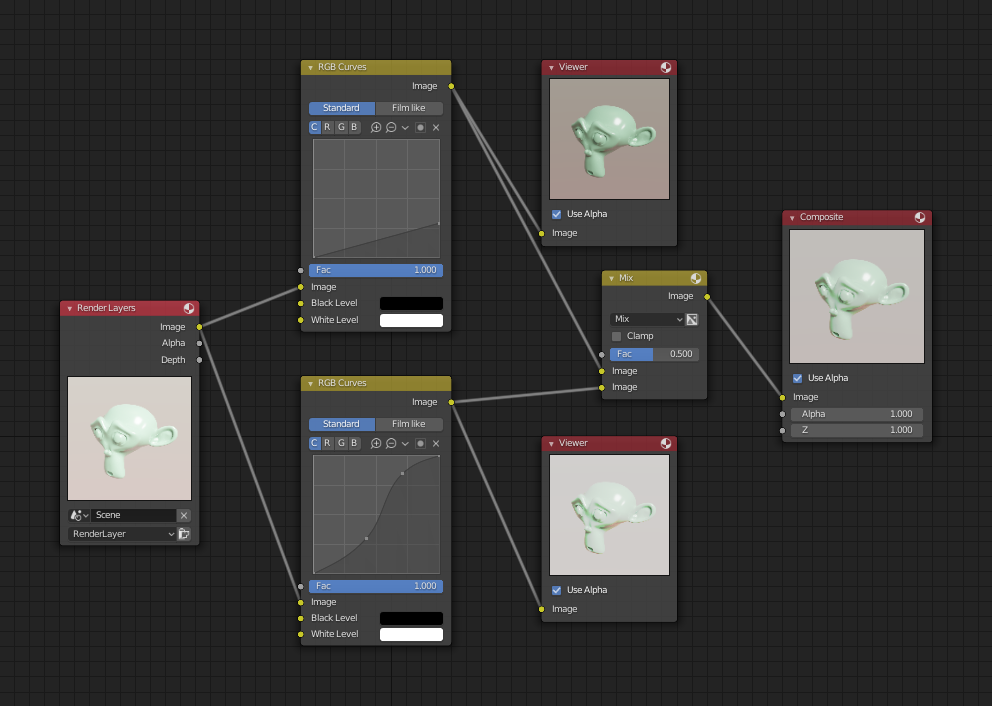
Example node setup showing two RGB Curves nodes and a Mix node for composition.
The top Curvas RGB darkens the image by linearly scaling each color value to a smaller one.
The bottom curve node increases constract by making small values smaller and large values larger.
Finally, the Mix node blends the two together.
Watermark Images
In the old days, a pattern was pressed into the paper mush as it dried, creating a mark that identified who made the paper and where it came from. The mark was barely perceptible except in just the right light. Probably the first form of subliminal advertising.
Nowadays, people watermark their images to identify them as personal intellectual property, for subliminal advertising of the author or hosting service, or simply to track their image’s proliferation throughout the web.
Blender provides a complete set of tools for you to both encode your watermark and to tell if an image has your watermark.
Codificando sua marca d’água em uma imagem
First, construct your own personal watermark. You can use your name, a word, or a shape or image not easily replicated. While neutral gray works best using the encoding method suggested, you are free to use other colors or patterns. It can be a single pixel or a whole gradient; it is up to you.
In the example below, we are encoding the watermark in a specific location in the image using the Translate node; this helps later because we only have to look at a specific location for the mark. We then use the RGB to BW node to convert the color image to grayscale numbers, which we then feed into the Map Range node to reduce the mark to one-tenth of its original intensity.
The Add node (Mix node with blending mode Add) adds the corresponding pixels, making the ones containing the mark ever-so-slightly brighter.
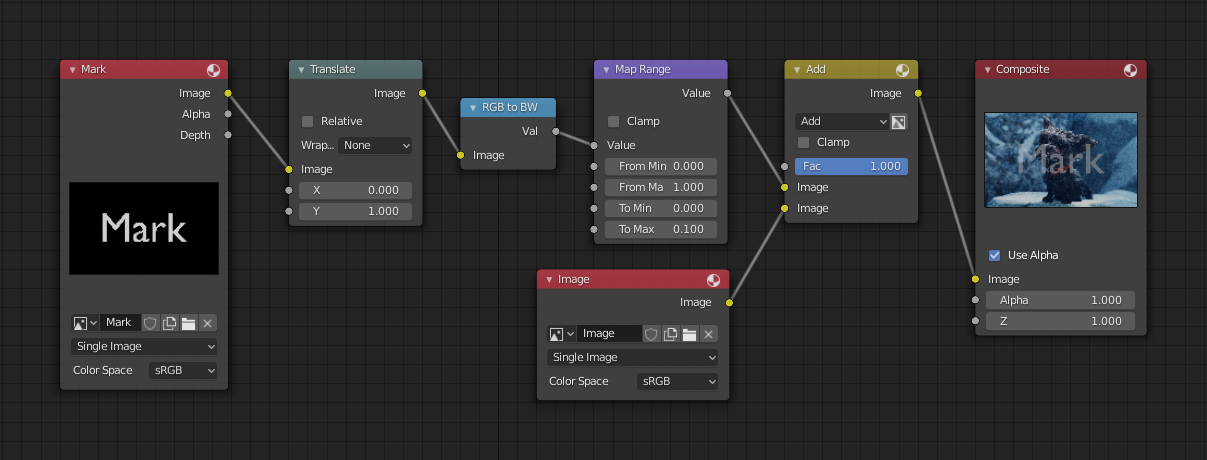
Embedding a watermark in an image.
Caso você queira que as pessoas percebam claramente a sua marca, não a escalone em demasiado, ou torne-a em uma cor contrastante. Existem também outras maneiras, usando outras definições de mistura e arranjos mais chiques. Sinta-se livre para experimentar !
Decodificando uma imagem para ver sua marca d’água
When you see an image that you think might be yours, use the node tree below to compare it to your stock image (pre-watermarked original). In this tree, the Mix node is set to Difference, and the Map Value node amplifies any difference. You can see how the original mark clearly stands out.
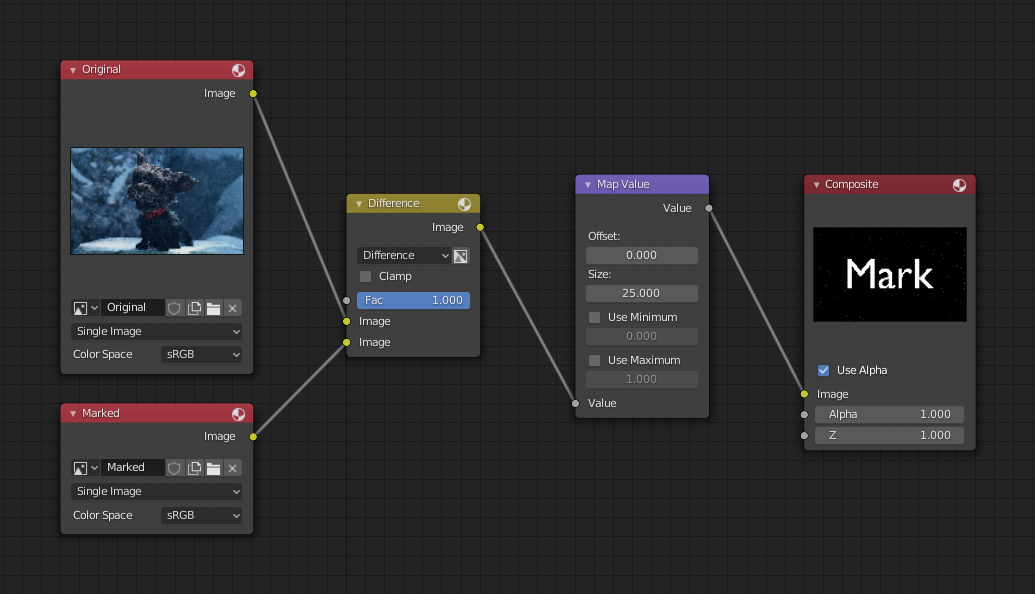
Verificando uma imagem para ver sua marca d’água.