运算
运算 节点的功能是执行数学运算。
输入
此节点的输入是动态的。有些输入仅适用于某些运算符。例如,加数 输入只适用于 乘后再加 运算符。
- 数值
输入值。可以输入三角法则定义的弧度数值。
- 加数
输入加数。
- 基础(基数)
输入底数。
- 指数
输入幂(指数)。
- ε
输入对数的基数。
- 距离
输入距离。
- 最小值
输入最小值。
- 最大值
输入最大值。
- 增量
输入增量。
- 缩放
输入比例。
- 角度
输入角度。
- 弧度
输入弧度。
属性
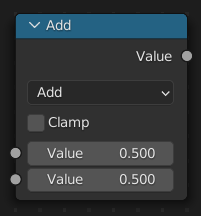
- 运算
数学运算符将两侧的输入值按运算符表示的含义进行数学运算:
- 函数
- 相加:
将运算符两侧的数值进行加法运算。
- 相减:
对两侧的输入值进行减法运算。
- 正片叠底(相乘):
将两个输入值进行相乘运算。
- 相除:
第一个值除以第二个值。除以零的结果为零。
- 乘后再加:
将两个乘积值再次进行 相加 运算。
- 能量(乘方):
将 底数 进行 乘方 运算。
- 对数:
以 基数 为基数的值的对数。
- 平方根:
求输入值的平方根。
- 平方根取倒:
即用数字1除以一个数值的平方根所得的结果。
- 绝对:
读取输入值而不考虑其符号。这会将负值转换为正值。
- 指数:
提升欧拉数为输入值的N次幂。备注:e,作为数学常数,是自然对数函数的底数。有时称它为欧拉数(Euler number)。
- 比较
- 最小值:
比较输入值,将其中最小值作为结果输出。
- 最大值:
将两个输入值比较,将最大的一个作为结果输出。
- 小于:
如果第一个值小于第二个值,输出 1.0,反之输出 0.0.
- 大于:
如果第一个值大于第二个值,输出 1.0,反之输出 0.0.
- 符号:
识别输入值的符号情况,所有正数将输出值为 1.0.所有负数将输出值为 -1.0.0 值本身输出为 0.
- 比较:
比较两个输入值的差值是否小于或等于参数 Epsilon,(备注:Epsilon 是希腊语第五个字母艾普西隆的小写,写作 ϵ 或 ε,常用于数学参数等的命名。)符合即输出值为 1.0.
- 平滑最小值:
- 平滑最大值:
- 圆滑(舍入)
- 圆(四舍五入):
将输入值按位四舍五入到最接近的整数,若小数部分为 0.5 则向上舍入。
- 基面:
将输入值向下取最接近的整数值。
- 向上取整:
将输入值向上取整到最接近的整数值。
- 截断:
将一个 输入值 的整数部分进行输出,小数部分舍弃。
- 分数:
返回输入 值 的分数部分。
- 截断取模:
第一个输入值除以第二个输入值,输出所得结果的余数值(备注:取模运算("Modulus Operation")和取余运算("Remainder Operation")两个概念有重叠的部分但又不完全一致。主要的区别在于对负整数进行除法运算时操作不同。取模主要是用于计算机术语中。取余则更多是数学概念。参看百度百科 "取模运算")。
- 向下取模:
返回除法运算的正余数。
- 循环:
在输入值和小于最大值的最大整数倍数值之间,最小值 和 最大值 绝对值的差值之间取值进行输出。
- 吸附:
将输入值向下舍入为最接近 增量 的整数倍。
- 乒–乓:
随着输入值的增加,在 0.0 和 缩放 值之间来回跳动。
- 三角函数
- 转换
- 到弧度:
将输入值从角度数值转换为弧度数值。
- 到角度:
将输入值从弧度数值转换为角度数值。
- 钳制
限定输出数值的范围(0.0 到 1.0)。参见钳制。
输出
- 数值
数值输出。