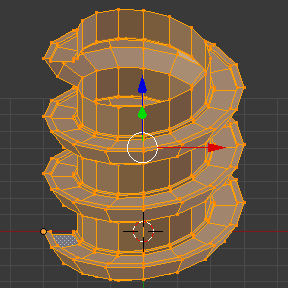
螺旋

参考

模式:

编辑模式

菜单:

边 ‣ 螺旋

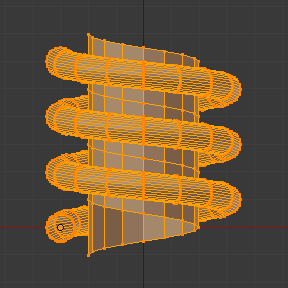
螺旋 操作可沿着螺旋线挤出几何体。您可以用它来创建螺丝、弹簧、海螺等。

虽然它与螺旋修改器类似,但有一些重要区别:

螺旋操作项

螺旋修改器

在世界空间工作。

在物体空间工作。

仅挤出选中的几何。

挤出全部几何。

中心点可以手动指定。

中心点始终是物体原点。

一圈总是 360° 。

角度可自由选择。

每次旋转的高度偏移会根据几何形状自动计算。

高度偏移必须手动指定。

每次旋转还可以有一个偏离/朝向中心轴的径向偏移(同样由几何决定)。

半径保持不变。

As described above, the Screw operator automatically determines the height offset and radial offset to apply after each revolution. It does this by looking for the endpoints of an open profile -- a series of connected edges that don't form a closed loop. The geometry is extruded so that the profile's top vertex in one revolution will coincide with the bottom vertex in the next.

The most common use case is extruding such an open profile. You're not limited to this, however. As long as there is one open profile in the selection -- even just a single loose edge -- you can also extrude closed profiles and even geometry with faces.

You can see some examples below.

../../../../_images/modeling_meshes_editing_edge_screw_example-shell.png

木螺钉。

../../../../_images/modeling_meshes_editing_edge_screw_example-spring.png

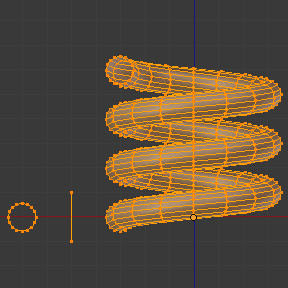
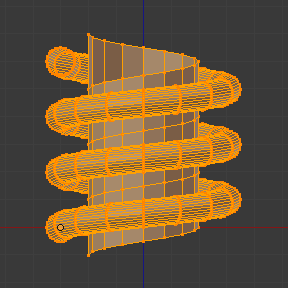
弹簧.

用法

First, make sure you have an open profile in your mesh. If you want to extrude anything else (such as one or more circles), you should create an open profile next to it.

Once that's done, enter Edit Mode and select the geometry you want to extrude, making sure to include exactly one open profile. If you have fewer or more, the operator will fail with the error "You have to select a string of connected vertices too."

Make sure the 3D 游标 is at the centerpoint around which you want the geometry to turn. Also make sure that the vertical axis on your screen matches the direction of the axis around which it should turn. The most common example is turning around the global Z axis: for that, you'd place the 3D Cursor at the world origin and switch to an orthographic side view.

Now you're ready to run the operator: open the Edge menu (by clicking it in the 3D Viewport's header or pressing Ctrl-E) and click Screw.

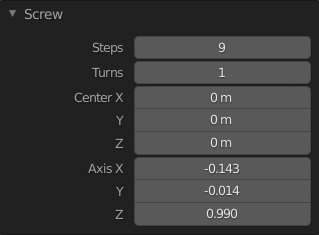
You can change the number of steps and turns in the Adjust Last Operation panel.

If you only created an open profile to guide the extrusion (not because you wanted its geometry), you can select its extruded faces by hovering over one and pressing L, then delete them by pressing X or Delete.

选项

../../../../_images/modeling_meshes_editing_edge_screw_interactive-panel.png

螺旋面板(编辑模式下)。

步数 (阶梯)

The number of extrusions to be done for each 360° turn.

圈数

The number of turns to create.

X/Y/Z/-X/-Y/-Z

The worldspace coordinates of the centerpoint around which to spin the geometry. Initially this is the location of the 3D Cursor.

轴向 X, Y, Z

The direction vector around which to spin the geometry. Initially this is the screen-space vertical axis (so the global Z axis when in a side view or the global Y axis when in top view). By inverting the Axis, you can flip between going clockwise and counterclockwise.

Tip

You can use the Align View to Active menu item to align the viewport, and thereby the Axis, to a certain item in the scene.

Notice that the Axis only determines how the geometry spins "horizontally" around the centerpoint. It doesn't determine how the geometry moves "vertically." Instead, the geometry always moves by a distance and direction given by the endpoints of the open profile, and goes downward in the object's local space.

示例

创建一个弹簧

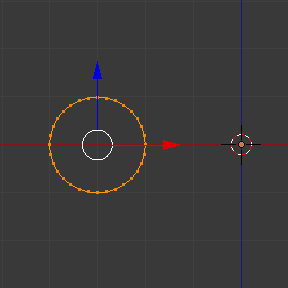
First, let's create a circle to serve as the spring's cross section:

  1. 打开Blender,删除默认立方体。

  2. 按下 Shift-A 并选择 网格 ‣ 圆环 以创建一个圆环。

  3. 设置新建物体的 位置 X 属性为 -3,并设置 旋转 X 属性为 90° 。

  4. 按下 Tab 进入 编辑模式

  5. Switch to the Front Orthographic view by pressing Numpad1.

../../../../_images/modeling_meshes_editing_edge_screw_circle-moved-x-3units.png

Extrusion profile created.

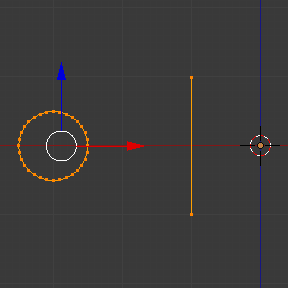
Next, let's create a vertical line to specify the distance between spring loops:

  1. 点击空白处或按下 Alt-A 以取消选择全部顶点。

  2. 点击 Ctrl-鼠标右键 两次以创建两个以边相连的顶点。

  3. Select both vertices and press S X 0 Return to ensure they have the same X coordinate. (This is necessary to keep the spring's radius constant.)

../../../../_images/modeling_meshes_editing_edge_screw_spring-profile-ready.png

Guide profile created.

Now, we're ready to create the spring:

  1. Select both the circle and the line by pressing A.

  2. 点击 边 ‣ 螺旋

  3. Adjust the Steps and Turns to your liking.

  4. Try changing Axis Z to -1 and see that this makes the spring turn the other way.

../../../../_images/modeling_meshes_editing_edge_screw_spring-counterclockwise.png

逆时针方向。

../../../../_images/modeling_meshes_editing_edge_screw_spring-clockwise.png

翻转为顺时针方向。

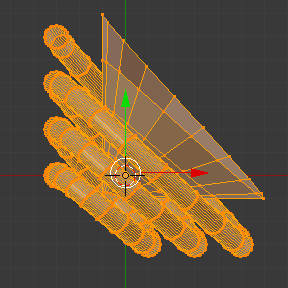
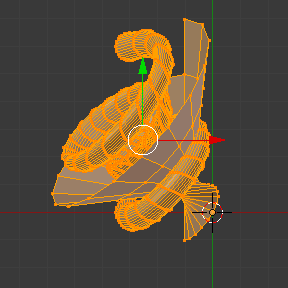
You can get some interesting results by making the Axis diagonal (e.g. keeping Axis Z at -1 and setting Axis X to 1). Notice that each individual spring loop is inclined by 45°, but that after each loop, we still go down vertically (in the direction of the guide line).

../../../../_images/modeling_meshes_editing_edge_screw_angular-vector-example1.png
../../../../_images/modeling_meshes_editing_edge_screw_angular-vector-example2.png

Creating a Screw Spindle

The Screw operator is perfectly suited for creating helixes without any gaps between the turns.

  1. Open Blender and enter Edit Mode for the default cube.

  2. 按下 XDelete 删除所有顶点。

  3. Switch to the Front Orthographic view by pressing Numpad1.

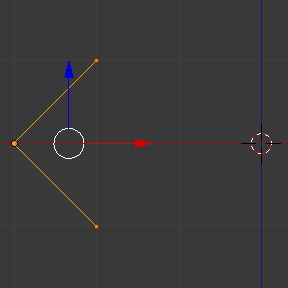
  4. Click Ctrl-RMB three times to create a profile like the one below.

  5. Select the two vertices closest to the global Z axis and press S X 0 Return to ensure they have the same X coordinate.

  6. 选择所有三个顶点然后点击 边 ‣ 螺旋

  7. Adjust the Steps and Turns to your liking.

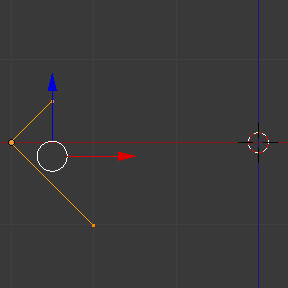
../../../../_images/modeling_meshes_editing_edge_screw_perfect-spindle-profile.png

Profile for a screw spindle.

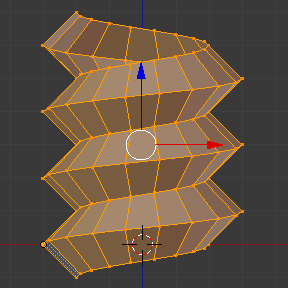
../../../../_images/modeling_meshes_editing_edge_screw_generated-perfect-spindle.png

Result after running the Screw operator.

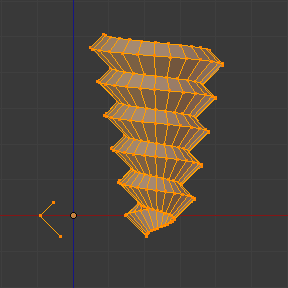
You can also create more interesting shapes, like this spiral "staircase":

楼梯。
../../../../_images/modeling_meshes_editing_edge_screw_ramp-like-profile.png

轮廓.

../../../../_images/modeling_meshes_editing_edge_screw_ramp-like-generated.png

生成的网格。

Creating a Screw Tip

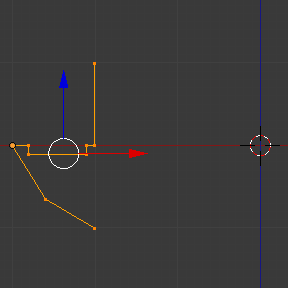
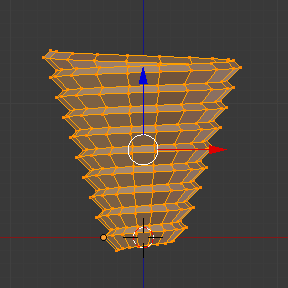
Until now, we've always made sure that the first and last vertex of the profile have the same X coordinate, thereby keeping the radius of the helix constant. However, nothing stops you from using different X coordinates and having the helix shrink/expand along its height.

../../../../_images/modeling_meshes_editing_edge_screw_profile-with-vector-angle.png

轮廓.

../../../../_images/modeling_meshes_editing_edge_screw_generated-with-base-vector-angle.png

生成物.