Một Số Ví Dụ (Examples)
Here are some simple examples showing the power of soft body physics.
Khối Lập Phương Đàn Hồi (A Bouncing Cube)
Quá Trình (The Process)
First, change your start and end frames to 1 and 150.
Then, add a plane, and scale it five times. Next, go to the physics tab, and add a collision. The default settings are fine for this example.
Now add a cube, or use the default cube, then enter Edit Mode to subdivide it three times. Add a Bevel Modifier to it to smoothen the edges and then to add a little more, press R twice, and move your cursor a bit.
When finished, your scene should look like this:
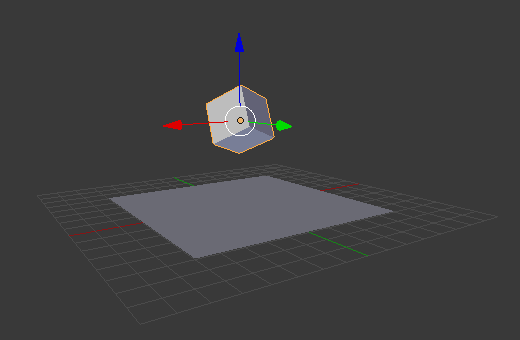
The scene, ready for soft body physics.
Everything is ready to add the soft body physics. Go to and choose "Thân Mềm". Uncheck the "Mục Tiêu Thân Mềm", and check "Thân Mềm Tự Va Đập". Also, under "Cạnh Thân Mềm", increase the Bending to 10.
Playing the animation will now give a slow animation of a bouncing cube. To speed things up, we need to bake the soft body physics.
Under Soft Body Cache change the values of your start and end frames. In this case 1 and 150. Now, to test if everything is working, you can take a cache step of 5 or 10, but for the final animation it is better to reduce it to 1, to cache everything.
When finished, your physics panel should look like this:

The physics cache settings.

The physics edges and self collision settings.
You can now bake the simulation, give the cube materials and textures and render the animation.
Kết Quả Tạo ra (The Result)
Khối lập phương bật nảy được kết xuất (The rendered bouncing cube)