Pose Library
This section describes the pose library, which is based on the Asset Browser(アセットブラウザー). For an overview of the asset system, see the Asset Libraries(アセットライブラリ) section. The pose library is meant to be used in Pose Mode. In other words, it only works when posing an armature, and not for general object animation.
注釈
The pose library is implemented as an add-on. This add-on is enabled by default; disabling it will remove the pose library from Blender's user interface.
The "building blocks" of the pose library are actually implemented in Blender itself. The add-on only contains the user interface and the logic that determines what is stored in a pose asset. This was intentionally put into an add-on, so that artists or studios who want to change the behavior can do so with an add-on of their own.
What is a Pose Asset?
A pose asset is an action that has been marked as asset, and that contains exactly one frame of animation data. Usually these are created via the Create Pose Asset button (see below), but any action that is keyed on exactly one frame can be seen as pose asset.
Each pose in the library is stored in its own action data-block. This means that it can get its own name, its own preview image, and can be organized in Asset Catalogs.
Since a pose asset is just an action, it can also contain slots. That means a single pose asset can contain a pose for more than one armature. When applying the pose, the best matching slot for the given armature will be chosen to read the pose from. If no good match can be found it will fall back to the first slot. For generic pose assets, it is recommended to use single-slot actions. That way Blender always uses the first (and only) slot, regardless of which character the pose is applied to. If a pose is specific to two or more characters, they can be stored in the same asset for convenience. For info on how to create such multi-character pose assets see Pose Creation.
Creating a Pose Library
A pose library is a bunch of actions that exist in blend-files of an Asset Library. Such blend-files can either be created manually, or by exporting poses to a library. If a pose asset is created by exporting to a library, a .asset.blend file will be created for it which will contain just that one asset, and which cannot be opened as a normal blend file to modify it. Otherwise there is no restriction on how many pose assets can be contained in a blend-file. It is also possible to link in a character, props, etc., which can then not only be used to create the poses, but also for rendering previews.
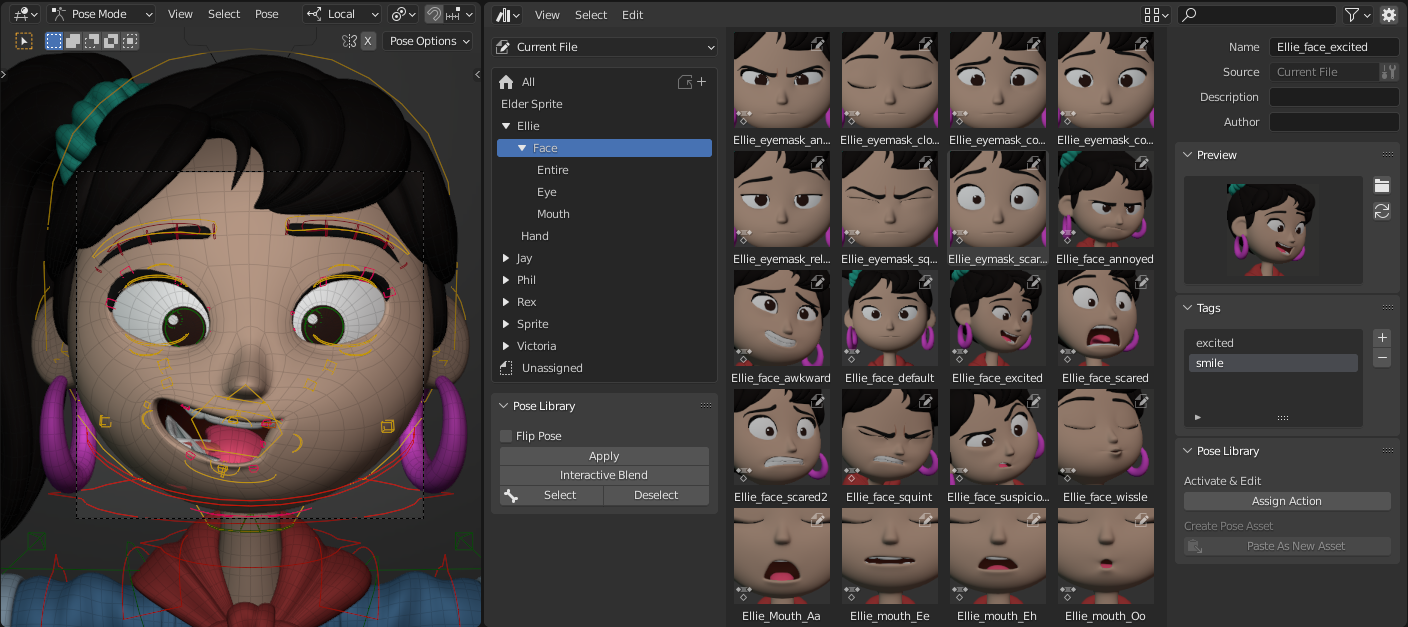
Example pose library of the Sprite Fright character Ellie.
Pose Creation
To create a pose in the library from the Action Editor, pose the character, select the relevant bones, and click the Create Pose Asset button. The same option is available in the 3D Viewport while in Pose Mode under the Pose menu. This will create the new pose action, which will contain keys for the current value of each bone's location, rotation, scale, and Bendy Bone properties. It doesn't matter if the character is animated or not, so you can easily create pose assets from existing animation. You can even create a pose asset containing bones of two or more different armatures. To do so, put the armatures in pose mode and select the bones you want to add to the asset. Clicking the Create Pose Asset button will then still create a single action, but with separate slots for each armature.
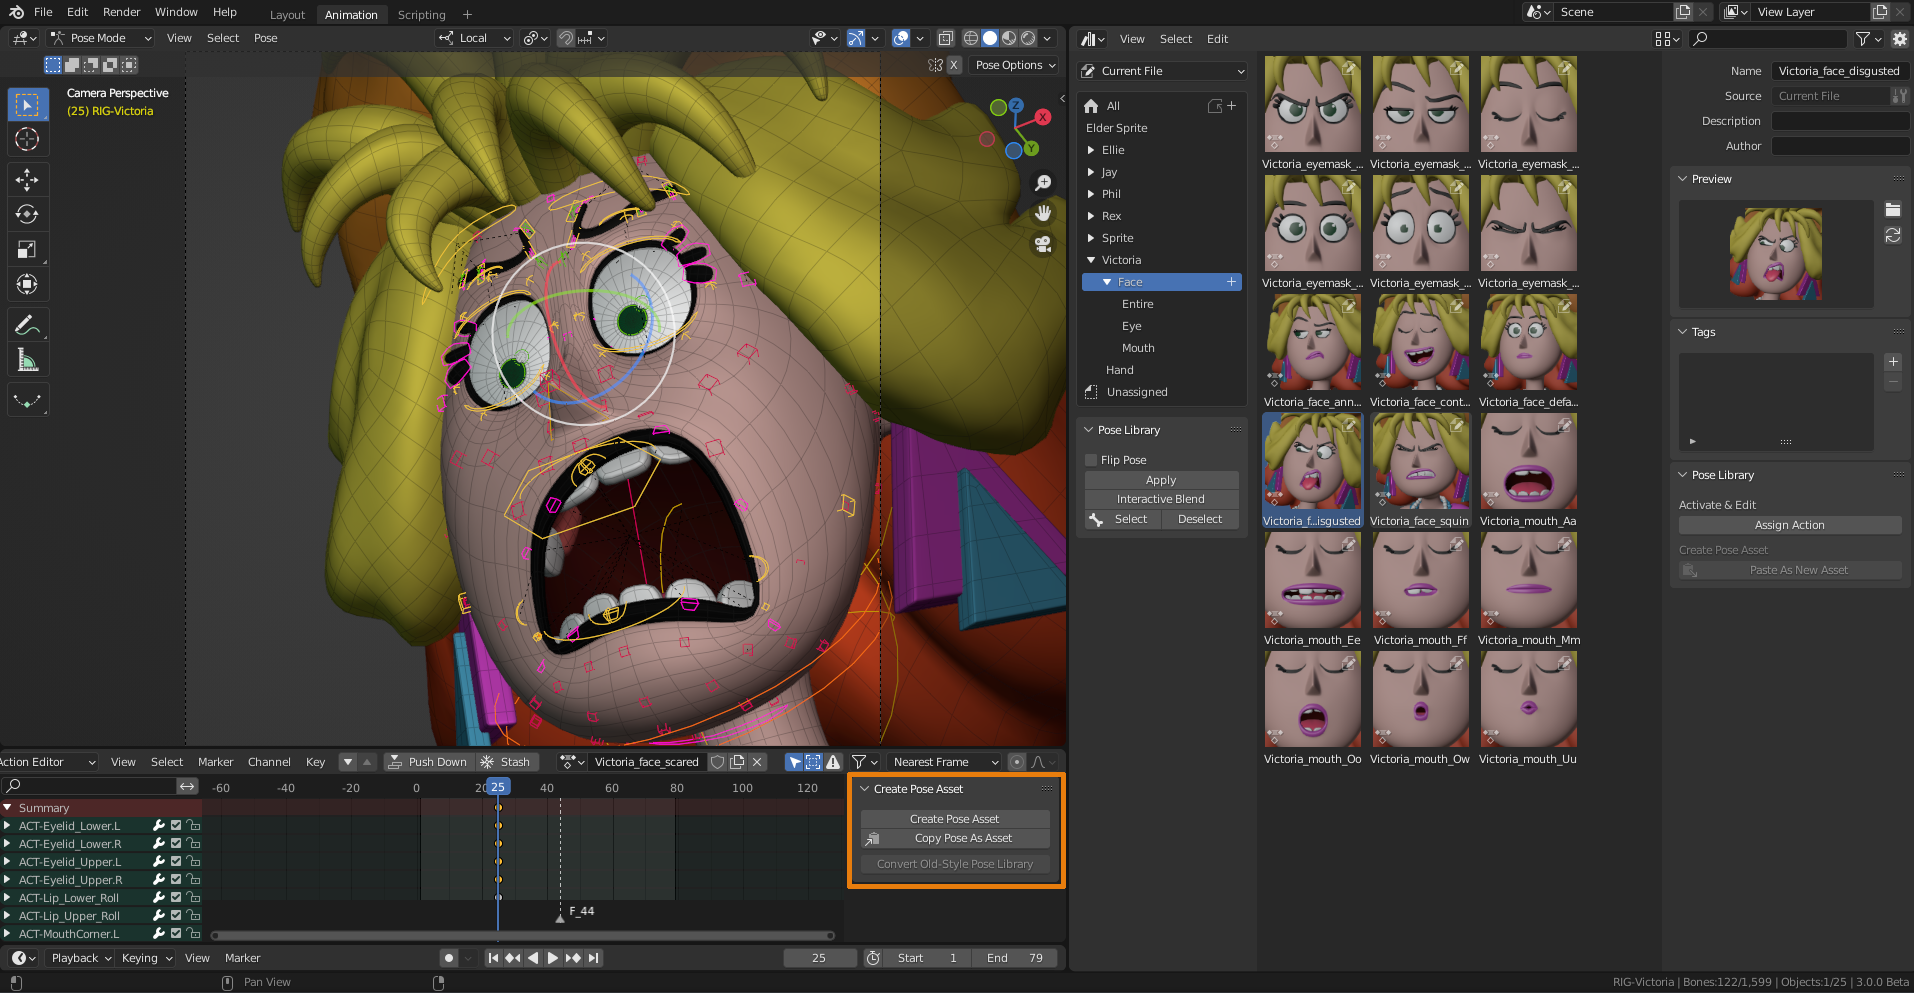
To create a new pose asset, use the Create Pose Asset button in the Action editor.
If the "Current File" library is chosen, the action is created in the current blend file and marked as an Asset. If another library is chosen, the pose is extracted and a new .asset.blend file is created containing the action.
In case the pose asset has been created in the current file, it can be renamed in the Asset Browser. There you can also right click on the thumbnail, then choose Assign Action to assign the action to the active Object (see description above).
注釈
The Create Pose Asset button creates a new asset. To make sure that this is actually visible in the user interface, so that you know that something happened, it tries to make sure that the Asset Shelf is visible in the 3D Viewport.
Pose Creation by Copying from Other File
As described in Design Limitations, Blender only writes data to the currently open blend-file or to an .asset.blend file. To copy a pose from some other file into a pose library file, see the following steps:
Pose the character and select the relevant bones.
Click the Copy Pose as Asset button, which is available in the Action Editor. This will create the pose asset (including its thumbnail) and store it in a temporary file somewhere.
Choose an existing pose asset, and open its context menu. Click the Open Blend File option.
A new Blender process will start, and automatically open the asset library file that contains the chosen pose. By the way, this works for all assets, not just poses!
In the Asset Browser, click the Paste as New Asset button. This will load that temporary file, and load all the assets it can find in there. In our case, it will only find a single pose, but future versions of Blender may extend this for other asset types. This is why the button is named so generically -- it is not pose-specific.
Give the pose a name, and click on the "refresh" button in the preview image panel to render a new preview if you want.
Save the file and quit Blender.
The original Blender is still running in the background and notices that the new Blender has quit. It automatically refreshes the Asset Browser to show the newly added pose.
Controlling the Look of Preview Images
The pose library preview images are rendered with the active Scene camera. This approach was preferred over rendering a specific 3D Viewport for two main reasons:
There is only one scene camera active at any time, making it predictable which camera is used.
The camera, as well as the rest of the scene, can be set up specifically for rendering the thumbnails. Pose library files are intended for that purpose: to contain the poses and render their preview images.
The preview images are rendered using the Workbench Engine. Switch the scene to use that as render engine, and you'll see various options to influence the look. Select a pose asset and press the Generate Preview button to re-render the preview image with the current settings.
You can also animate settings such as MatCap rendering, light positions, and intensities, etc. Use this to your advantage!
Modifying a Pose Asset
A pose asset can be modified after it has been created. This is only possible for pose assets in the current file or that have been exported into an .asset.blend file. For that, an operator has been created which can be accessed by right clicking a pose asset. That operator works on the active object, so updating the asset from selected bones of multiple armatures won't work. It will find the best matching slot, falling back to the first one. There are 4 modes.
- Adjust Pose
Update existing channels in the pose asset from the selected bones, but don't remove or add any channels.
- Replace(置き換え)
Completely replace all channels in the pose asset with the channels of the selected bones.
- Add(追加)
Add channels of the selected bones to the pose asset. Existing channels will be updated.
- Remove(削除)
Remove channels of the selected bones from the pose asset.
Using the Pose Library
The pose library can be used to pose one or more characters. The current bone selection will be used to determine which bones are modified. When editing multiple armatures at once, a matching slot of the pose asset is determined for each armature. It is possible to either fully apply a pose or blend it into the character's current pose interactively. How exactly these operations work depends on where you use them. This section will explain the use from both the Asset Browser and the 3D Viewport.
Use from the Asset Browser
The pose library can be used directly from the Asset Browser. The Pose Library panels will appear when the active object is an armature and in Pose Mode. The catalog system and the filter bar at the top can be used to search for specific poses.
The following operators can be accessed by RMB on a pose:
- Apply Pose
Applies the pose to the character. If there are any bones selected, the pose will be applied only to those bones. This makes it possible to create a "finger guns" pose by applying a fist pose to the hand, and then an "open hand" pose for only the index finger and thumb. Double-clicking a pose will also apply it.
- Apply Pose Flipped
Will mirror the pose from left to right and vice versa. This makes it possible, for example, to apply a left-hand pose to the right hand, reducing the number of poses you have to put into the library. This can of course also be applied for asymmetrical facial expressions that depend on the camera angle. While blending (see below), keep Ctrl pressed to blend the flipped pose.
- Blend Pose
Allows you to gradually blend a pose from the library into the character's pose. Click the button, then move the mouse left/right to determine the desired blend. A pose asset can be "subtracted" while blending. Drag to the right to blend as usual, drag to the left to subtract the pose. While blending, you can use Tab to toggle between the original and the blended pose. As usual in Blender, LMB or press Return to confirm; RMB or press Esc to cancel the operator. Blending can also exaggerate a pose, by pressing E (for Extrapolate) and applying a pose for more than 100%.
- Select/Deselect Pose Bones
Select or deselect the bones that are used in the pose. This can be used to create a selection set, or simply show what was part of the pose and what wasn't.
Use from 3D Viewport
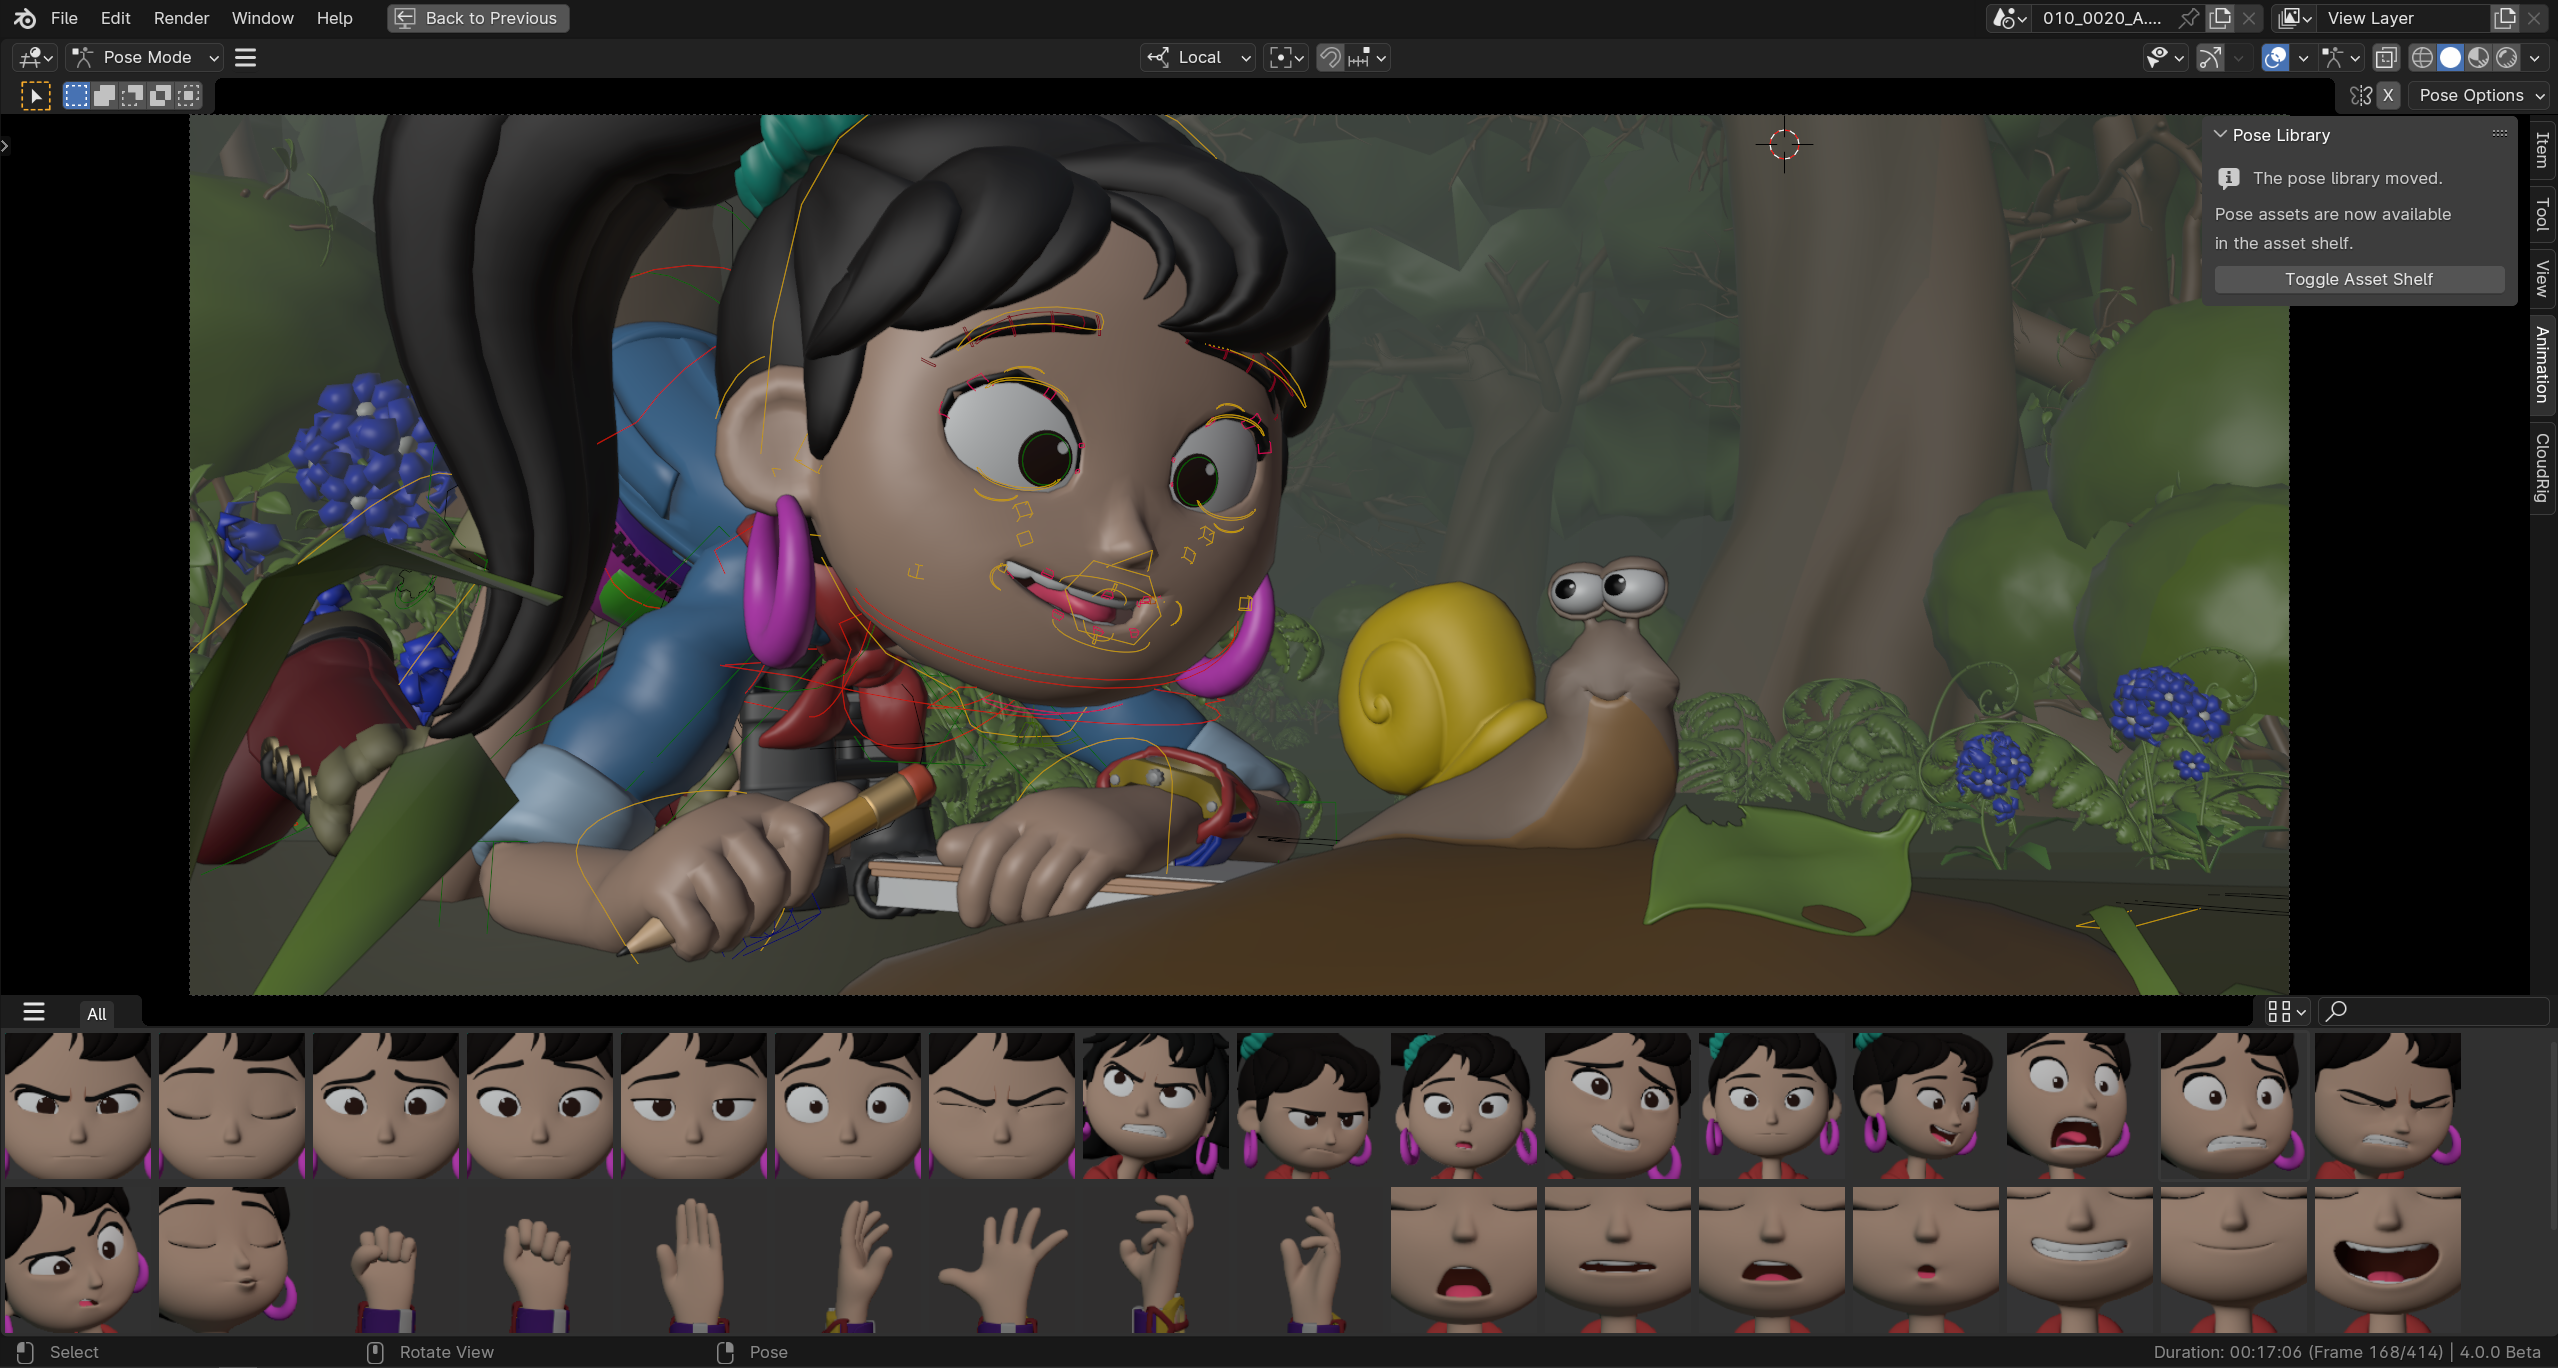
The pose library in use from the Asset Shelf.
注釈
The pose library previously lived in the Sidebar within the Pose Library panel. The panel still exists, but now contains a button to open the asset shelf.
In the 3D viewport, poses can be quickly applied from the Asset Shelf. Contrary to the Asset Browser, the shelf allows you to apply poses quicker.
Click on a pose to apply it. A single click is enough. You can also select and apply a pose via the cursor keys. This allows for fast exploration of the poses, to directly see the result on the active character.
Drag the pose thumbnail left to right to blend it into the character's current pose. Just release the mouse button to confirm.