Layers(レイヤー)
参照
- Mode(モード):
全てのモード
- Panel(パネル):
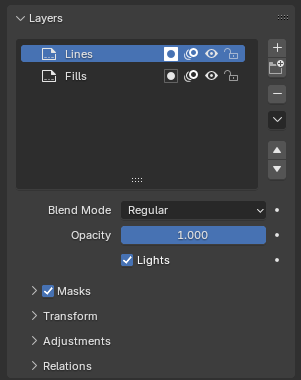
Grease Pencil Layers panel.
Grease Pencil objects can be organized into a tree known as the layer tree for grouping and arranging strokes.
Any stroke can only belong to a single 2D layer. The selected layer is the active layer. Only one layer or group can be active at a time. When you draw, the new strokes are added to the active layer. By default the view order of the layers in the viewport is top to bottom.
Layers can be grouped using Layer Groups. A layer can only be in one group at a time. Layers can be moved into groups using drag-and-drop. Groups can be color coded with a color tag.
Every layer corresponds to a channel in the Dope Sheet editor (in Grease Pencil mode). See Dope Sheet for more information.
Layers can also be used together with Modifiers to only affect part of your drawing. See Modifiers for more information.
Layers can mask other layers by clicking (Use Mask) or using the checkbox in the Masks panel header. See Masks(マスク) for more information.
Tip
Sometimes the layers you are not working on can be a distraction in the 3D Viewport. Activate the Fade Inactive Layers overlay to control the opacity of the non-active layers.
- Layer Tree
Tree View of all layers and groups for the Grease Pencil object.
Next to the layer name there are four icons buttons that control common properties of the layer:
- / Use Mask
Toggle the affect of Masks on the layer.
- / Onion Skinning
Toggle using the layer for Onion Skinning.
- / Hide
ビューポートとレンダリングでレイヤーの表示を切り替えます。
- / Lock
レイヤーの編集可・不可を切り替えます。
- Add New Layer
Adds a new layer to the active object.
- Add New Layer Group
Adds a new layer group to the active object. Note, layer groups cannot be added from the Dopesheet; they must be added from the Properties editor.
- Remove Layer/Group
Removes the active layer or layer group.
- Layer Specials
Operators for working with layers.
- Duplicate(複製)
Makes an exact copy of the selected layer appending a number to differentiate its name.
- Duplicate Empty Keyframes
Makes a copy of the selected layer but with empty keyframes. Useful to easily have empty keyframes preset to work on the cleanup or filling process.
- Show All
Turns on the visibility of every layer in the list.
- Hide Others
Turns off the visibility of every layer in the list except the active one.
- Lock All(すべてロック)
Locks editing of all the layers in the list.
- Unlock All(すべてロック解除)
Unlocks editing of all the layers in the list.
- Autolock Inactive Layer
Automatically locks the editing of every layer in the list except the active one. This way you avoid making unwanted changes in other layers without the need to lock them every time.
- Ignore Material Locking
Allow editing strokes even if they use locked materials.
- Merge Down Shift-Ctrl-M
Combine the selected layer with the layer below, the new layer keeps the name of the lower layer.
- Merge Group
Combine layers in the active layer group into a single layer.
- Merge All
Combine all layers into the active layer.
- Mask with Layer Above/Below
Adds a mask to the active layer with layer above or below.
- Copy Layer to Selected
Copy the active layer to the selected Grease Pencil object.
- Copy All Layers to Selected
Copy all layers to the selected Grease Pencil object.
- Reorder Layer
Moves the active layer or layer group up/down in the tree.
Below the layers list there are additional settings:
- Blend Mode(ブレンドモード)
The layer blending operation to perform. See Color Blend Modes.
- Opacity(不透明度)
Used to set the opacity of the layer.
- Lights(照明)
When enabled, the layer is affected by lights.
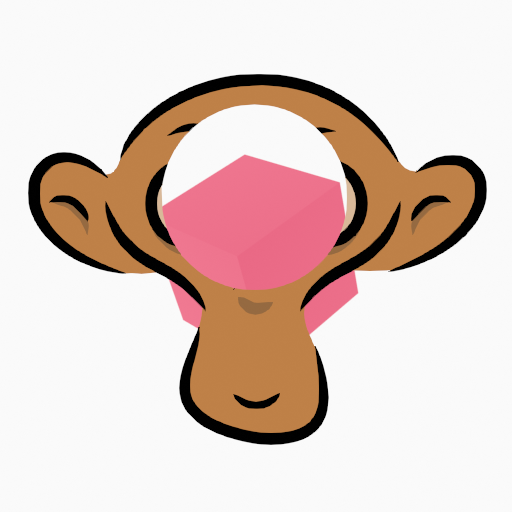
Masks(マスク)

Masks panel.
In Grease Pencil there are no special mask layers, any layer can act as a mask for other layers. The mask system is flexible enough to allow top-bottom and bottom-top masking.
Layers used as masks can use all the blend modes and different opacity values like any other layer.
Tip
If you want to make a full transparent masking you will have to set the mask layer's opacity to 0.
The layer/s that will act as mask of the current layer could be added to the Mask list view.
In the Masks list next to the layers name there are two icons buttons that control common properties of the layer mask:
- / Invert
Inverts the mask.
- / Hide
ビューポートとレンダリングでレイヤーの表示を切り替えます。
Transform(トランスフォーム)
Allows per-layer location, rotation and scale transformations.
Adjustments
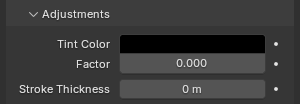
Layers adjustment panel.
- Tint Color
Color that tint any material colors used in the layer.
- Factor(係数)
Controls the amount of tint color to apply.
- Stroke Thickness
Thickness value that override the strokes thickness in the layer.
Relations(関係)
- Parent(親・ペアレント)
Select a Parent object to manipulate the layer. The layer will inherit the transformations of the parent, this is especially useful when rigging for cut-out animation.
- Pass Index(パスインデックス)
The layer index number can be used with some modifiers to restrict changes to only certain areas.
See Modifiers for more information.
- View Layer(ビューレイヤー)
Defines the View Layer to use for the Grease Pencil layer. If empty, the layer will be included in all View Layers. This is useful to separate drawings parts for compositing.
- Use Masks in Render
If disabled, no masks on the layer are included in the view layer render.
Display(表示)
- Channel Color
Sets the color to use in the channel region of the Dope Sheet.