UVs(UV) & Texture Space(テクスチャ空間)
UV Maps(UVマップ)
参照
- Mode(モード):
全てのモード
- Panel(パネル):
If you have a mesh object selected, you'll find its UV maps in the Data tab of the Properties editor. After selecting a map, you can view and edit it in the UV editor.
One mesh can have multiple UV maps (e.g. one map per texture), although it's also possible to reuse a UV map for multiple textures.
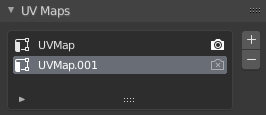
The UV Maps panel in the Data tab.
- / Active Render
Marks the UV map as the default one for rendering. The Active Render UV map is used for:
The UV Pass for compositing
The Texture Coordinate (テクスチャ座標)ノード for material shading.
The UV Map (UVマップ) ノード for material shading when no UV map is specified.
- Add UV Map
Duplicates the selected UV map, or creates a new one if the list is empty.
- Remove UV Map
Removes the selected UV map.
Texture Space(テクスチャ空間)
参照
- Mode(モード):
全てのモード
- Panel(パネル):
This panel lets you configure the object's Texture Space, which is a 3D box used for generating texture coordinates without the use of a UV map. You can visualize the texture space using the option in the Viewport Display(ビューポート表示) panel.
- Texture Mesh Mesh objects
Use another mesh for texture indices. The vertices of the two objects must be perfectly aligned or the UV map will be distorted.
- Auto Texture Space(自動テクスチャ空間)
Calculates the texture space automatically.
- Location X, Y, Z, Size X, Y, Z
Lets you define the texture space manually, relative to the object. Note that you can also edit it in the 3D Viewport -- see Editing below.
- Match Texture Space Curve objects
Modifies the Location and Size to match the object's bounding box. This disables Auto Texture Space.
Editing(編集)
参照
- Mode(モード):
Object Mode(オブジェクトモード)
- Menu(メニュー):
Click one of these menu items, then move the mouse to adjust the texture space and press LMB to confirm. While transforming, you can use keyboard shortcuts to lock certain axes; see the status bar.
アクセス
When setting up a material shader, you can use the Generated output of the Texture Coordinate (テクスチャ座標)ノード to read the 3D coordinate inside the object's texture space. You can then pass this coordinate to a texture node.
Tip
Texture spaces do not have rotation support. You can use a Mapping (マッピング)ノード to manually rotate the coordinate in the material shader instead.