Selecting Grease Pencil Elements
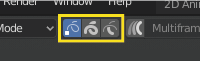
Select Mode
参照
- Mode(モード):
Edit Mode(編集モード)
- Menu(メニュー):
- ショートカットキー:
1, 2, 3
Edit Mode selection buttons.
In Edit Mode there are three different selection modes. You can enter the different modes by selecting one of the three buttons in the header.
- Points(ポイント):
To select individual points.
- Strokes:
To select an entire stroke.
- Segments(セグメント):
To select all points that are between other strokes.
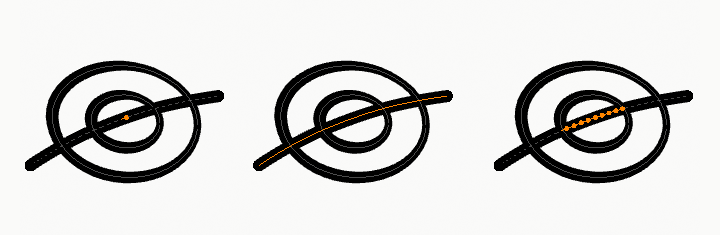
Points, stroke and in between stroke selection sample.
Select All/None/Invert
All these options have the same meaning and behavior as in Object Mode.
Select Random(ランダム選択)
参照
- Mode(モード):
Edit Mode(編集モード)
- Menu(メニュー):
Randomly selects unselected points or strokes.
- Ratio(比率)
The likelihood of an unselected elements being selected. Note that, this is not the percentage amount of elements that will be selected.
- Random Seed(ランダムシード)
疑似乱数ジェネレーターで使用される Seed(シード) 。
- Action(アクション)
Selection or deselection of elements.
Select Alternated
参照
- Mode(モード):
Edit Mode(編集モード)
- Menu(メニュー):
Selects alternate points in the selected strokes.
Select More/Less(選択の拡大縮小)
参照
- Mode(モード):
Edit Mode(編集モード)
- Menu(メニュー):
- ショートカットキー:
Ctrl-NumpadPlus 、 Ctrl-NumpadMinus
The purpose of these operators is to reduce or enlarge the current selection within a stroke (i.e. they will never "go outside" of a stroke or "jump" to another stroke in the same object).
- More(拡大)
For each selected point, select all its linked points (i.e. one or two...).
- Less(縮小)
For each selected point, if all points linked to this point are selected, keep this one selected. Otherwise, deselect it.
ヒント
When all points of a stroke are selected, nothing will happen (as for Less, all linked points are always selected, and of course, More cannot add any). Conversely, the same goes when no points are selected.
By Stroke Type
参照
- Mode(モード):
Edit Mode(編集モード)
- Menu(メニュー):
Selects curves based on whether they are strokes or fills.
- Type(タイプ)
- Stroke:
Select all stroke curves (outlines).
- Fill(フィル):
Select all fill curves (enclosed filled shapes).
- Deselect(選択解除)
If enabled, matching curves are deselected instead of selected.
Select Similar(類似選択)
参照
- Mode(モード):
Edit Mode(編集モード)
- Menu(メニュー):
- ショートカットキー:
Shift-G
Select all strokes with similar characteristics.
- Mode(モード)
The characteristics to compare.
- レイヤー:
Selects all the points/strokes with a similar layer index.
- Material(マテリアル):
Selects all the points/strokes with a similar material index.
- Vertex Color (頂点カラー):
Selects all the points/strokes with a similar vertex color.
- Radius(半径):
Selects all the points/strokes with a similar stroke radius.
- Opacity(不透明度):
Selects all the points/strokes with a similar layer opacity
- Threshold(しきい値)
How similar the selection must be.
Select Fill
参照
- Mode(モード):
Edit Mode(編集モード)
- Menu(メニュー):
- ショートカットキー:
Ctrl-L
Selects all curves that belong to the same fill region as the active curve.
Grease Pencil fills can be composed of multiple boundary curves. This operator expands the current selection to include all curves that define the same enclosed fill area.
This is useful when editing or transforming an entire filled shape, ensuring that all boundary strokes are selected together.
Select Linked(リンク選択)
参照
- Mode(モード):
Edit Mode(編集モード)
- Menu(メニュー):
- ショートカットキー:
L
Selects the stroke under the cursor along with all connected points belonging to the same stroke.
This is useful for quickly selecting an entire stroke for editing, transforming, moving between layers, or applying material changes.
- Deselect Linked
Removes the linked stroke under the cursor from the selection.
Shortcut: Shift-L
Select First/Last
参照
- Mode(モード):
Edit Mode(編集モード)
- Menu(メニュー):
These operators will toggle the selection of the first or last point(s) of the stroke(s) in the object. This is useful to quickly find the start of a stroke.