Knife Topology Tool
参照
- Mode(モード):
Edit Mode(編集モード)
- Tool(ツール):
- Menu(メニュー):
- ショートカットキー:
K
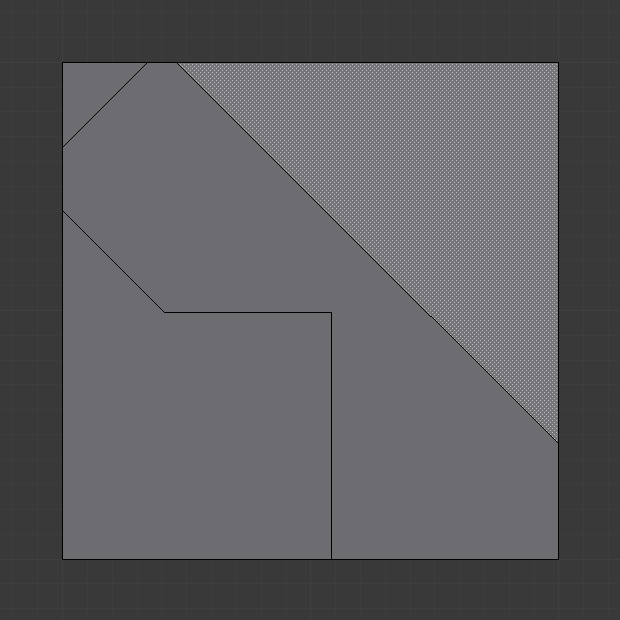
The Knife tool allows to interactively "cut through" faces, subdividing them and creating a chain of new edges along the way.
使用方法
First, select the tool in the Toolbar or press K. The cursor will change into a scalpel to indicate it's active.
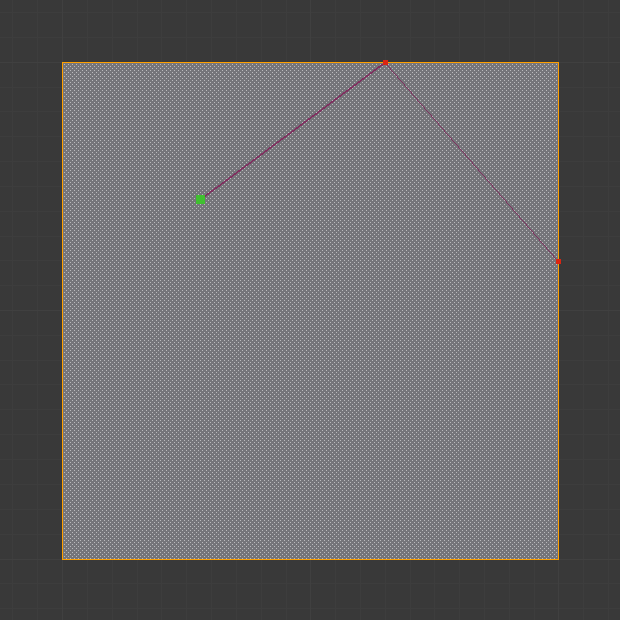
Click LMB at the place where you want to start cutting. This can be anywhere: on an existing vertex, edge, or face, or even outside of the mesh.
Move your mouse to the next location. You'll see a yellow line indicating the new edges that will be created, and aqua dots indicating the new vertices. Click LMB to confirm and start on the next cutting segment.
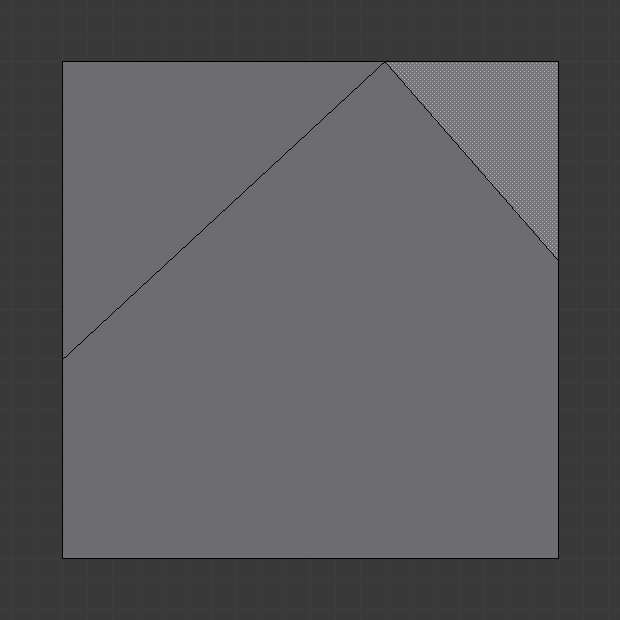
Once you're done, press Spacebar or Return to apply the cuts. Alternatively, press Esc to cancel.
ヒント
By using 複数のオブジェクトへの編集, you can cut multiple objects at the same time.

Tool Settings(ツールの設定)
These settings are only available when using the tool from the Toolbar (not when pressing K). They can be found in the Tool tab of the Properties Editor editor and of the Sidebar.
- Occlude Geometry(ジオメトリを塞ぐ)
Only cut geometry visible on screen. By disabling this, you can cut all the way through the mesh, including faces that are on the backside or behind others.
- Only Selected
Only cut through selected geometry. You can press Shift-K instead of K to start cutting with this option enabled.
- X-Ray(透過)
Show the cutting path even if it's occluded by geometry.
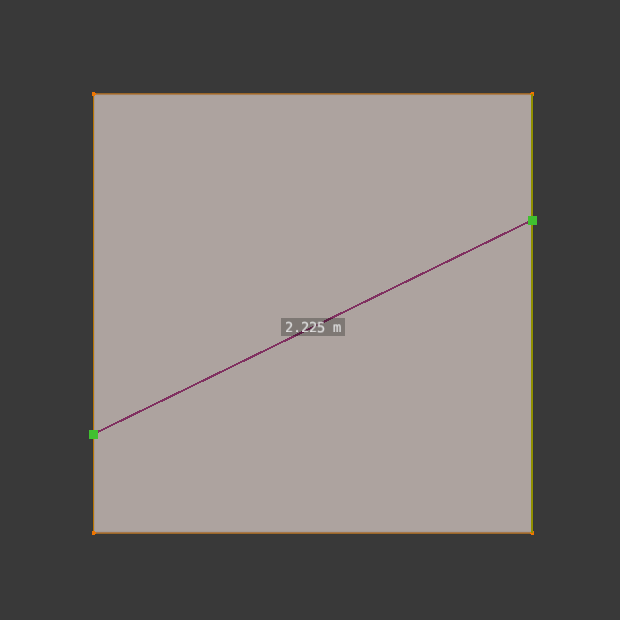
- Measurements
The measurements to show along the cutting path: distances, angles, or both.
- Angle Snapping(角度をスナップ)
Whether to constrain the cutting lines to multiples of the Snap Increment angle.
- None(なし):
No snapping.
- Screen(スクリーン):
Snap in screen space (the viewing plane).
- Relative(相対):
Snap in a plane on the geometry, relative to an adjacent edge or cutting line.
- Snap Increment
The angle to use for Angle Snapping.


コントロール
These keyboard shortcuts are shown in the status bar while cutting. They're available both when using the tool from the Toolbar and when pressing K.
- Cut LMB
You can either click to add a new cutting line, or drag to create cutting lines as you move the mouse over edges.
- Close Loop - Double-click LMB
Adds a cutting point at the cursor (just like when single-clicking) and then connects it to the first point in the current path, closing the loop.
- Stop RMB
Completes the current cutting path and begins a new one. The cursor will snap to previously defined cuts.
- Confirm(決定) Spacebar または Return
Confirms the cut, turning the cutting paths into edges.
- Cancel(キャンセル) Esc
カットをキャンセルします。
- Undo(元に戻す) Ctrl-Z
Undoes the previous cutting line (or, if you dragged the mouse before, all the cutting lines created during that drag).
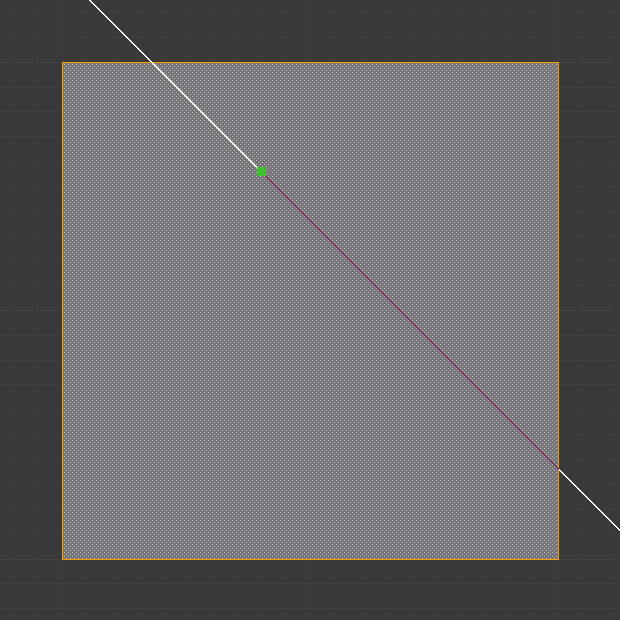
- Midpoint Snap(中点にスナップ) Shift
Hold to snap the cursor to the center of edges.
- Ignore Snap(スナップ無視) Ctrl
Hold to temporarily stop the cursor from snapping to existing vertices, edges, and cutting lines.
- Cut Through C
Also cut through occluded faces, instead of only the visible ones. This is linked to (and the opposite of) the Occlude Geometry setting above.
- Axis X, Y, or Z
Constrains the current cutting line to a global axis. Press a second time to use the object's local axis, and a third time to disable the constraint again.
- Measure S
Cycles between measurements to show: distances, angles, or both.
- X-Ray V
Toggles whether to display cuts occluded by geometry.
- Angle Constraint A
Constrains cutting lines to multiples of the Snap Increment angle. This angle can be specified in the Tool Settings before cutting (see above) or typed while cutting with Angle Constraint active.
By default, the snapping is done in the Screen plane. Press A a second time to snap in planes on the geometry, Relative to an automatically chosen edge or cutting line. You can press R to select a different reference line.
Press A a third time to disable the snapping again.

既知の制限
重複する頂点
If a cut creates duplicate vertices, this is often caused by the clipping range being too large. Try increasing the Clip Start to avoid this problem. Also see Depth Troubleshooting for details.