Использование групп вершин#
Группы вершин для костей#
Это одно из основных применений окрашивания весов. Хотя вы можете заставить Blender генерировать веса автоматически (см. раздел skinning), вы можете захотеть подправить их или даже нарисовать заново, особенно вокруг суставов.
Это делается следующим образом:
Выберите арматуру и переведите ее в режим Pose Mode, нажав Ctrl-Tab.
Убедитесь, что в верхней панели убран флажок.
Выберите меш и включите режим Рисования весов (Weight Paint Mode).
Убедитесь, что в заголовке 3D вьюпорт (3D Viewport) отмечено Выбор костей (Bone Selection).
Select a bone using Alt-LMB (or Shift-Ctrl-LMB). This will activate the bone’s vertex group and display its current weights on the mesh.
Paint weights for the bone using LMB.
Примечание
You can only select one bone at a time in this mode.
Совет
The bones are likely embedded inside the mesh, making them invisible and unselectable. To get around this, you can enable In Front for the armature.
If a bone doesn’t have a vertex group yet when you start painting, Blender will create one automatically.
If you have a symmetrical mesh and a symmetrical armature, you can use Mirror Vertex Groups to automatically create vertex groups and weights for the other side.
Vertex Groups for Particles#
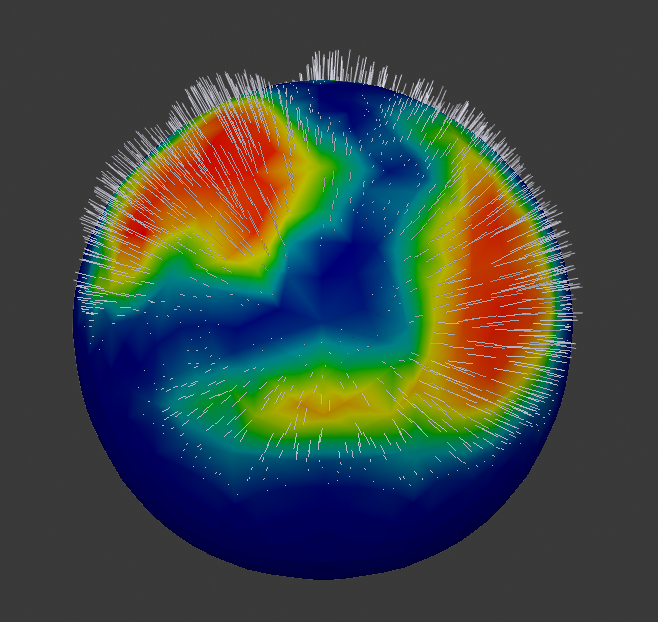
Weight painted particle emission.#
By selecting vertex groups in the Vertex Groups panel of a particle system’s properties, you can have different particle densities, hair lengths etc. across different areas of the mesh.