Sử Dụng các Nhóm Điểm Đỉnh (Using Vertex Groups)
Nhóm Điểm Đỉnh cho các Xương (Vertex Groups for Bones)
This is one of the main uses of weight painting. While you can have Blender generate the weights automatically (see the skinning section), you may want to tweak them or even create them from scratch, especially around joints.
Quá trình được as follows:
Lựa Chọn the khung rối và đưa/mang it vào "Pose Mode" bởi/theo pressing Ctrl-Tab.
Make sure that is unchecked in the topbar.
Lựa Chọn the khung lưới và đưa/mang it vào "Chế Độ Sơn Trọng Lượng".
Make sure that Bone Selection is checked in the 3D Viewport's header.
Lựa Chọn một xương using Alt-NCT (LMB) (hoặc Shift-Ctrl-NCT (LMB)). This will kích hoạt the xương's nhóm điểm đỉnh và hiển thị của nó hiện tại trọng lượng trên khung lưới.
Paint weights for the bone using LMB.
Ghi chú
You có thể duy lựa chọn cái/số một xương tại một thời gian vào/trong this chế độ.
Mẹo
The bones are likely embedded inside the mesh, making them invisible and unselectable. To get around this, you can enable In Front for the armature.
If a bone doesn't have a vertex group yet when you start painting, Blender will create one automatically.
Nếu you have một đối xứng khung lưới và một đối xứng khung rối, you có thể sử dụng Phản Chiếu Đối Xứng Nhóm Điểm Đỉnh (Mirror Vertex Groups) tới tự động kiến tạo nhóm điểm đỉnh và trọng lượng cho/đối với the phía bên kia.
Nhóm Điểm Đỉnh cho Hệ Thống Hạt (Vertex Groups for Particles)
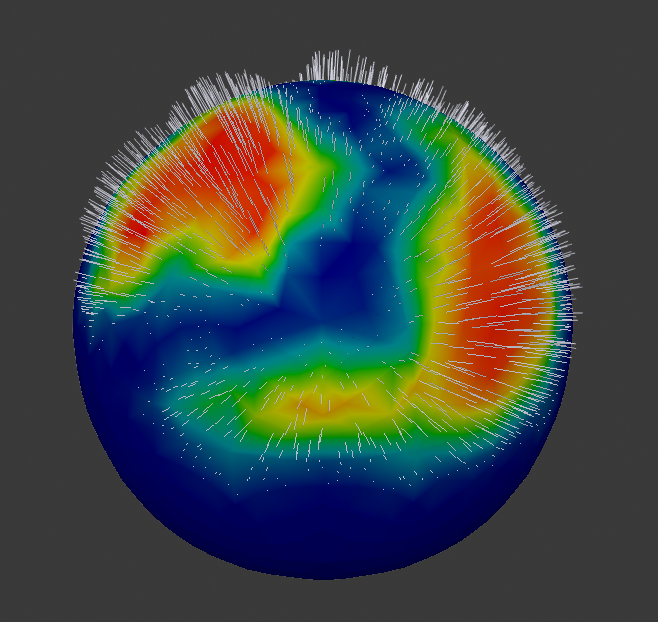
Phát xạ hạt đã được sơn trọng lượng.
By selecting vertex groups in the Vertex Groups panel of a particle system's properties, you can have different particle densities, hair lengths etc. across different areas of the mesh.