Editing UVs
Sau khi mở gói, bạn sẽ cần sắp xếp các ánh xạ UV, để chúng có thể được sử dụng trong tạo chất liệu hoặc sơn. Mục tiêu biên soạn của bạn là:
Khâu các mảnh (của ánh xạ UV) lại với nhau.
Giảm thiểu không gian lãng phí trong hình ảnh.
Phóng to các mặt mà bạn muốn biết thêm chi tiết.
Sửa kích thước/phóng to các mặt bị kéo giãn.
Thu nhỏ các mặt quá sần sùi và có quá nhiều chi tiết.
Với lượng không gian lãng phí là tối thiểu, hầu hết các điểm ảnh đều được sử dụng tối đa để mang lại độ chi tiết và độ mịn cao nhất cho chất liệu UV. Một mặt UV có thể nhỏ bằng một điểm ảnh (các chấm tí xíu tạo nên hình ảnh ấy) hoặc lớn bằng toàn bộ hình ảnh. Bạn nên thực hiện các điều chỉnh lớn trước tiên, và sau đó mới hiệu chỉnh bố trí.
Biến Hóa [Transform]
Tham Chiếu [Reference]
- Trình Biên Soạn (Editor):
Trình Biên Soạn UV (UV Editor)
- Chế Độ [Mode]:
Chế Độ Biên Soạn [Edit Mode]
- Công Cụ (Tool):
- Trình Đơn [Menu]:
Di Chuyển (Move) G
Xoay Chiều (Rotate) R
Đổi Tỷ Lệ (Scale) S
Xô Nghiêng (Shear) Shift-Ctrl-Alt-S
Khóa Trục (Axis Locking)
Các phép biến hóa có thể được khóa vào một trục bằng cách nhấn X hoặc Y sau một trong các công cụ biến hóa đã được kích hoạt. Ngoài ra, giữ NCG (MMB) xuống sẽ ràng buộc chuyển động vào trục X hoặc Y.
Trượt Điểm Đỉnh [Vertex Slide]
Tham Chiếu [Reference]
- Chế Độ [Mode]:
Chế Độ Biên Soạn [Edit Mode]
- Trình Đơn [Menu]:
Trượt Điểm Đỉnh sẽ biến hóa một điểm đỉnh dọc theo một trong các cạnh liền kề của nó. Sử dụng Shift-V để kích hoạt công cụ. Điểm đỉnh được chọn gần nhất với con trỏ chuột sẽ là điểm đỉnh điều khiển. Di chuyển chuột dọc theo hướng của cạnh mong muốn để xác định vị trí điểm đỉnh. Sau đó nhấn NCT (LMB) để xác nhận biến hóa.
- Hệ Số (Factor)
Xác Định the số lượng của trượt đẩy performed. Âm giá trị correspond tới slides về phía cái/số một điểm đỉnh, trong khi dương ones, ám chỉ tới the cái khác cái/số một.
- Đồng Đều (Even) E
Theo mặc định, giá trị dịch chuyển của các điểm đỉnh là phần trăm độ dài các cạnh mà chúng di chuyển. Khi chế độ Đồng Đều được kích hoạt thì các điểm đỉnh được sẽ dịch chuyển bởi một giá trị tuyệt đối.
- Đảo Lật (Flipped) F
Khi Đảo Lật được kích hoạt thì các điểm đỉnh di chuyển cùng một khoảng cách từ các điểm đỉnh liền kề, thay vì di chuyển từ vị trí ban đầu của chúng.
- Hạn Định (Clamp) Alt hoặc C
Bật/tắt chế độ hạn định trượt đẩy nội trong giới hạn của cạnh.
Trượt Đẩy Cạnh (Edge Slide)
Tham Chiếu [Reference]
- Chế Độ [Mode]:
Chế Độ Biên Soạn [Edit Mode]
- Trình Đơn [Menu]:
Trượt đẩy một hoặc nhiều cạnh ngang qua các mặt liền kề với một số hạn chế liên quan đến việc lựa chọn các cạnh (tức là lựa chọn "nhất định" xác định một vòng mạch hợp lệ, xem dưới đây).
- Hệ Số (Factor)
Xác Định the số lượng của trượt đẩy performed. Âm giá trị correspond tới slides về phía một mặt, trong khi dương ones, ám chỉ tới the cái khác cái/số một.
- Đồng Đều (Even) E
Buộc vòng cạnh phải khớp với hình dạng của vòng cạnh liền kề. Bạn có thể đảo lật sang điểm đỉnh đối diện bằng cách dùng phím F.
- Đảo Lật (Flipped) F
Khi chế độ Đồng Đều đang hoạt động thì tùy chọn này sẽ đảo lật giữa hai vòng cạnh nằm kề nhau, vòng cạnh đang hoạt động sẽ được sử dụng để khớp.
- Hạn Định (Clamp) Alt hoặc C
Bật/tắt chế độ hạn định trượt đẩy nội trong giới hạn của cạnh.
- Biên Soạn Phản Chiếu Đối Xứng (Mirror Editing)
Cho phép bạn lan truyền hoạt động của thao tác tới các phần tử đối xứng của khung lưới (nếu có, theo chiều hướng X cục bộ).
Ngẫu Nhiên Hóa (Randomize)
Tham Chiếu [Reference]
- Trình Biên Soạn (Editor):
Trình Biên Soạn UV (UV Editor)
- Chế Độ [Mode]:
Chế Độ Biên Soạn [Edit Mode]
- Trình Đơn [Menu]:
Randomize the scale, rotation and offset of selected UV islands. The Randomize Transform tool in the UV editor works similar to Randomize Transform tool in the 3d view.
- Random Seed (Mầm Ngẫu Nhiên)
Changes the random seed used by the pseudo-random number generator, producing a different transform result for each seed value.
- Vị Trí [Location]
Lượng ngẫu nhiên hóa vị trí.
- Xoay Chiều (Rotation)
Lượng ngẫu nhiên hóa xoay chiều.
- Đổi Tỷ Lệ Đồng Đều (Scale Even)
Apply the same scale to the U coordinate and V coordinate.
- Tỷ Lệ (Scale)
Lượng ngẫu nhiên hóa tỷ lệ theo tọa độ U và V.
Phản Chiếu Đối Xứng (Mirror)
Tham Chiếu [Reference]
- Trình Biên Soạn (Editor):
Trình Biên Soạn UV (UV Editor)
- Chế Độ [Mode]:
Chế Độ Biên Soạn [Edit Mode]
- Trình Đơn [Menu]:
- Tổ Hợp Phím Tắt [Shortcut]:
Ctrl-M
Các UV có thể được phản chiếu đối xứng trên trục Y hoặc trục X:
Phản Chiếu Đối Xứng X (Mirror X)
Phản Chiếu Đối Xứng Y
Bạn cũng có thể sử dụng các phím nóng X hoặc Y hoặc giữ NCG (MMB) và kéo rê theo hướng phản chiếu đối xứng.
Sao Chép Tọa độ UV Phản Chiếu Đối Xứng (Copy Mirrored UV Coordinates)
Tham Chiếu [Reference]
- Trình Biên Soạn (Editor):
Trình Biên Soạn UV (UV Editor)
- Chế Độ [Mode]:
Chế Độ Biên Soạn [Edit Mode]
- Trình Đơn [Menu]:
Copies UV coordinates from one side of a symmetrical mesh to the mirrored side.
The operator searches for mirrored vertices across the chosen mesh axis and copies their UV coordinates to the corresponding selected vertices. This is useful when working with symmetrical models where UVs only need to be edited on one side.
Only selected vertices are affected.
- Mesh Axis
Defines the axis used to find mirrored vertices in the mesh.
- -X to +X:
Copy UVs from the negative X side to the positive X side.
- -Y to +Y:
Copy UVs from the negative Y side to the positive Y side.
- -Z to +Z:
Copy UVs from the negative Z side to the positive Z side.
- +X to -X:
Copy UVs from the positive X side to the negative X side.
- +Y to -Y:
Copy UVs from the positive Y side to the negative Y side.
- +Z to -Z:
Copy UVs from the positive Z side to the negative Z side.
- UV Axis
Defines the UV axis used when mirroring UV coordinates.
- X:
Mirror UV coordinates across the horizontal UV axis.
- Y:
Mirror UV coordinates across the vertical UV axis.
- Độ/Chính Xác (Precision)
Tolerance used when searching for mirrored vertex pairs.
Higher values allow matching vertices that are slightly offset from perfect symmetry.
Bám Dính (Snap)
Tham Chiếu [Reference]
- Trình Biên Soạn (Editor):
Trình Biên Soạn UV (UV Editor)
- Chế Độ [Mode]:
Chế Độ Biên Soạn [Edit Mode]
- Trình Đơn [Menu]:
- Tổ Hợp Phím Tắt [Shortcut]:
Shift-S
Bám dính trong Trình Biên Soạn UV tương tự như Bám dính trong 3D (Snapping in 3D). Để các tùy chọn bám dính vào điểm ảnh hoạt động, một hình ảnh phải được nạp vào.
- Cái được Chọn tới Điểm Ảnh (Selected to Pixels)
Di chuyển lựa chọn đến điểm ảnh gần nhất. Xem thêm về "Làm Tròn về Điểm Ảnh" dưới đây.
- Cái được Chọn tới Con Trỏ (Selected to Cursor)
Di chuyển lựa chọn đến vị trí con trỏ 2D.
- Cái được Chọn tới Con Trỏ [Dịch Chuyển]` (Selected to Cursor [Offset])
Di chuyển tâm lựa chọn đến vị trí con trỏ 2D, trong khi vẫn bảo toàn dịch chuyển của các điểm đỉnh từ tâm.
- Cái được Chọn tới cái chưa được Chọn Kề Cạnh (Selected to Adjacent Unselected)
Di chuyển lựa chọn sang phần tử không được chọn liền kề.
- Con Trỏ tới Điểm Ảnh (Cursor to Pixels)
Bám dính con trỏ vào trung tâm của đối tượng (cái được chọn).
- Con Trỏ về cái được Chọn (Cursor to Selected)
Di chuyển Con Trỏ tới trung tâm của lựa chọn.
- Con Trỏ về Tọa Độ Gốc (Cursor to Origin)
Đặt con trỏ về vị trí (0, 0, 0).
Hợp Nhất [Merge]
Tham Chiếu [Reference]
- Trình Biên Soạn (Editor):
Trình Biên Soạn UV (UV Editor)
- Chế Độ [Mode]:
Chế Độ Biên Soạn [Edit Mode]
- Trình Đơn [Menu]:
- Tổ Hợp Phím Tắt [Shortcut]:
M
- Tại Tâm (At Center)
Di chuyển các UV đã chọn đến vị trí trung bình của chúng.
- Tại Vị Trí Con Trỏ (At Cursor)
Di chuyển các UV đã chọn đến vị trí con trỏ 2D.
Theo Khoảng Cách (By Distance)
Tham Chiếu [Reference]
- Trình Biên Soạn (Editor):
Trình Biên Soạn UV (UV Editor)
- Chế Độ [Mode]:
Chế Độ Biên Soạn [Edit Mode]
- Trình Đơn [Menu]:
Hợp nhất các UV đã chọn trong "Khoảng Cách Hợp Nhất" chỉ định.
- Khoảng Cách Hợp Nhất (Merge Distance)
Tối Đa khoảng cách giữa merged điểm đỉnh.
- Chưa Chọn (Unselected)
Hợp Nhất đã chọn tới cái khác chưa chọn điểm đỉnh.
- Có Cùng Điểm Đỉnh (Shared Vertex)
Merge UVs that correspond to the same mesh vertex, even if they have different UV coordinates.
Tách Phân (Split)
Tham Chiếu [Reference]
- Trình Biên Soạn (Editor):
Trình Biên Soạn UV (UV Editor)
- Chế Độ [Mode]:
Chế Độ Biên Soạn [Edit Mode]
- Trình Đơn [Menu]:
- Tổ Hợp Phím Tắt [Shortcut]:
Alt-M
- Lựa Chọn (Selection) Y
Tách phân (ngắt kết nối) lựa chọn khỏi phần còn lại của UV. Cạnh viền ranh giới của bất kỳ phần tử nào không được chọn đều được nhân đôi.
Lưu ý rằng "sao chép" được để chính xác ở vị trí giống như bản gốc, vì vậy bạn phải di chuyển nó để nhìn thấy rõ ràng.
Rip Move UV
Tham Chiếu [Reference]
- Trình Biên Soạn (Editor):
Trình Biên Soạn UV (UV Editor)
- Chế Độ [Mode]:
Chế Độ Biên Soạn [Edit Mode]
- Trình Đơn [Menu]:
- Tổ Hợp Phím Tắt [Shortcut]:
V
The Rip Move UV operator separates selected UV elements (vertices, edges, or faces) from connected components, creating a "rip" in the UV map. After the separation, the selection enters move mode, allowing precise control over where and how the UV elements are pulled apart.
This is useful for isolating UV islands or unwrapping overlapping elements without affecting surrounding geometry.
Ghi chú
The Rip Move UV operator is not compatible with Sync Selection. To use this tool, make sure Sync Selection is disabled in the UV Editor.
Xem thêm
Rip Region Tool -- Modal version of the rip operator.
Mesh editing Rip -- Similar functionality for mesh editing in the 3D Viewport.
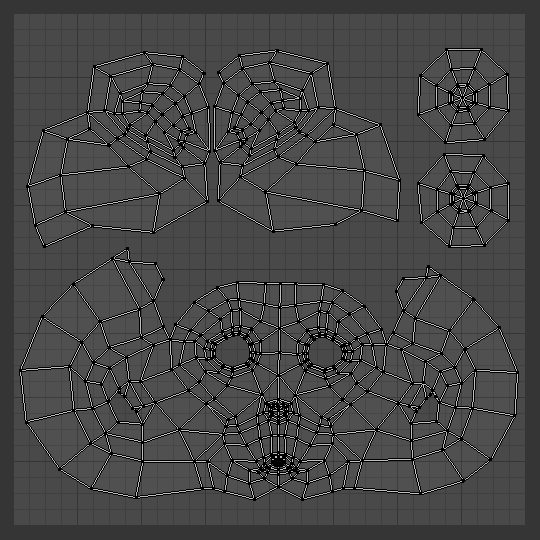
Mở Gói (Unwrap)
Tham Chiếu [Reference]
- Trình Biên Soạn (Editor):
Trình Biên Soạn UV (UV Editor)
- Chế Độ [Mode]:
Chế Độ Biên Soạn [Edit Mode]
- Trình Đơn [Menu]:
- Tổ Hợp Phím Tắt [Shortcut]:
U
Blender cung cấp một số phương pháp ánh xạ UV. Các phương pháp phóng chiếu đơn giản hơn sử dụng các công thức ánh xạ không gian 3D lên không gian 2D, bằng phương pháp nội suy vị trí của các điểm tới một điểm, trục hoặc bình diện thông qua một bề mặt. Các phương pháp tiên tiến hơn có thể được sử dụng với các mô hình phức tạp hơn và có các mục đích sử dụng cụ thể hơn.
Đính Ghim & Tháo Ghim (Pin & Unpin)
Tham Chiếu [Reference]
- Trình Biên Soạn (Editor):
Trình Biên Soạn UV (UV Editor)
- Chế Độ [Mode]:
Chế Độ Biên Soạn [Edit Mode]
- Trình Đơn [Menu]:
- Tổ Hợp Phím Tắt [Shortcut]:
P, Alt-P
Bạn có thể đính ghim các UV để chúng không di chuyển giữa nhiều hoạt động mở gói. Khi mở gói một mô hình, đôi khi "Khóa" các UV nhất định, để các phần của bố trí UV giữ nguyên hình dạng và/hoặc ở cùng một vị trí, là một việc nên làm. Việc ghim xuống được thực hiện bằng cách chọn một UV, sau đó chọn "Đính Ghim" từ trình đơn UV hoặc dùng phím tắt P. Bạn có thể "Tháo Ghim một UV" bằng phím tắt P nữa.
Đối với các đối tượng hữu cơ, Đính Ghim hiệu quả nhất khi sử dụng phương pháp Mở Gói của ánh xạ UV,. Một ví dụ là khi bạn đang kiến tạo mô hình một đối tượng đối xứng bằng cách sử dụng Bộ Điều Chỉnh Phản Chiếu Đối Xứng (Mirror Modifier). Một số UV trên trục phản chiếu đối xứng có thể được dùng chung trên các đối tác được phản chiếu đối xứng. Bạn có thể đính ghim các UV tương ứng với đường giữa, sau đó căn chỉnh chúng trên trục X và chúng sẽ ở lại nguyên vị trí đó.
The sculpting tools, Pinch and Relax, will not move any pinned UVs. This allows you to pin the borders, or around interior holes, and gives even more control to the sculpt tools.
Pinning also works great with the Live Unwrap tool. If you pin two or more UVs, with Live Unwrap on, moving or scaling the pinned UVs will interactively unwrap the model. You can even use the Grab sculpting tool to move the pinned UVs. This helps with fitting a UV island to a certain shape or region.
Đảo Nghịch [Invert Pins]
Tham Chiếu [Reference]
- Trình Biên Soạn (Editor):
Trình Biên Soạn UV (UV Editor)
- Chế Độ [Mode]:
Chế Độ Biên Soạn [Edit Mode]
- Trình Đơn [Menu]:
Pin all unpinned selected UVs and unpin all currently selected pinned UVs.
Đánh Dấu/Xóa Đường Khâu (Mark/Clear Seams)
Tham Chiếu [Reference]
- Trình Biên Soạn (Editor):
Trình Biên Soạn UV (UV Editor)
- Chế Độ [Mode]:
Chế Độ Biên Soạn [Edit Mode]
- Trình Đơn [Menu]:
Xin xem thêm Đường Khâu (Seams).
Tạo Đường Khâu từ các Hải Đảo (Seams from Islands)
Tham Chiếu [Reference]
- Chế Độ [Mode]:
Chế độ góc nhìn
- Trình Đơn [Menu]:
Cho thêm các đường khâu tại ranh giới của các hải đảo UV hiện có. Chức năng này rất hữu ích khi sửa đổi UV của các khung lưới đã được mở gói.
Đóng Gói Hải Đảo (Pack Islands)
Tham Chiếu [Reference]
- Trình Biên Soạn (Editor):
Trình Biên Soạn UV (UV Editor)
- Chế Độ [Mode]:
Chế Độ Biên Soạn [Edit Mode]
- Trình Đơn [Menu]:
The Pack Islands tool can be used to optimize the UV layout by adjusting existing islands to efficiently fill the Texture Space. Based on the options selected, the tool will scale, translate and rotate the islands, ensuring a specified margin exists between them to maximize the usage of the UV space. Pinned islands can have additional restrictions applied to customize the packing process even further.
- Phương Pháp Hình Dạng [Shape Method]
The phương pháp tới sử dụng khi considering the hình dạng của mỗi một hải đảo.
- Exact Shape (Concave):
Use the complete shape of the island, including filling any holes or concave regions around the island.
- Boundary Shape (Convex):
Takes into account the boundary (Convex Hull) of the island. This method will not place islands inside holes.
- Bounding Box (Khung Hộp Viền):
Uses the simple bounding box of the island.
- Tỷ Lệ (Scale)
Scale the islands to fill the unit square, or pack islands towards the lower left corner.
- Xoay Chiều (Rotate)
Allows the rotation of islands, as well as translation and scaling, to optimize texture usage.
- Phương Pháp Xoay Chiều [Rotation Method]
The allowable rotations to use for each island.
- Bất Cứ:
Any rotation which improves the packing is allowed.
- Căn chỉnh theo trục [Axis-aligned]:
The island will first be rotated into a smallest rectangle. Additional rotation will only be in 90-degree turns.
- Bản Số (Cardinal):
Like the four cardinal directions on a compass, North, South, East and West, only 90-degree turns will be allowed.
- Phương Thức Mép Lề (Margin Method)
Phương pháp sử dụng khi tính khoảng trống giữa các hải đảo.
- Đổi Tỷ Lệ (Scaled):
Use scale of existing UVs to multiply margin.
- Thêm (Add):
Đơn Giản phương pháp, just thêm the lề.
- Phân Số (Fraction):
Precisely specify the fraction of the UV unit square for margin. (Slower than other two methods.)
- Lề (Margin)
Tỷ lệ cho khoảng trống giữa các hải đảo.
- Lock Pinned Islands
An island which has any of its UVs pinned is considered a Pinned Island. With this option, Pinned Islands will be unable to move. The other islands will pack around them.
- Phương Pháp Khóa [Lock Method]
Change the way Pinned Islands are packed
- Tỷ Lệ (Scale):
The scale of the Pinned Islands will not change.
- Xoay Chiều (Rotation):
Pinned Islands will not rotate.
- Xoay Chiều và tỷ lệ (Rotation and Scale):
Pinned Islands can translate, but not scale nor rotate.
- Hợp Nhất sự Đè Gối lên Nhau [Merge Overlapping]
Before the main packing operation, overlapping islands are detected and temporarily combined. During packing, the relative rotation and position of the merged islands are preserved.
- Đóng Gọn vào (Pack To)
Determines the final placement of UV islands after completing the packing operation.
- UDIM gần nhất (Closest UDIM):
Đóng Gói các hải đảo tới the UDIM khung lưới đồ thị gần nhất tới the trung tâm của lựa chọn.
- UDIM đang Hoạt Động (Active UDIM):
Đóng Gói các hải đảo tới the đang/hoạt động/năng động U-Dimension: Bố Trí các Hình Ảnh Chất Liệu cho Uv thành các Ô như Ô Cờ hình ảnh bố trí ô cờ hoặc, nếu không hình ảnh được khả dụng, the U-Dimension: Bố Trí các Hình Ảnh Chất Liệu cho Uv thành các Ô như Ô Cờ khung lưới đồ thị bố trí ô cờ where the 2D con trỏ được nằm ở.
- Khung hộp viền ban đầu [Original bounding box]:
Find the original bounding box of the selection, packs the islands, and then moves them back inside the original box.
- Custom Region:
Packs islands into a user-defined custom region set with Set User Region. This allows packing islands into arbitrary UV areas, such as reserved atlas regions, trim sheet zones, or layout-specific texture slots. Requires Custom Region to be enabled.
Ghi chú
The performance of the Pack Islands operator is heavily affected by the options selected, and sometimes the options can combine in different ways to produce unexpectedly slower results.
The fastest results can be obtained by using the "Bounding Box" shape method and the "Add" margin method.
Although enabling the "Rotate" option slightly impacts performance, it will often enhance efficiency, making it a good choice to always keep enabled.
However the "Fraction" margin method requires significantly more computation to find the exact scale. For certain layouts, it may even take up to 10 times longer to complete then using the simpler "Add" or "Scaled" methods.
Similarly, the "Exact shape" and "Boundary shape" methods are much slower than the simple "Bounding Box" method.
Trung Bình Tỷ Lệ Hải Đảo (Average Island Scale)
Tham Chiếu [Reference]
- Trình Biên Soạn (Editor):
Trình Biên Soạn UV (UV Editor)
- Chế Độ [Mode]:
Chế Độ Biên Soạn [Edit Mode]
- Trình Đơn [Menu]:
Sử dụng công cụ "Trung Bình Tỷ Lệ Hải Đảo" sẽ đổi tỷ lệ từng hải đảo UV để chúng có cùng tỷ lệ.
- Bất Đồng Đều (Non-Uniform)
Giảm độ kéo giãn của chất liệu trung bình trong các hải đảo bằng cách đổi tỷ lệ trục U và V một cách độc lập.
- Ứng Suất Cắt/Xô Nghiêng (Shear)
Giảm hiện tượng xô nghiêng chất liệu trung bình trong các hải đảo bằng cách xô nghiêng trục U.
Arrange/Align Islands
Tham Chiếu [Reference]
- Trình Biên Soạn (Editor):
Trình Biên Soạn UV (UV Editor)
- Chế Độ [Mode]:
Chế Độ Biên Soạn [Edit Mode]
- Trình Đơn [Menu]:
Arranges the selected UV islands along a straight line on the UV grid. This operator can align islands horizontally or vertically, with customizable starting positions, alignment reference, sorting order, and spacing.
This is useful for organizing UV layouts, aligning modular texture pieces, or arranging UDIM tiles consistently.
- Initial Position
Determines the reference point used to calculate the initial alignment.
- Bounding Box (Khung Hộp Viền):
Uses the bounding boxes of the selected islands.
- Khung Lưới Đồ Thị UV (UV Grid):
Aligns islands relative to the UV grid origin (0-1 UV tile).
- UDIM đang Hoạt Động (Active UDIM):
Aligns islands based on the active UDIM tile.
- Con Trỏ 2D (2D Cursor):
Uses the current position of the 2D cursor as the origin.
- Axis (Trục)
The axis along which to arrange UV islands.
- X:
Align UV islands horizontally.
- Y:
Align UV islands vertically.
- Căn Chỉnh (Align)
Determines how the islands are aligned relative to each other.
- Tối Thiểu (Min):
Aligns islands by their minimum boundary.
- Tối Đa (Max):
Aligns islands by their maximum boundary.
- Trung Tâm (Center):
Aligns islands by the center of the largest island.
- None [Không]:
Keeps each island's original offset and alignment.
- Theo Thứ Tự (Order)
Specifies how to order the islands along the chosen axis.
- Largest to Smallest:
Sorts islands by area, from largest to smallest.
- Smallest to Largest:
Sorts islands by area, from smallest to largest.
- Cố Định (Fixed):
Keeps the current selection order.
- Lề (Margin)
Defines the space between arranged islands, measured in UV units.
Set User Region
Tham Chiếu [Reference]
- Trình Biên Soạn (Editor):
Trình Biên Soạn UV (UV Editor)
- Chế Độ [Mode]:
Chế Độ Biên Soạn [Edit Mode]
- Trình Đơn [Menu]:
- Tổ Hợp Phím Tắt [Shortcut]:
Ctrl-B
Defines a rectangular region in the UV Editor to be used as a Custom Region
Once defined, this region can be selected as the Pack To target in the Pack Islands operator by choosing Custom Region and enabling Custom Region.
Custom Region
Tham Chiếu [Reference]
- Trình Biên Soạn (Editor):
Trình Biên Soạn UV (UV Editor)
- Chế Độ [Mode]:
Chế Độ Biên Soạn [Edit Mode]
- Trình Đơn [Menu]:
- Tổ Hợp Phím Tắt [Shortcut]:
Ctrl-Alt-B
Enables or disables the use of a Custom Region for UV operations such as Pack Islands.
When enabled, the previously defined user region (created using Set User Region) becomes active and visible in the UV Editor. This region defines the boundaries where UV islands are packed or manipulated.
Disabling this option restores the default behavior, where UV operations apply to the standard unit square or the active UDIM tile.
Tối Giản sự Kéo Giãn (Minimize Stretch)
Tham Chiếu [Reference]
- Trình Biên Soạn (Editor):
Trình Biên Soạn UV (UV Editor)
- Chế Độ [Mode]:
Chế Độ Biên Soạn [Edit Mode]
- Trình Đơn [Menu]:
The Minimize Stretch tool, reduces UV stretch by minimizing the difference between the angles in 3D and the angles in UV space. This operation is similar to the Nới Lỏng (Relax) tool with the Geometry Method, but uses a different algorithm.
- Lấp Lỗ Hổng (Fill Holes)
Just during minimize stretch, internal holes will be filled with temporary polygons to prevent stretching and overlaps of the surrounding UVs.
- Pha Trộn [Blend]
The fraction between 0 and 1 of the original UVs to blend in once the stretch is minimized. A blend of 0 is the fully minimized stretch. Blend of 0.5 is halfway between the original UVs and the minimize stretch UVs.
- Số Lần Lặp Lại (Iterations)
More iterations result in smoother UVs, but take longer to process.
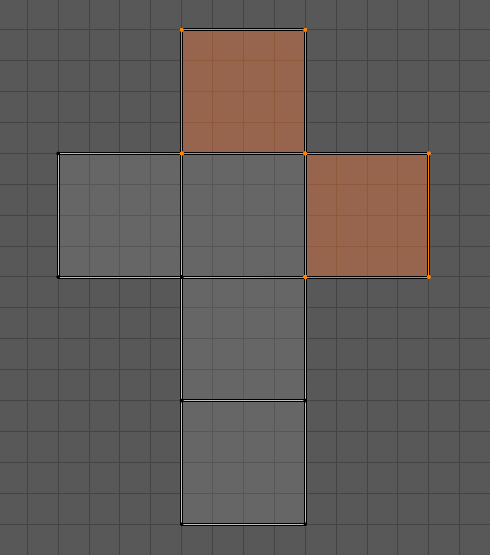
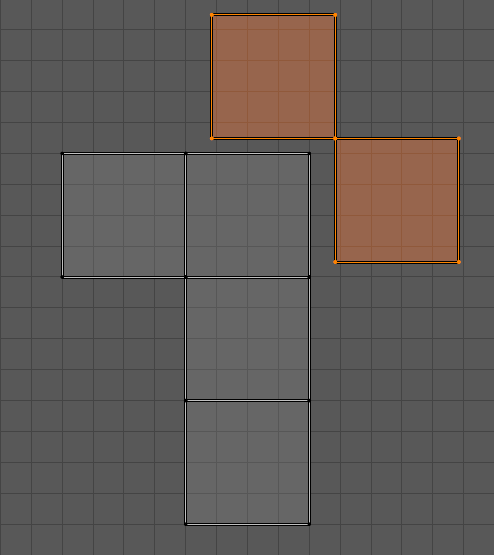
Đính Vá (Stitch)
Tham Chiếu [Reference]
- Trình Biên Soạn (Editor):
Trình Biên Soạn UV (UV Editor)
- Chế Độ [Mode]:
Chế Độ Biên Soạn [Edit Mode]
- Trình Đơn [Menu]:
- Tổ Hợp Phím Tắt [Shortcut]:
Alt-V
Công cụ "Đính Vá" sẽ nối các UV được chọn có chung điểm đỉnh lại. Bạn đặt công cụ để giới hạn đường vá theo khoảng cách trong bảng điều khiển Điều Chỉnh Thao Tác Trước Đây (Adjust Last Operation), bằng cách kích hoạt "Dùng Giới Hạn" và điều chỉnh "Khoảng Cách Giới Hạn".
Căn Chỉnh (Align)
Tham Chiếu [Reference]
- Trình Biên Soạn (Editor):
Trình Biên Soạn UV (UV Editor)
- Chế Độ [Mode]:
Chế Độ Biên Soạn [Edit Mode]
- Trình Đơn [Menu]:
- Tổ Hợp Phím Tắt [Shortcut]:
Shift-W
Di Chuyển đã chọn UV điểm đỉnh tới một đường nét/thẳng, where that đường nét/thẳng được specified vào/trong different ways bởi/theo "Axis".
- Axis (Trục)
- Nắn Thẳng (Straighten):
Vị TríV điểm đỉnh dọc theo the đường nét/thẳng defined bởi/theo the điểm cuối.
- Nắn Thẳng X (Straighten X):
Vị TríV điểm đỉnh theo chiều ngang dọc theo the đường nét/thẳng defined bởi/theo the điểm cuối.
- Nắn Thẳng Y (Straighten Y):
Vị TríV điểm đỉnh theo chiều dọc dọc theo the đường nét/thẳng defined bởi/theo the điểm cuối.
- Tự Động Căn Chỉnh (Align Auto):
Positions UV vertices automatically chooses the direction based on which is most alignment already.
- Căn Chỉnh theo Chiều Dọc [Align Vertically]:
Positions UV vertices vertically along the line defined by the midpoint of the selection.
- Căn Chỉnh theo Chiều Ngang [Align Horizontally]:
Positions UV vertices horizontally along the line defined by the midpoint of the selection.
- Position Mode Align Vertically: / Align Horizontally:
Determines how the final alignment line position is calculated.
- Trung Bình (Mean):
Aligns UVs along the average (mean) position of the selection.
- Tối Thiểu (Minimum):
Aligns UVs along the smallest coordinate value.
- Tối Đa (Maximum):
Aligns UVs along the largest coordinate value.
Căn Chỉnh Xoay Chiều (Align Rotation)
Tham Chiếu [Reference]
- Trình Biên Soạn (Editor):
Trình Biên Soạn UV (UV Editor)
- Chế Độ [Mode]:
Chế Độ Biên Soạn [Edit Mode]
- Trình Đơn [Menu]:
The Align Rotation tool aligns entire islands to either the U or V axis.
The tool has three different methods of operation. The different methods specify the source for the alignment, and also whether to align with both the U and V axes, or just the V axis alone.
When using the Auto method, islands are aligned so that UV edges are aligned to either the U axis or the V axis. This method works best with quads and meshes representing organic subjects.
When using the Edge method, only the selected edges are considered, and the islands will be aligned such that the selected edges are aligned with the V axis. This method works with the selection, so it works best when a particular edge, or edge loop, needs to be aligned in UV coordinates.
When using the Geometry method, the geometry is taken into consideration. Either the X axis, the Y axis, or the Z axis can be used. Suppose the X axis is chosen. Using this method, edges which have a positive extent in the X axis will be rotated in the UV map so that the edge extends upwards in the V axis. This method works best to align multiple islands which share some common geometric property, either in the X, Y or Z axis.
Note that in the Auto method, edges can end up aligned either up or down or left or right depending on the orientation of the island prior to activating the tool. In the Edge method, the alignment of selected edges can be either up or down in the V axis, whatever is closest to the current orientation of the UV island. By comparison, in the Geometry method, the alignment will always be pointing up in the V axis, ignoring any previous orientation.
Move on Axis
Tham Chiếu [Reference]
- Trình Biên Soạn (Editor):
Trình Biên Soạn UV (UV Editor)
- Chế Độ [Mode]:
Chế Độ Biên Soạn [Edit Mode]
- Trình Đơn [Menu]:
Moves selected UV coordinates along a chosen axis by a specified distance. This operator is designed for precise UV adjustments and supports multiple movement modes. It is especially useful when combined with the number pad keys for quick directional nudging.
Use the following shortcuts to move UVs directly from the keyboard:
Numpad8 / Numpad2: Move up or down.
Numpad4 / Numpad6: Move left or right.
- Thể Loại (Type)
The movement unit type.
- Năng Động (Dynamic):
Move using the active grid size. Holding Ctrl while pressing a number pad key activates this mode.
- Pixel (Điểm Ảnh):
Move by pixel increments. Holding Shift while pressing a number pad key activates this mode.
- UDIM:
Move by full UV tiles (1.0 UV unit). Using the number pad keys with no modifying keys uses this mode.
- Axis (Trục)
The axis along which to move the UVs.
- Trục X (X Axis):
Move vertices horizontally.
- Y Axis:
Move vertices vertically.
- Khoảng Cách (Distance)
The distance to move the UVs, measured in the selected unit type.
Sao Chép UV (Copy UVs)
Tham Chiếu [Reference]
- Trình Biên Soạn (Editor):
Trình Biên Soạn UV (UV Editor)
- Chế Độ [Mode]:
Chế Độ Biên Soạn [Edit Mode]
- Trình Đơn [Menu]:
- Tổ Hợp Phím Tắt [Shortcut]:
Ctrl-C
For each selected UV island, the Copy UVs tool will copy its topology and UV coordinates into a temporary clipboard for later use with the Paste UVs tool.
Ghi chú
The Copy UVs tool currently uses an internal clipboard which is not shared between instances of blender.
Dán UV (Paste UVs)
Tham Chiếu [Reference]
- Trình Biên Soạn (Editor):
Trình Biên Soạn UV (UV Editor)
- Chế Độ [Mode]:
Chế Độ Biên Soạn [Edit Mode]
- Trình Đơn [Menu]:
- Tổ Hợp Phím Tắt [Shortcut]:
Ctrl-V
For each selected UV island, the Paste UVs tool will attempt to match the topology of an island stored in the internal clipboard. If a match is found, the UVs stored in the clipboard for the original island will be pasted onto the currently selected island.
For example, if a triangle attached to a quad attached to a quad is in the clipboard, then a different triangle <=> quad <=> quad is selected, then the topologies match, and the UVs will be pasted over the current selection.
For best results, you may want to use the Rip tool, or , prior to using Paste UVs.
Hiện/Ẩn Giấu các Mặt (Show/Hide Faces)
Tham Chiếu [Reference]
- Trình Biên Soạn (Editor):
Trình Biên Soạn UV (UV Editor)
- Chế Độ [Mode]:
Chế Độ Biên Soạn [Edit Mode]
- Trình Đơn [Menu]:
Di Chuyển Toàn Bộ Alt
Ẩn Giấu cái được Chọn (Hide Selected) H
Ẩn Giấu cái Không được Chọn (Hide Unselected) Shift-H
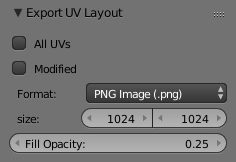
Xuất Khẩu Bố Trí UV (Export UV Layout)
Tham Chiếu [Reference]
- Trình Biên Soạn (Editor):
Trình Biên Soạn UV (UV Editor)
- Chế Độ [Mode]:
Chế Độ Biên Soạn [Edit Mode]
- Trình Đơn [Menu]:
When painting textures in an external application, it is often useful to have a reference image showing the UV layout of the mesh. The Export UV Layout operator saves the current UV map as an image that can be used as a guide while painting textures.
The exported image contains lines representing the UV edges within the
standard UV Editor grid (the 0-1 UV space).
Edges outside this range will not appear in the exported image.
By default, only UV faces selected in the 3D Viewport are exported. Selections made only in the UV Editor are ignored.
The exported image can be opened in a painting application and used as a transparent overlay while creating textures. Once the texture is finished, it can be imported back into Blender and used in a material.
For more information on using images as textures, see Image Textures.

Tính Chất [Properties]
Các Tùy Chọn về Xuất Khẩu.
- Toàn Bộ UV (All UVs)
Export all UVs instead of only the faces selected in the 3D Viewport.
- Export Tiles
Controls which UV tiles are exported.
- None [Không]:
Export only UVs in the [0, 1] range.
- UDIM:
Export tiles in the UDIM numbering scheme:
1001 + u_tile + 10*v_tile.- UVTILE:
Export tiles in the UVTILE numbering scheme:
u(u_tile + 1)_v(v_tile + 1).
- Đã Sửa Đổi (Modified)
Export the UVs from the evaluated mesh with modifiers applied.
- Định Dạng/Hình Thức [Format]
The file format used for the export:
PNG,EPS, orSVG.- Kích Thước (Size)
The resolution of the exported image in pixels.
- Độ Đục của Màu Phủ (Fill Opacity)
Sets the opacity of the face fill in the exported image.
Biên Soạn Cân Đối (Proportional Editing)
Tham Chiếu [Reference]
- Trình Biên Soạn (Editor):
Trình Biên Soạn UV (UV Editor)
- Chế Độ [Mode]:
Chế Độ Biên Soạn [Edit Mode]
- Tiêu Đề (Header):
- Trình Đơn [Menu]:
- Tổ Hợp Phím Tắt [Shortcut]:
O
Biên Soạn Cân đối có sẵn trong biên soạn UV. Các điều khiển cũng giống như trong Cổng Nhìn 3D. Xem Biên Soạn Cân đối trong môi trường 3D (Proportional Editing in 3D) để đọc tài liệu tham khảo đầy đủ.
Tùy chọn về UV (UV Options)
Tham Chiếu [Reference]
- Trình Biên Soạn (Editor):
Trình Biên Soạn UV (UV Editor)
- Chế Độ [Mode]:
Chế Độ Biên Soạn [Edit Mode]
- Trình Đơn [Menu]:
- Mở Gói Trực Tuyến (Live Unwrap)
Liên tục mở gói các hải đảo UV đã chọn trong khi biến hóa các điểm đỉnh được đính ghim. Lưu ý, tùy chọn này khác với tùy chọn Mở Gói Trực Tuyến (Live Unwrap) trong Cổng Nhìn 3D.
- Làm Tròn về Điểm Ảnh (Round to Pixels)
Trong quá trình chuyển đổi UV, bạn có thể sử dụng Làm Tròn về Điểm Ảnh để giúp khớp với các hình thể trong hình ảnh, hoặc đảm bảo UV của bạn được căn chỉnh chính xác theo chiều ngang, chiều dọc, hoặc theo đường chéo.
Lưu ý rằng Làm Tròn về Điểm Ảnh được áp dụng sau chế độ bám dính.
- Tắt (Disabled):
Các UV sẽ không được làm tròn.
- Góc Cạnh (Corner):
Sẽ buộc các UV làm tròn về vào góc của điểm ảnh gần nhất của hình ảnh, nếu đã được nạp vào.
- Trung Tâm (Center):
Sẽ buộc các UV làm tròn về tâm các điểm ảnh gần nhất của hình ảnh, nếu đã được nạp vào.
- Giới Hạn Trong Ranh Giới của hình ảnh (Constraining to Image Bounds)
Đối với các chất liệu tiêu chuẩn, tùy chọn này ngăn chặn UV di chuyển ra ngoài phạm vi UV 0 đến 1. Đối với các chất liệu U-Dimension: Chiều U$ (UDIMs), tùy chọn này ngăn chặn UV di chuyển ra ngoài ô UDIM gần nhất.
Cổng Nhìn 3D (3D Viewport)
Xoay Chiều UV (Rotate UVs)
Tham Chiếu [Reference]
- Trình Biên Soạn (Editor):
Cổng Nhìn 3D (3D Viewport)
- Chế Độ [Mode]:
Chế Độ Biên Soạn [Edit Mode]
- Trình Đơn [Menu]:
Định hướng của chất liệu UV được xác định theo từng mặt. Ví dụ, nếu hình ảnh bị lộn ngược hoặc nằm nghiêng thì hãy sử dụng (trong trình đơn Cổng Nhìn 3D ở chế độ Lựa Chọn Mặt) để xoay chiều UV trên mỗi mặt theo góc 90 độ mỗi lượt.
Đảo Ngược UV (Reverse UVs)
Tham Chiếu [Reference]
- Trình Biên Soạn (Editor):
Cổng Nhìn 3D (3D Viewport)
- Chế Độ [Mode]:
Chế Độ Biên Soạn [Edit Mode]
- Trình Đơn [Menu]:
Công cụ phản chiếu đối xứng UV trên mỗi mặt, đảo lật hình ảnh, hiển thị hình ảnh bị đảo ngược cho bạn thấy.