Giới Thiệu [Introduction]
Assigning weight to the points is primarily used for rigging strokes in cut-out animation, where the vertex groups are used to define the relative bone influences on the strokes. See Using Vertex Group for more information.
Ghi chú
A vertex in Grease Pencil is called point. Point and vertex names are equivalent.
Weight Painting is a method to maintain large amounts of weight information in an intuitive way. The selected Grease Pencil object is displayed slightly shaded with a rainbow color spectrum. The color visualizes the weights associated to each point in the active vertex group. By default blue means unweighted and red means fully weighted.
You assign weights to the points of the object by painting on it with weight brushes. Starting to paint on a strokes automatically adds weights to the active vertex group (a new vertex group is created if needed).
Sơn Trọng Lượng (Weight Paint)
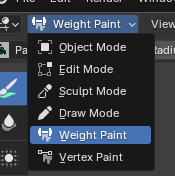
3D Viewport Mode selector: Weight Paint Mode.
Weight Paint Mode is selected from the Mode menu in the 3D Viewport header. Once Weight Paint Mode is activated, the Toolbar of the 3D Viewport will change to Weight Paint Mode specific panels. A red circle will appear and follow the location of the cursor in the 3D Viewport.
Các Tùy Chọn về Trọng Lượng (Weight Options)
- Đa Khung Hình (Multiframe)
Sometimes you may need to assign weight to several frames at the same time with the Weight Paint tools.
You có thể kích hoạt đa khung hình biên soạn với the Đa Khung Hình nút bấm tiếp theo tới the các chế độ trình lựa chọn (faded đường nét/thẳng biểu tượng). Xin Xem Đa Khung Hình (Multiframe) cho/đối với tăng thông tin.