Введение
Animating with Grease Pencil
The main goal of Grease Pencil is to offer a 2D animation tool full immersed in a 3D environment.
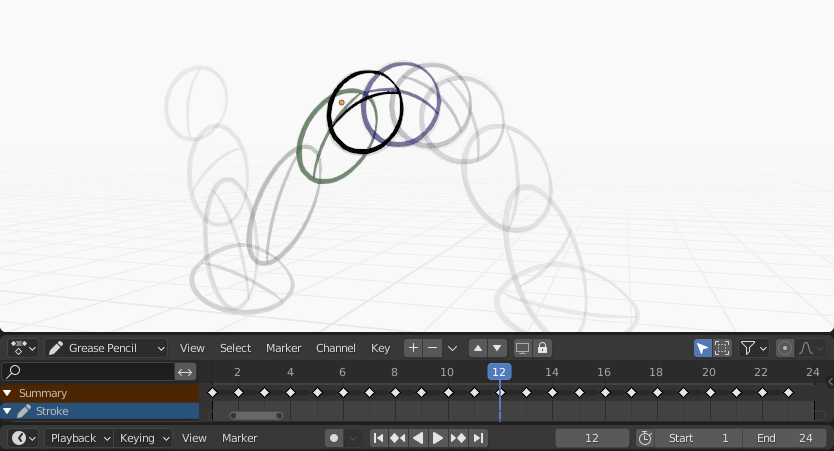
Sample animation showing Grease Pencil object keyframes in the Dope Sheet with onion skinning enabled.
In Blender, Grease Pencil objects can be animated in many ways:
- Moving as a whole object
Changing their position, orientation or size in time;
- Drawing frame by frame
Drawing one frame at a time (traditional animation).
- Deforming them
Animating their points;
- Inherited animation
Causing the object to move based on the movement of another object (e.g. its parent, hook, armature, etc.). Useful for cut-out animation for example.
For a complete overview of animation in Blender please refer to the Animation & Rigging chapter.
2D Traditional Animation
Ключевые кадры
Traditional animation in Grease Pencil is achieved with the use of keyframes that hold the strokes information at a particular frame or frame range.
With Auto keyframe activated, every time you create a stroke in Grease Pencil object Draw Mode a new keyframe is added at the current frame on the active channel. With Auto keyframe deactivated, you will have to add manually a new keyframe or your new strokes will be added on the active keyframe.
Дополнительную информацию см. в разделе Редактирование ключевых кадров.
Примечание
The channels in the Dope Sheet correspond to the active 2D layer of the Grease Pencil object.
Grease Pencil has its own mode in the Dope Sheet to work with keyframes. See Grease Pencil mode in the Dope Sheet section for more information. There are also several tools on the Stroke menu to work with keyframes and strokes. See Animation tools for more information.
Калькирование (onion skinning)
One key element in traditional animation is the use of onion skinning. Grease Pencil offer a lot of flexibility and options for this tool. See Onion Skinning for more information.
Animation Options
Draw Mode
In Draw Mode there are three options related to the animation workflow that you can use.

General drawing/animation options.
- Add Weight Data
When enabled, new strokes weight data is added according to the current vertex group and weights. If there is no vertex group selected, no weight data is added.
This is useful for example in cut-out animation for adding new drawing on the same vertex group without the need to creating it afterwards.
See Weight Paint Mode for more information.
- Additive Drawing
When creating new frames, the strokes from the previous/active frame are include as a basis for the new one.
- Multiframe
If you need to add new strokes to your animation on several frames you can use multiframe drawing.
You can activate multiframe drawing with the Multiframe button next to the modes selector (faded lines icon). See Multiframe for more information.
Режим редактирования (edit mode)
In Edit Mode there is an option related to the animation workflow that you can use.

Multiframe editing.
- Multiframe
Sometimes you may need to modify several frames at the same time with edit tools, for example to repositioning drawings in an animation.
You can activate multiframe editing with the Multiframe button next to the modes selector (faded lines icon). See Multiframe for more information.
Примеры
Traditional Animation
This example shows you how to animate a bouncing ball with a traditional 2D animation technique and Grease Pencil.
First, go to menu to start with a new 2D animation template. The template is ready to quick start your animation with a Grease Pencil object already created, Onion Skinning activated, Auto Keyframe enabled and in camera view.
Set the range of the animation in the Timeline from 1 to 24.
In the 3D Viewport draw a ball on the upper left corner with the Draw Tool (extreme).
Move to frame 12 and draw a squashed ball in the bottom center (breakdown).
Move to frame 24 and draw a ball in the top right corner of the 3D Viewport (extreme).
Keep drawing all the in-between frames you want using the onion skinning ghost as a reference.
Чтобы протестировать анимацию, нажмите Пробел для воспроизведения.