Структура поверхностей
Поверхности схожи с кривыми тем, что используют сплайны Безье или NURBS для создания плавной геометрии, следующей за набором контрольных точек. Главное отличие, конечно, заключается в том, что кривая создаёт линию, а поверхность – лист.
Объект-«поверхность» может содержать несколько разъединённых поверхностей. Та, которая выделена в режиме редактирования, называется «активным сплайном».
Сетка контрольных точек
Несмотря на то, что поверхность можно сравнить с мешем, поскольку к обоим применим модификатор Subdivision Surface, всё же у неё имеется больше ограничений, поскольку контрольные точки должны быть строго расположены в самой сетке: каждый «ряд», обозначенный жёлтой линией, должен иметь одинаковое количество контрольных точек, как и каждый «столбец», обозначенный розовой линией. Единственный способ расширить поверхность – это экструдирование всего ряда или столбца.
Панель „Active Spline“ управляет тем, является ли поверхность циклической (замкнутой) в каждом направлении сетки, а также следует ли использовать кривые Безье или NURBS.
Веса (weights)
Форму можно дополнительно настраивать путём изменения веса отдельных контрольных точек на панели „Transform“, находящейся на боковой панели.
The property is called W; while there is also one called Weight, this is the Goal Weight for soft body simulations.
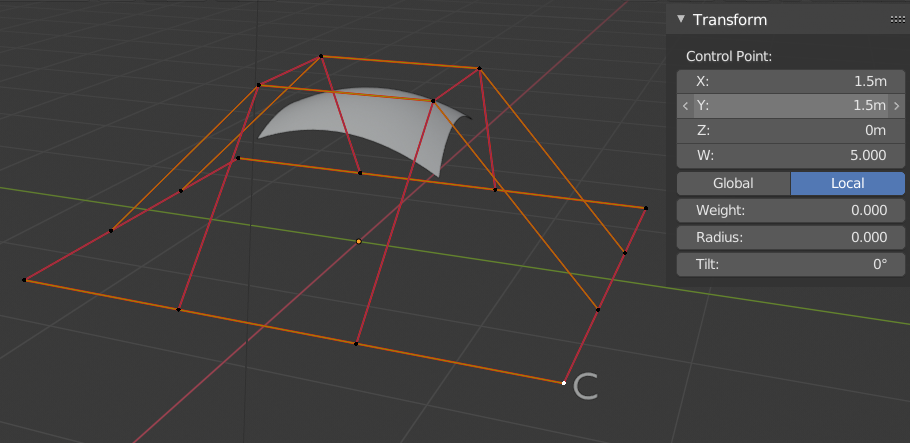
Контрольная точка с бо́льшим весом притягивает поверхность к себе.
Примечание
Если все контрольные точки имеют одинаковый „вес“, то они фактически нейтрализуют друг друга, и поверхность в итоге будет выглядеть так же, как и раньше. Именно разница в весах заставляет поверхность двигаться к контрольной точке или от неё.
Веса необходимы для получения определённых «чистых» форм, таких как цилиндры или сферы. В разделе «Примитивы» в меню „Добавить“ – все они уже настроены.
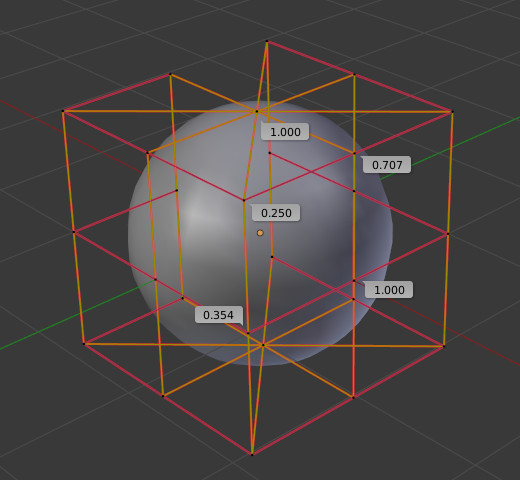
Веса контрольных точек на сферической поверхности.