Coordenadas UV y espacio de texturizado
Mapas UV
Referencia
- Modo:
Todos los modos
- Panel:
Cuando se tenga un objeto de tipo malla seleccionado, sus mapas UV podrán encontrarse en la pestaña Datos del editor de Propiedades. Luego de seleccionar un mapa, será posible verlo y editarlo en el Editor de UV.
Una malla podrá contener varios mapas UV (p.ej: uno por cada textura usada), igualmente será posible reutilizar un mismo mapa UV para varias texturas.
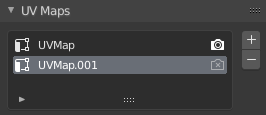
El panel Mapas UV en la pestaña Datos.
- / Activo al procesar
Marks the UV map as the default one for rendering. The Active Render UV map is used for:
La pasada UV, usada en composición.
El Nodo Coordenadas de texturizado, usado para el sombreado de materiales.
El Nodo Mapa UV, usado para el sombreado de materiales cuando no se especifica un mapa UV.
- Agregar mapa UV
Duplicará el mapa UV seleccionado o creará uno nuevo, en caso de que la lista de mapas estuviera vacía.
- Eliminar mapa UV
Eliminará el mapa UV seleccionado.
Espacio de texturizado
Referencia
- Modo:
Todos los modos
- Panel:
Este panel permitirá configurar el Espacio de texturizado del objeto, que es un volumen rectangular 3D usado para generar coordenadas de texturizado, como alternativa al uso de un mapas UV. Será posible visualizar el espacio de texturizado usando la opción correspondiente dentro del panel Presentación en vistas.
- Malla para texturizado objetos de tipo malla
Permitirá usar información de otra malla para los identificadores de texturizado. Los vértices de ambos objetos deberán estar perfectamente alineados, de lo contrario, el mapa UV será distorsionado.
- Automático
Calculará el espacio de texturizado de manera automática.
- Posición X, Y, Z, Tamaño X, Y, Z
Permitirá definir manualmente el espacio de texturizado, en relación con el objeto. Nótese que también será posible editarlo en la Vista 3D – ver Edición más abajo.
- Ajustar espacio de texturizado objetos de tipo curva
Modificará la Posición y el Tamaño del espacio de texturizado, para que coincidan con el volumen delimitador del objeto. Esto deshabilitará la opción Automático.
Edición
Referencia
- Modo:
Modo Objeto
- Menú:
Hacer clic en una de estas opciones, luego mover el ratón para ajustar el espacio de texturizado y presionar LMB para confirmar. Durante la transformación será posible usar atajos de teclado para bloquear ciertos ejes; ver las opciones disponibles en la barra de estado.
Acceso
Al configurar un material, será posible utilizar la salida Generada del Nodo Coordenadas de texturizado para leer las coordenadas de texturizado del espacio de texturizado del objeto. Será posible pasar estas coordenadas a un nodo de textura.
Truco
Texture spaces do not have rotation support. You can use a Nodo Mapeo to manually rotate the coordinate in the material shader instead.