Introducción
Se ha mostrado en las secciones anteriores cómo diseñar un esqueleto, crear cadenas de huesos, etc. Ahora, como tener un buen sistema de control no suele ser la meta final (a menos que se desee producir una animación de «Danza macabra»), muy probablemente se querrá colocar algo de carne y piel por encima de los esqueletos! Por esto, no resulta sorprendente que en inglés se conozca a este proceso de «enlazar» un esqueleto con otros objetos que serán deformados por éste, como to el proceso de «skinning», que en español podría ser traducido como «forrado»…
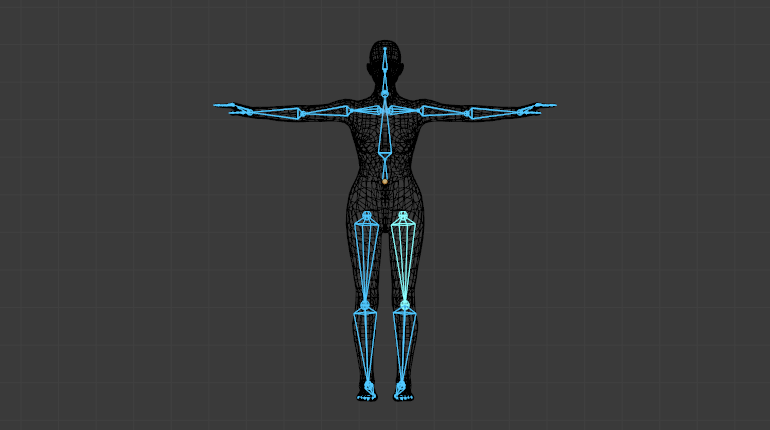
La piel humana forrando a su esqueleto.
En Blender existen dos formas principales de realizar este proceso:
Se podrá subordinar o restringir objetos a huesos – luego, al transformar a estos últimos en el modo Pose, sus «subordinados» serán también transformados de manera análoga a lo que sucede en una relación jerárquica estándar entre superior y subordinados… Al usar este método los «subordinados» no serán nunca deformados.
Se podrá usar el modificador Esqueleto sobre una malla completa, y luego, algunas partes de ese objeto a algunos huesos dentro de ese esqueleto. Se trata de un método más complejo y potente, y la única forma de realmente deformar la geometría del objeto, por ejemplo, para modificar las posiciones relativas de sus vértices o puntos de control.
Consejo
Redirección
La redirección, que es una forma de aplicar datos de captura de movimiento (obtenidos del mundo real) a un sistema de control, se encuentra disponible mediante complementos e importadores.