Flujo de trabajo de despliegue y disposición
Esta página contiene varios consejos acerca del despliegue y la disposición de las UV.
Despliegue en múltiples pasos
If you unwrap an entire mesh in one go, the resulting UV map may look rather messy. In the example below, the ear and facial features are squashed and the neck is stretched out way too far:
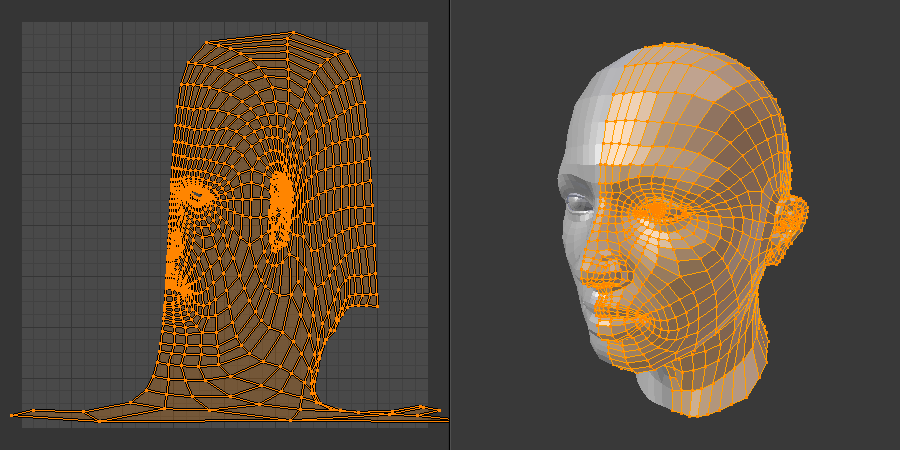
Despliegue malo, fijarse en la oreja y el cuello.
While you could of course start fixing this UV map by hand, it’s probably a better idea to drop it and unwrap the mesh differently. We’ll divide it into pieces, unwrapping each one separately with the most suitable projection.
We start by selecting just the head – excluding the eyes, ears, and neck – and unwrapping it using Proyección esférica:
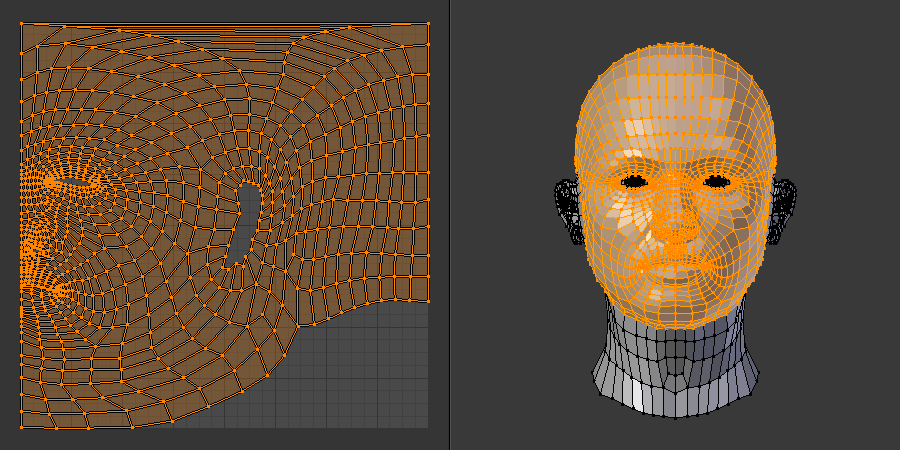
Desplegando sólo la cabeza.
Next, select the ear, align the 3D Viewport view to look straight at it, and unwrap it using Proyectar desde la vista.
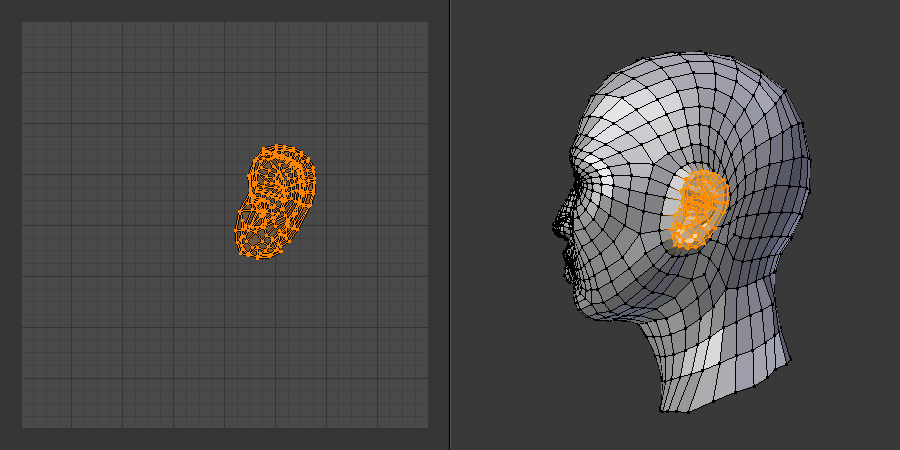
Desplegando la oreja.
The UV Editor only shows the ear at this point, but don’t worry: the UV coordinates for the head are still there, just hidden. To make them visible again, either select the head in the 3D Viewport again or enable Sincronizar selección in the UV Editor.
Luego, se podrá desplegar el cuello usando Proyección cilíndrica.
Consejo
Instead of selecting and unwrapping each piece individually, you can also use Costuras to mark cutting lines around the ear and neck, then run a single Desplegar to map all three parts in one go.
Once everything is unwrapped, you can select the whole mesh in the 3D Viewport to see the full UV map. Most likely, the different UV parts or «islands» will be overlapping; you can fix this in the following ways:
For each island, select a vertex and press Ctrl-L to select all the vertices it’s connected (Linked) to. You can also hover over the vertex and press L, or simply set the Modo de selección to Island. Once the island is selected, scale it down and move it to a place where it no longer overlaps the others.
Alternatively, you can simply click Empacar islas in the menu to have Blender lay out the islands automatically.
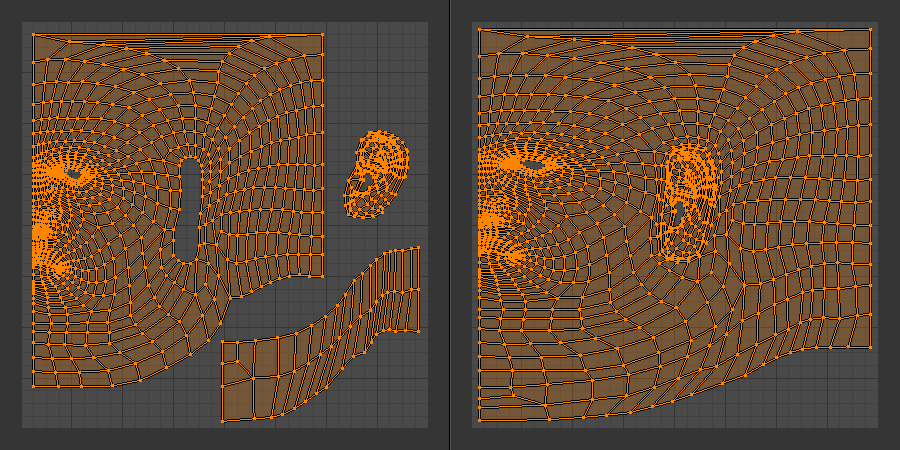
Mapas UV dispuestos juntos y cosidos.
As a final step, you can align the islands to each other by moving and scaling, then connect them using Fusionar (o Mezclar) – or better yet, Unir.
Refinamiento de la disposición
After using the unwrapping tools, you may want to manually tweak the UV map, for example scaling up an area so it receives more pixels of the texture and can thus be more detailed. You can also use Minimizar estiramiento if the UV map is too warped compared to the 3D mesh.
Múltiples mapas UV
A mesh can have more than one UV map, where each map can assign different UV coordinates to the same 3D vertex. This is useful if, say, you need one UV map for textures and another for storing prebaked lighting.
You can add and remove UV maps in the UV Maps panel.
Transferencia de mapas UV
You can copy a UV map from one mesh to another in several ways. If the meshes have the exact same topology and only differ in vertex positions, you can use Copiar mapas UV. If they have (approximately) the same surface but different topology, you can instead use Transferir datos de malla.