Uso de los grupos de vértices
Grupos de vértices para huesos
Este es uno de los principales usos de la pintura de influencias. Si bien es posible hacer que Blender genere las influencias de manera automática (ver la sección de deformación con esqueletos), es posible que se desee retocarlas o hasta crearlas desde cero, especialmente alrededor de algunas articulaciones.
El proceso es el siguiente:
Select the armature and bring it into Pose Mode by pressing Ctrl-Tab.
Make sure that is unchecked in the topbar.
Seleccionar el objeto e ingresar al modo Pintar Influencias.
Make sure that Bone Selection is checked in the 3D Viewport’s header.
Select a bone using Alt-LMB (or Shift-Ctrl-LMB). This will activate the bone’s vertex group and display its current weights on the mesh.
Pintar las influencias para el hueso, usando LMB.
Nota
You can only select one bone at a time in this mode.
Truco
Los huesos probablemente se encontrarán dentro de la malla, haciéndolos invisibles y no pudiendo ser seleccionados. Para evitar este problema, será posible activar la opción En frente del esqueleto.
If a bone doesn’t have a vertex group yet when you start painting, Blender will create one automatically.
If you have a symmetrical mesh and a symmetrical armature, you can use Mirror Vertex Groups to automatically create vertex groups and weights for the other side.
Grupos de vértices para partículas
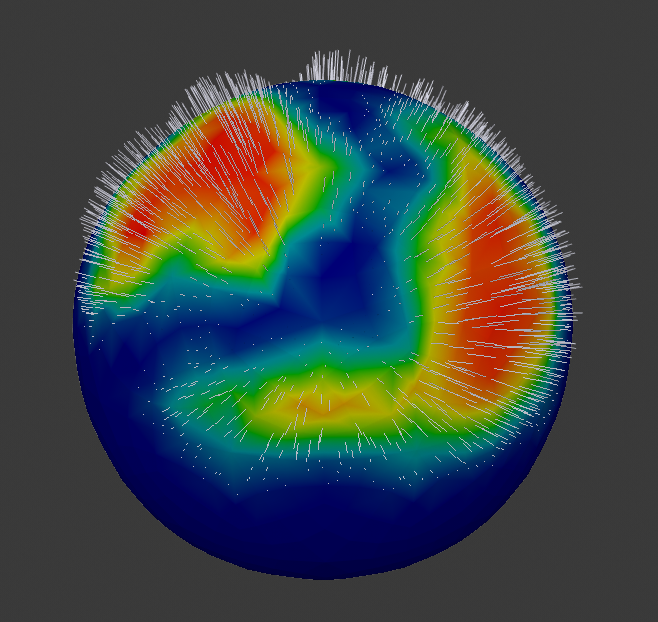
Weight painted particle emission.
By selecting vertex groups in the Vertex Groups panel of a particle system’s properties, you can have different particle densities, hair lengths etc. across different areas of the mesh.