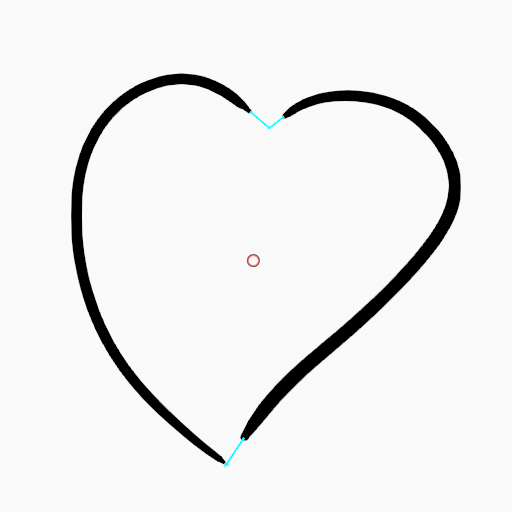
Инструмент «Заполнить» (fill tool)
Ссылка
- Режим (mode):
Режим рисования (draw mode)
- Инструмент (tool):
The Fill tool creates filled Grease Pencil strokes by detecting enclosed regions formed by existing strokes.
Depending on the selected Fill Solver, the boundary can be computed from the stroke geometry or from a pixel-based representation, allowing fills to work with both clean line art and more complex drawings.
The Fill tool uses any of the Grease Pencil Fill draw mode brushes. Activating a brush from an asset shelf or brush selector also activates this tool for convenience.
Настройки панели «Инструмент» (tool settings)
Ассет кисти (brush asset)
Селектор ассетов используется для вызова всплывающего браузера ассетов, в котором можно выбрать активную кисть для инструмента.
Дополнительную информацию см. в разделе «Операторы ассета».
Параметры кисти (brush settings)
You can also configure the brush’s main settings exposed in the Tool Settings for convenience.
- Направление Ctrl
Determines which side of the detected boundary is filled.
- Нормаль (normal):
Fill the enclosed region under the cursor.
- Инвертировано (inverted):
Fill the region outside the detected boundary. This is useful for filling the background around a drawing.
- Size Delaunay
Maximum distance used to search for an enclosed region around the cursor.
- Precision Pixel
Controls the accuracy of the pixel-based boundary detection.
Higher values produce more accurate fills at the cost of increase computation time.
- Dilate/Contract Pixel
Expand or shrink the detected fill region relative to the boundary strokes.
- Thickness Pixel
Thickness of the boundary strokes used by the Pixel fill solver.
Дополнительно (advanced)
- Решатель заполнения (fill solver)
Method used to detect the fill region.
- Делоне (Delaunay):
Uses the stroke geometry directly to compute enclosed regions. Produces accurate fills that are independent of viewport resolution.
- Пиксель (pixel):
Rasterizes the strokes and performs a flood fill. Useful for sketches or drawings where geometric boundaries are less reliable.
- Size Unit Delaunay
Controls how the brush Size is measured.
- Вид (view):
Measure the brush Size in screen space.
- Сцена (scene):
Measure the brush Size in scene units.
The brush size remains constant regardless of the viewport zoom level. The unit system is configured in the Scene Units.
- Граница (boundary)
Determines which strokes are considered when detecting fill boundaries.
- Все (all):
Use both strokes and fill guide strokes.
- Штрихи (strokes):
Use only strokes.
- Линии редактирования (edit lines):
Use only fill guide strokes.
- / Показать линии
Display the auxiliary lines used to compute the fill boundary.
- Слои (layers)
Determines which Layers contribute to the fill boundary.
- Видимое (visible):
Calculate boundaries using all visible layers.
- Активный (active):
Calculate boundaries using only the active layer.
- Слой выше (layer above):
Calculate boundaries using the layer above the active layer.
- Слой ниже (layer below):
Calculate boundaries using the layer below the active layer.
- Все выше (all above):
Calculate boundaries using all layers above the active layer.
- Все ниже (all below):
Calculate boundaries using all layers below the active layer.
- Simplify Pixel
Reduce the complexity of the detected boundary before filling.
Higher values improve performance but may reduce the accuracy of the filled region.
- Игнорировать прозрачность (ignore transparent)
Ignore strokes whose material opacity falls below the specified threshold when calculating fill boundaries.
The slider controls the opacity threshold used to consider a material transparent.
- Limit to Viewport Pixel
Fill only regions visible in the viewport.
- Авто-удалять направляющие заполнения (auto-remove fill guides )
Automatically remove manually created fill guide strokes after creating a fill.
Закрытие разрывов (gap closure)
Gap closure generates temporary helper lines to automatically close small gaps between strokes, allowing open regions to be filled.
- Internal Gaps
Stop helper lines at internal gaps.
- Detection Factor
Controls the sensitivity of gap detection.
Higher values detect more gaps, which can result in smaller fill regions.
- Size Pixel
Maximum distance used by the selected gap closure method when creating temporary helper lines.
- Mode S Pixel
Method used to generate temporary helper lines.
- Радиус (radius):
Connect nearby open stroke endpoints that fall within the specified radius.
- Расширить (extend):
Extend open stroke ends until they intersect another stroke or reach the specified distance.
- Visual Aids Pixel
Display the temporary helper lines used for gap closure.
- Strokes Collision D Pixel
Stop extending helper lines when they intersect an existing stroke.
Использование
Выбор кисти и материала
В настройках инструмента выберите тип кисти, материала и цвета, которые будут использоваться. Инструмент „Fill“ использует различные типы кистей «заполнения». Дополнительную информацию см. в разделе «Параметры кисти (brush settings)».
Области «заполнения»
Нажмите ЛКМ внутри замкнутой области штриха. Инструмент автоматически рассчитает границы и создаст новый замкнутый штрих, залитый выбранным материалом.



Направляющие заполнения (fill guides)
Если в области, которую вы хотите залить, есть большой разрыв, можно вручную добавить направляющие для заливки – временные вспомогательные линии для замыкания открытых контуров. Чтобы создать такую линию, нажмите Alt-ЛКМ и нарисуйте штрих, закрывающий нужную область.
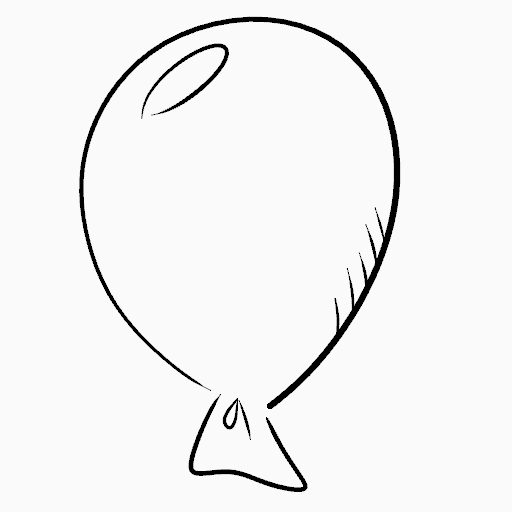
Исходный рисунок.¶ |
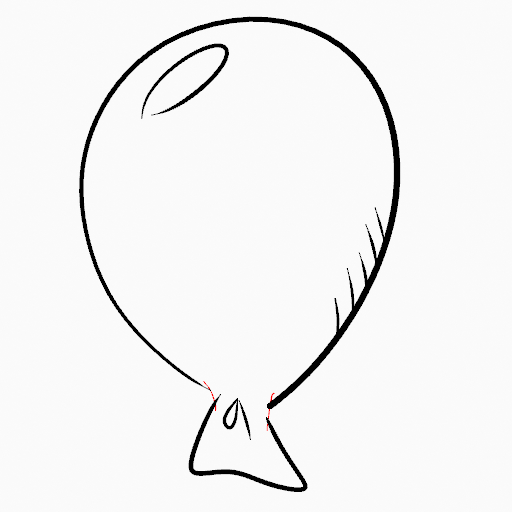
Добавление направляющих заполнения, чтобы закрыть открытые участки (красные линии).¶ |

Использование инструмента „Fill“, чтобы залить область новым материалом, позволив ему распространиться на новую замкнутую область.¶ |
Когда вас устроит результат заливки, вы можете удалить „направляющие для заполнения“ с помощью инструмента „Clean Up“ в меню „Grease Pencil“ в режиме редактирования.
Автоматическое закрытие разрывов
Более автоматический способ закрывать разрывы в области, которую вы хотите заполнить – это использование временных вспомогательных линий. Есть два метода их применения: „Radius“ или „Extend“.
Режим „Radius“ использует временные вспомогательные линии, рассчитываемые на основе радиуса ближайших открытых точек, чтобы замкнуть разомкнутые контуры. Установите размер больше нуля, чтобы контролировать размер окружности над открытыми точками (окружность исчезнет, когда линия замкнёт разрыв). Нажмите на область, которую нужно заполнить, и измените длину штрихов с помощью PageUp, PageDown или Колёсика мышки. Когда длина вас устроит и вы убедитесь, что временные штрихи пересекают друг друга, нажмите ещё раз, чтобы залить область.

Исходный рисунок.¶ |
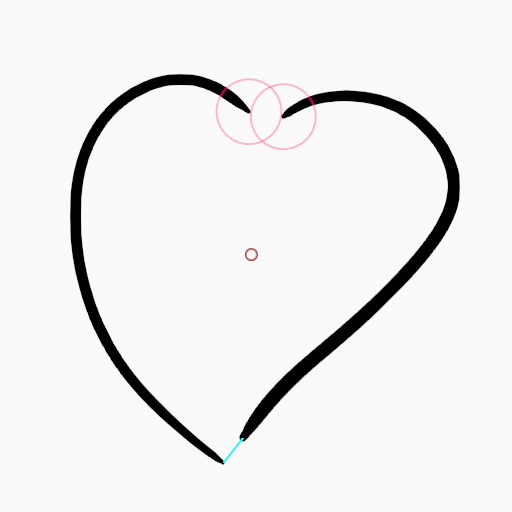
Использование режима „Radius“ для закрытия открытых областей (красные окружности и голубые линии).¶ |

Использование инструмента заливки для заполнения новых замкнутых областей с предотвращением протекания материалов.¶ |
Режим „Extend“ использует временные вспомогательные линии, продлевающие концы текущих штрихов, для замыкания открытых фигур. Установите значение размера больше нуля для использования удлинённых линий, щёлкните над нужной для заливки областью и измените длину штрихов с помощью клавиш PageUp/PageDown, Колёсика мышки или СКМ пера. Когда длина вас устроит и вы убедитесь, что временные штрихи пересекаются друг с другом, щёлкните ещё раз, чтобы залить область.