Меню «Штрих»
На этой странице рассматривается множество инструментов из меню „Stroke“. Это инструменты, которые работают преимущественно со штрихами, однако некоторые из них также работают с выделением точек.
Подразделить (subdivide)
Ссылка
- Режим (mode):
Режим редактирования (edit mode)
- Меню:
Оператор „Subdivide“ добавляет новые контрольные точки на выделенных сегментах кривой, разделяя их на более мелкие секции. Это полезно для создания более плавных переходов, подготовки кривых для более тонких настроек или добавления дополнительных деталей для анимации или моделирования.
- Количество разрезов (number of cuts)
Устанавливает количество делений для каждого выделенного сегмента; каждый разрез добавляет одну новую контрольную точку на сегмент.
- Выделенные точки (selected points)
Если включено, – воздействует только на выделенные точки внутри штриха.
Подразделить и сгладить (subdivide and smooth)
Ссылка
- Режим (mode):
Режим редактирования (edit mode)
- Меню:
Подразделяет и сглаживает штрихи путём добавления новых точек между выделенными.
- Количество разрезов (number of cuts)
Количество выполняемых подразделений.
- Выделенные точки (selected points)
Если включено, – воздействует только на выделенные точки внутри штриха.
- Итераций (iterations)
Количество повторений операции сглаживания.
- Коэффициент (factor)
Степень сглаживания добавленных точек.
- Сгладить конечные точки (smooth endpoints)
Сглаживать начальные и конечные точки штриха.
- Поддерживать форму (keep shape)
Сохраняет форму штрихов.
- Положение (position)
Включение этого параметра позволяет оператору изменять положение точек.
- Радиус (radius)
Включение этого параметра позволяет оператору изменять толщину точек.
- Непрозрачность (opacity)
Включение этого параметра позволяет оператору изменять прозрачность (силу/альфа-канал) точек.
Упрощение (simplify)
Ссылка
- Режим (mode):
Режим редактирования (edit mode)
- Меню:
Позволяет снижать сложность штрихов Grease Pencil за счёт стратегического удаления точек. Это полезно для очистки линий, оптимизации производительности и подготовки рисунков к дальнейшему редактированию или анимации. Доступно несколько режимов работы, описанных ниже:
Фиксировано (fixed)
Ссылка
- Режим (mode):
Режим редактирования (edit mode)
- Меню:
Удаляет чередующиеся точки в штрихах, за исключением начальной и конечной точек.
- Шаги (steps)
Количество повторений этой процедуры.
Адаптивно (adaptive)
Ссылка
- Режим (mode):
Режим редактирования (edit mode)
- Меню:
Использование алгоритма „RDP“ (Ramer-Douglas-Peucker) для удаления лишних точек. Алгоритм пытается сохранить исходную форму линии, используя меньшее количество точек.
- Коэффициент (factor)
Позволяет управлять количеством рекурсивных упрощений, применяемых алгоритмом.
Сэмплировать (sample)
Ссылка
- Режим (mode):
Режим редактирования (edit mode)
- Меню:
Воссоздаёт геометрию штриха с задаваемой пользователем длиной между точками.
- Длина (length)
Расстояние между точками на воссоздаваемом штрихе. Меньшим значениям потребуется больше точек для воссоздания штриха, тогда как бо́льшие значения приводят к уменьшению количества точек, необходимых для воссоздания кривых.
Объединить (merge)
Ссылка
- Режим (mode):
Режим редактирования (edit mode)
- Меню:
Упрощает штрих, объединяя точки, расположенные ближе заданного расстояния.
- Расстояние (distance)
Максимальное расстояние между вершинами для определения того, какие из них будут объединены.
Обводка (outline)
Ссылка
- Режим (mode):
Режим редактирования (edit mode)
- Меню:
Оператор „Outline“ преобразует выделенные штрихи Grease Pencil в замкнутые фигуры. Он создаёт новые штрихи вдоль внешнего контура исходного штриха, эффективно формируя заполненную обводку с регулируемой толщиной.
- Вид (view)
Определяет метод проецирования, используемый для создания обводки:
- Вид (view):
Использовать текущую перспективу вьюпорта в качестве плоскости проекции.
- Спереди (front):
Использовать оси „X-Z“ в качестве плоскости проекции (вид спереди).
- Сторона (side):
Использовать оси „Y-Z“ в качестве плоскости проекции (вид сбоку).
- Сверху (top):
Использует оси „X-Y“ в качестве плоскости проекции (вид сверху).
- Камера (camera):
Использовать перспективу активной камеры в качестве плоскости проекции.
- Радиус (radius)
Позволяет задавать толщину обводки/контура по обе стороны от исходного штриха. Более высокие значения приводят к расширению периметра.
- Коэффициент смещения (offset factor)
Масштабирует контур штриха внутрь или наружу. – Положительные значения сдвигают периметр наружу. – Отрицательные значения сдвигают его внутрь. – Значение „0“ центрирует периметр точно на исходном штрихе.
- Угловые подразделения (corner subdivisions)
Количество подразделений, используемых для сглаживания углов на концах и соединениях штрихов. Более высокие значения сглаживают углы, но увеличивают сложность штриха.

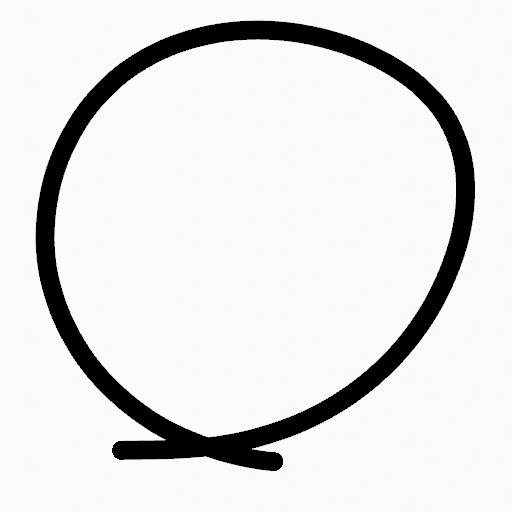
Обрезать (trim)
Ссылка
- Режим (mode):
Режим редактирования (edit mode)
- Меню:
Обрезает выделенный штрих до первой петли или пересечения.
Объединить (join)
Объединить (join)
Ссылка
- Режим (mode):
Режим редактирования (edit mode)
- Меню:
Объединить два или более штрихов в один.
- Тип (type)
- Объединить (join):
Ctrl-J Объединить выделенные штрихи путём соединения точек.
- Отделить и скопировать (split and copy):
Копировать выделенные точки в новый штрих.
- Leave Gaps
When enabled, do not use geometry to connect the strokes.
Отделить и скопировать (split and copy)
Ссылка
- Режим (mode):
Режим редактирования (edit mode)
- Меню:
- Горячая клавиша:
Shift-Ctrl-J
То же самое, что и „Объединить (join)“, но по умолчанию выбран „тип“ „Отделить и скопировать (split and copy)“.
Переместить на слой (move to layer)
Ссылка
- Режим (mode):
Режим редактирования (edit mode)
- Меню:
- Горячая клавиша:
M
Переместить выделенные штрихи на другой слой.
Всплывающее меню содержит список всех слоёв и групп слоёв активного объекта Grease Pencil. Выберите целевой слой для перемещения выделенных штрихов.
- Новый слой (new layer)
Создать новый слой и переместить выделенные штрихи на него.
После выбора этой опции появится окно-запрос для ввода названия нового слоя.
Назначить материал (assign material)
Ссылка
- Режим (mode):
Режим редактирования (edit mode)
- Меню:
Изменить материал, привязанный к выделенному штриху. Вы можете выбрать имя материала для использования выделенным штрихом из списка материалов текущего объекта Grease Pencil.
Установить активный материал (set active material)
Ссылка
- Режим (mode):
Режим редактирования (edit mode)
- Меню:
Сделать материал выделенного штриха активным материалом объекта.
Расположить (arrange)
Ссылка
- Режим (mode):
Режим редактирования (edit mode)
- Меню:
Изменить порядок отрисовки штрихов внутри 2D-слоя.
- На передний план (bring to front)
Переместить выделенные точки/штрихи в самый верх списка (поверх всех остальных объектов).
- Приблизить (bring forward)
Переместить выделенные точки/штрихи на один уровень выше относительно других в порядке отрисовки.
- Отдалить (send backward)
Переместить выделенные точки/штрихи на один уровень ниже относительно других в порядке отрисовки.
- На задний план (send to back)
Переместить выделенные точки/штрихи в самый низ списка (под все остальные объекты).
Замкнуть (close)
Ссылка
- Режим (mode):
Режим редактирования (edit mode)
- Меню:
- Горячая клавиша:
F
Замкнуть или разомкнуть штрихи путём соединения их последней и первой точки.
- Тип (type)
- Замкнуть все (close all):
Замкнуть все выделенные «открытые» штрихи.
- Разомкнуть все (open all):
Разомкнуть все выделенные «замкнутые» штрихи.
- Переключить (toggle):
Изменить состояние выделенных штрихов (замкнутые размыкает, а разомкнутые замыкает) в зависимости от того, что требуется.
- Выровнять плотность точек (match point density)
Добавить точки на новом сегменте для сохранения той же плотности.
Переключить замкнутость (toggle cyclic)
Ссылка
- Режим (mode):
Режим редактирования (edit mode)
- Меню:
Переключение между разомкнутым и замкнутым штрихом.
- Тип (type)
- Замкнуть все (close all):
Замкнуть все выделенные «открытые» штрихи.
- Разомкнуть все (open all):
Разомкнуть все выделенные «замкнутые» штрихи.
- Переключить (toggle):
Изменить состояние выделенных штрихов (замкнутые размыкает, а разомкнутые замыкает) в зависимости от того, что требуется.
- Выровнять плотность точек (match point density)
Добавить точки на новом сегменте для сохранения той же плотности.
Установить колпачки (set caps)
Ссылка
- Режим (mode):
Режим редактирования (edit mode)
- Меню:
Переключить стиль завершения штриха.
- Скруглённый (rounded)
Установить скруглённую форму для начальной и конечной точек штриха (по умолчанию).
- Плоская (flat)
Переключить окончание начальной и конечной точек штриха между плоской и скруглённой формой.
- Переключить начало (toggle start)
Переключить форму окончания начальной точки штриха между плоской и скруглённой.
- Переключить конец (toggle end)
Переключить форму окончания конечной точки штриха между плоской и скруглённой.
Переключить направление (switch direction)
Ссылка
- Режим (mode):
Режим редактирования (edit mode)
- Меню:
Оператор „Switch Direction“ изменяет направление выделенного штриха Grease Pencil на противоположное. Это означает, что начальная точка штриха становится конечной, и наоборот. Хотя эта операция не меняет визуальный вид самого штриха, она влияет на поведение объектов, зависящих от порядка точек, например, при использовании модификатора „Build“.
Установить начальную точку (set start point)
Ссылка
- Режим (mode):
Режим редактирования (edit mode)
- Меню:
Установить начальную точку для замкнутых штрихов. Она определяет место, где штрих начинается и заканчивается при зацикливании.
Установить равномерную толщину (set uniform thickness)
Ссылка
- Режим (mode):
Режим редактирования (edit mode)
- Меню:
Сделать толщину одинаковой по всей длине штриха.
- Толщина (thickness)
Значение толщины, применяемое ко всем точкам штриха.
Установить равномерную непрозрачность (set uniform opacity)
Ссылка
- Режим (mode):
Режим редактирования (edit mode)
- Меню:
Сделать значение непрозрачности одинаковым по всей длине штриха.
- Непрозрачность (opacity)
Значение непрозрачности, которое будет применено ко всем точкам штриха.
Масштабировать толщину (scale thickness)
Ссылка
- Режим (mode):
Режим редактирования (edit mode)
- Меню:
Если включено, – толщина штриха также масштабируется при операциях изменения размера.
Установить тип кривой (set curve type)
Ссылка
- Режим (mode):
Режим редактирования (edit mode)
- Меню:
- Горячая клавиша:
V
Устанавливает тип сплайна для сплайнов в компоненте штриха, которые находятся в выделении.
- Тип (type)
Указывает целевой тип сплайна. Более подробную информацию о типах сплайнов см. в разделе документации «Типы сплайнов».
- Безье (Bézier):
Преобразует сплайн в тип „Безье“. - „Полисплайны“ преобразуются с векторными ручками. - Сплайны „NURBS“ или „Catmull Rom“ преобразуются с автоматическими ручками.
Примечание
При преобразовании сплайна „NURBS“ в сплайн „Безье“ необходимо как минимум шесть точек. Когда количество точек не кратно трём, сплайн будет усечён.
- NURBS:
Преобразует сплайн в тип „NURBS“.
- Полилиния (poly):
Преобразует сплайн в тип „Poly“.
- Кэтмулл-Ром (Catmull Rom):
Преобразует сплайн в тип „Catmull Rom“.
- Ручки (handles)
Учитывает информацию о ручках во время конвертации.
Установить разрешение (set resolution)
Ссылка
- Режим (mode):
Режим редактирования (edit mode)
- Меню:
Задать количество точек, генерируемых вдоль каждого сегмента кривой (между двумя регулирующими ручками).
Установить тип штриха (set stroke type)
Ссылка
- Режим (mode):
Режим редактирования (edit mode)
- Меню:
Изменить тип выделенных кривых.
- Тип (type)
- Штрих (stroke):
Преобразовать выделенные кривые в чистую обводку, удаляя заполнения.
- Заполнить (fill):
Преобразовать выделенные кривые в сплошную заливку, удаляя контур.
- Оба (both):
Включить оба компонента (штрих и заполнение) для выделенных кривых.
Сбросить UV (reset UVs)
Ссылка
- Режим (mode):
Режим редактирования (edit mode)
- Меню:
Позволяет сбросить UV-преобразование выделенных кривых к их значениям по умолчанию.
Это восстанавливает исходную UV-карту штриха и заливки, удаляя все настройки масштабирования, вращения или смещения, применённые к координатам материала.
Объединить заполнения (join fills)
Ссылка
- Режим (mode):
Режим редактирования (edit mode)
- Меню:
- Горячая клавиша:
Shift-J
Объединить несколько выделенных областей заливки в единое заполнение.
Это полезно для объединения отдельных замкнутых фигур в одну общую закрашенную область.
Отделить заполнения (separate fills)
Ссылка
- Режим (mode):
Режим редактирования (edit mode)
- Меню:
- Горячая клавиша:
Alt-P
Разделить объединённую область заливки на отдельные заполнения на основе их индивидуальных граничных кривых.
Это позволяет снова редактировать ранее объединённые области заливки независимо друг от друга.
- Отдельно (individual)
Создать отдельную заливку для каждого отдельного штриха.