Asset Browser – Браузер Активів
The Asset Browser is the main interface for organizing and using assets. To access it, create a new area, click the Editor Type button in its top left corner, and choose Asset Browser.
Дивись також
- Asset Libraries – Бібліотеки Активів
For general information on Blender’s asset library system, including how to create and edit assets, and design choices.
- Asset Catalogs
For organizing assets.
- Pose Library – Бібліотека Поз
Built on top of the Asset Browser.
Інтерфейс
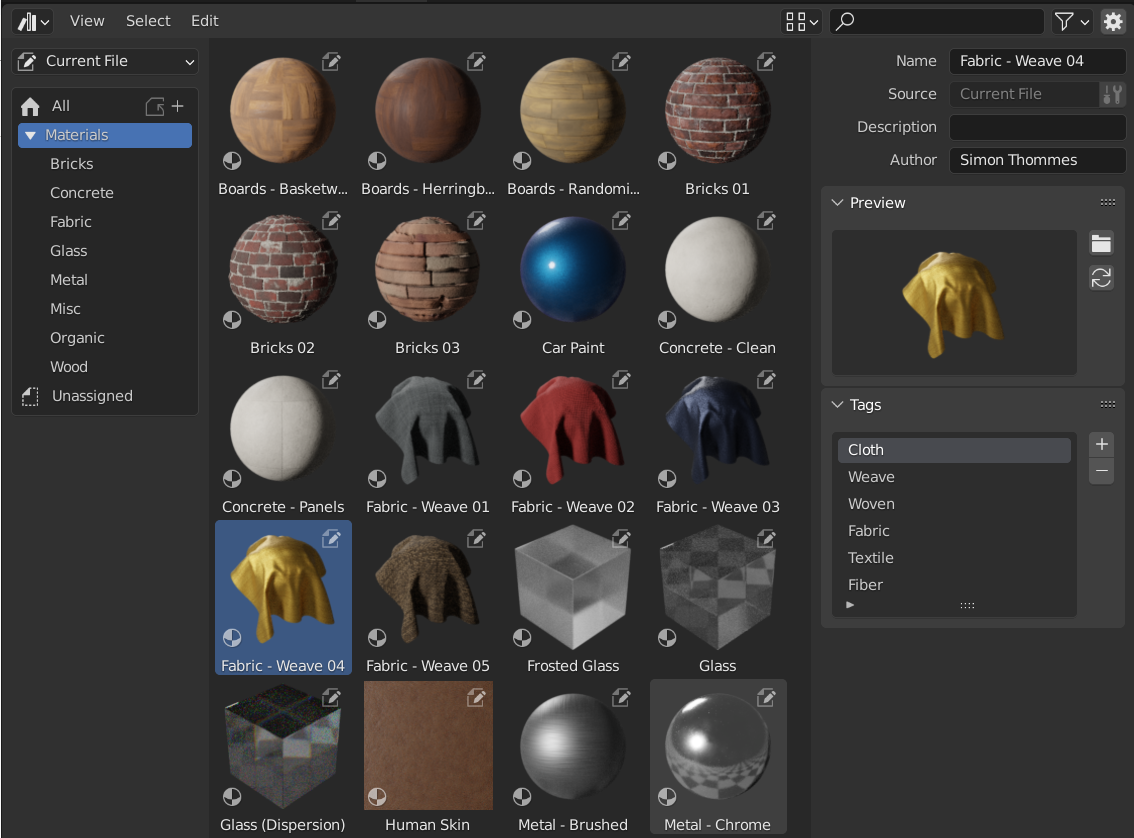
Asset Browser, showing materials in an asset library.
Заголовок
Import Settings
- Import Method
Determines how data is managed when an asset is imported. This option can be found in the center of the Asset Browser header (when an asset library other than Current File or Essentials is selected):
- Follow Asset or Preferences:
Use the import method set in the File Path Preferences.
- Link – Пов’язання:
The asset will be linked to the current blend-file, and thus be read-only. Later changes to the asset file will be reflected in all files that link it.
- Append – Прилучення:
The asset and all its dependencies will be Appended (copied) into the current file. Dragging a material into the scene three times will result in three independent copies. Dragging an object into the scene three times will also result in three independent copies.
«Залежності» в цьому випадку означає все, на що цей актив посилається. Для об’єкта це може бути його сіть та матеріали, а також інші об’єкти, що використовуються його модифікаторами, примусами чи драйверами.
Since the file now has its own copy of the asset, later changes to the asset file will not be reflected in the file it’s appended from.
- Pack – Упакування:
Imports the asset as linked data and immediately packs it into the current blend-file. This ensures that the asset remains available even if the original library data is modified or becomes unavailable.
Useful for maintaining self-contained files that do not rely on external asset library paths.
- Instance Collections – When Linking/Appending
Mimics the Instance Collections option when appending from the file browser
Some asset types such as collections can be created as an instanced collection. This is done by enabling the Instance option after dragging collection assets into the 3D Viewport. By enabling these options, an empty object is added that uses an instance of the collection. If this option is disabled, the full collection hierarchy will be added to the scene.
Collection Assets from the current file will always be instanced.
Display Settings – Устави Показу
Adjusts how assets are displayed in the asset list.
- Display Mode – Режим Показу
Control how files are displayed.
- Horizontal List – Горизонтальний Список:
Показує файли та теки горизонтальним списком.
- Thumbnails – Мініатюри:
Показує передогляди – previews.
- Preview Size Horizontal List
Change the size of thumbnails in list views.
- Column Size Horizontal List
The width of columns in horizontal list views.
- Size Thumbnails
Changes the size of the preview thumbnails.
- Sort By – Сортування За
- Назва:
Sort the asset list alphabetically.
- Asset Catalog:
Sort the asset list so that assets in the same catalog are kept together. Within a single catalog, assets are ordered by name. The catalogs are in order of the flattened catalog hierarchy.
Filter – Фільтр
Controls which asset types are displayed when browsing an asset library.
- Access
Filters assets based on whether they are available locally or must be downloaded from an online asset library.
- Online and Offline:
Shows both downloaded assets and assets that are available online.
- Online Only:
Shows only assets that are available online and have not yet been downloaded.
- Offline Only:
Shows only assets that are already available locally, either from local asset libraries or previously downloaded online assets.
Main Region – Головний Регіон
The center region of the Asset Browser lists the assets contained in the selected catalog.
Click LMB to select a single asset. Additionally hold Ctrl to add/remove that asset to/from the selection, or Shift to select a range of assets. You can also drag LMB to perform a box select.
The region has a context menu with the following operations:
- Refresh Asset Library R
Refreshes the list.
- Clear Asset – Зчищення Активу
Дивіться Removing Assets.
- Clear Asset (Set Fake User) – Зчищення Активу (Задання Фейкового Користувача)
Дивіться Removing Assets.
- Open Blend File – Відкриття Файлу Blend
Opens the blend-file containing the asset.
- Display Size – Розмір Показу
Changes the size of the preview thumbnails.
Asset Library Region
The region on the left lets you select an asset library and shows its catalogs. You can show/hide this region by pressing T.
- Asset Library
The asset library whose catalogs to show.
- All Libraries:
Show catalogs from all available libraries.
- Current File:
Show the catalogs in the current blend-file (even if that file is not yet part of an asset library). See The Current File Asset Library for more information.
- Essentials:
Show the catalogs that come bundled with Blender.
Any libraries that you added in the File Path Preferences are listed here too.
- Copy Bundle to Asset Library
Shown when Asset Library is set to Current File and the current blend-file is an asset bundle that’s not yet part of an asset library.
Lets you select a target asset library, then opens a File Browser in that library’s root folder so you can save the current blend-file there. Once saved, the assets in the blend-file become available as part of the library.
- Catalogs
Tree View that shows the catalogs of the selected asset library. A catalog is a group of assets; when you select one, only the assets in that catalog and its child catalogs will be listed.
You can rename a catalog by double-clicking it, or assign it to a different parent catalog by dragging and dropping.
Додатки та функціональності, як-от Pose Library – Бібліотека Поз, можуть показувати тут кастомні панелі.
Asset Details Region – Регіон Деталей Активу
The region on the right shows the metadata of the active asset. You can show/hide this region by pressing N or clicking the gear icon in the header.
Only metadata of assets contained in the current blend-file can be edited.
- Назва
The asset’s name. Unique for the asset data type within the same blend-file.
- Source – Джерело
Повний шлях до blend-файлу, що містить цей актив.
- Open Blend File – Відкриття Файлу Blend
Opens the blend-file that contains the asset in a new Blender instance. When this instance is closed, the Asset Browser will be automatically refreshed.
- Ліцензія
Optional name of the license under which this asset is distributed. Not used by Blender itself.
- Авторське право
Optional copyright notice. Not used by Blender itself.
- Опис
Optional asset description. Not used by Blender itself.
- Автор
Факультативне поле для автора активу. Не використовується самим Blender.
Preview – Передогляд
Показує зображення передогляду активу. Дивіться Asset Previews – Передогляди Активів.
- Load Custom Preview – Завантаження Кастомного Передогляду
Opens a File Browser where you can select a new image for the asset preview.
- Generate Preview – Генерування Передогляду
Autogenerate a new preview for the asset.
- Preview – Передогляд
Меню додаткових операторів передогляду.
- Render Active Object – Рендер Активного Об’єкта
Generates a preview based on the 3D Viewport’s Active object. This is useful for node groups, which cannot automatically generate their own preview.
- Remove Preview
Remove the preview of the asset.
- Capture Screenshot Preview
Drag-select a rectangle over an area of Blender to capture it as the preview image of the asset. See Screenshot Capture for Previews.
Імпорт
- Preferred Method
Uses the asset’s preferred import method when Follow Asset or Preferences is selected in the Asset Browser.
This allows assets to specify the import method that best suits their intended use. For example, a base mesh for sculpting can specify that it should always be appended so it is immediately editable after import.
Using Assets – Використання Активів
As a general rule, an asset can be used by dragging it from the Asset Browser to the desired location. Objects and worlds can be dragged from the Asset Browser into the scene. Materials can be dragged onto the object that should use them. Geometry nodes can also be dragged onto objects to add a Geometry Nodes Modifier. The use of pose assets is different, and is described in Pose Library – Бібліотека Поз.
When you drag a collection, it will be added as an instance – that is, a single object representing the entire collection, meaning the contents aren’t visible in the Outliner and can’t be edited. You can change this in the following ways:
Use Зробити Примірники Реальними – Make Instances Real to replace the object by the collection contents.
Alternatively: delete the object, find the collection in the Outliner’s Blender File Display Mode – Режим Показу, and click in its context menu.
There are several things that can happen when an asset is used, depending on the Import Method.
Зауважте, що всі регулярні операції Blender доступні після того, як актив додано в поточний файл. Наприклад, ви можете обрати пов’язання об’єкта ззовні в сцену; це також пов’яже його сіть та його матеріали в неї. Потім ви можете зробити локальним сам об’єкт ( – «Об’єкт > Відношення > Зроблення Локальним… > Вибрані Об’єкти»), водночас утримуючи сіть та матеріали, пов’язаними з файлів активів. Це дасть локальний, і, отже, редаговний, об’єкт, та триматиме сіть і матеріали автоматично актуальними при будь-яких змінах у бібліотеці активів.
Asset Previews – Передогляди Активів
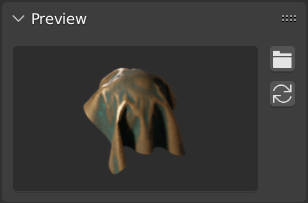
Панель передоглядів Preview у браузері активів Asset Browser.
Preview images are typically generated automatically when you mark a data-block as an asset. Objects are captured from their local -Y axis, while collections are captured from the global -Y axis (as these don’t have a local axis).
If the auto-generated preview image isn’t sufficient, you can replace it by a custom one.
Щодо передоглядів активів поз дивіться Controlling the Look of Preview Images – Керування Виглядом Зображень Передогляду.
Screenshot Capture for Previews
In case a specific preview is needed, a fast way to create it is with a screenshot. The operator to do so is located under the Preview popover, see Capture Screenshot Preview. It is only possible to take screenshots for editable assets, so assets in the Current File and Asset System Files.
Once started, you can click and drag a rectangular area over any part of Blender to capture a preview image. During dragging it is possible to move the whole capture area or to unlock the aspect ratio. See the shortcut help in the status bar for information on which keys to press.
On a re-run of the operator, the previously captured area will be remembered. Simply clicking allows you to easily take the same screenshot again.
Примітка
Selecting an area that is completely within a single 3D viewport will actually do a background render of that section. This allows the background to be transparent, but also means that UI elements can not be captured.
Asset Bundles – Пакети Активів
Пакетами активів є blend-файли, що не посилають на жоден інший файл і чиї імена закінчуються _bundle.blend. Будь-які текстури та інші зовнішні файли мають бути упакованими – packed у поточному blend-файлі.
Пакети активів можуть копіюватися в бібліотеку активів за допомогою браузера активів – Asset Browser:
Відкрийте blend-файл пакета активів.
Switch its Asset Browser to Current File (if it’s not set to that already).
Клацніть на Copy Bundle to Asset Library – «Копія Пакета в Бібліотеку Активів».
Виберіть бібліотеку активів, в яку копіювати.
A File Browser will open at the root folder of the selected asset library. Choose the desired location of the blend-file, and click the Copy to Asset Library button.
Цей blend-файл буде збережено в обраній локації та будь-які каталоги – catalogs пакета активів будуть влиті в цільову бібліотеку активів.
Примітка
Обидва, слово «актив» та слово «пакет» поширено використовуються, і необов’язково з тим самим значенням, як описано тут. Не все, що представлено як «пакет активів» буде мати доступну функціональність Copy to Asset Library; для цього файл пакета потребує дотримуватися вищезазначеного визначення.