Map UV Node – Вузол «Розкладка UV»
Map a texture using UV coordinates, to apply a texture to objects in compositing.
May be used in combination with Cryptomatte Node to apply the texture only to specific objects.
Inputs – Уводи
- Image – Зображення
Нова 2D текстура.
- UV
Увід для проходу рендера UV. Дивіться Cycles render passes.
Підказка
Для збереження проходу UV може використовуватися багатошаровий формат OpenEXR.
Properties – Властивості
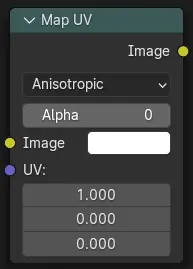
- Тип Фільтра – Filter Type
Методи інтерполяції.
- Anisotropic:
Enhances the clarity of textures viewed at oblique angles, addressing issues like blurring and distortion.
- Nearest – Найближче:
Без інтерполяції, використовує найближчий сусідній піксель.
- Alpha – Альфа
Поріг прозорості альфа, що використовується для ефекту поступового щезання пікселів на границях об’єктів зображення.
Outputs – Виводи
- Image – Зображення
Результатне зображення є увідним зображенням текстури, спотвореної відповідно до координат UV. Далі це зображення може накладатися, змішуючись з оригінальним зображенням, для малювання текстури поверх оригінала. Наладжуйте альфа та фактор мішання для керування тим, наскільки нова текстура накладається на стару.
Підказка
При малюванні цієї нової текстури допомагає наявність розкладок UV для оригінальних об’єктів у сцені, рекомендується зберігати ці контури UV для текстур під рукою навіть після завершення компонування.
Examples – Приклади
У прикладі нижче ми маємо накладений патерн сітки поверх двох голів після того, як вони були відрендерені. Під час рендерингу ми увімкнули шар UV в – «Шар Рендера > Проходи» у властивостях Properties. Використовуючи вузол Mix («Overlay» на ілюстрації), ми мішаємо нову текстуру UV поверх оригінального обличчя. Ми можемо використовувати цю текстуру сітки для допомоги у будь-якому відстежуванні руху, яке нам потрібно зробити.
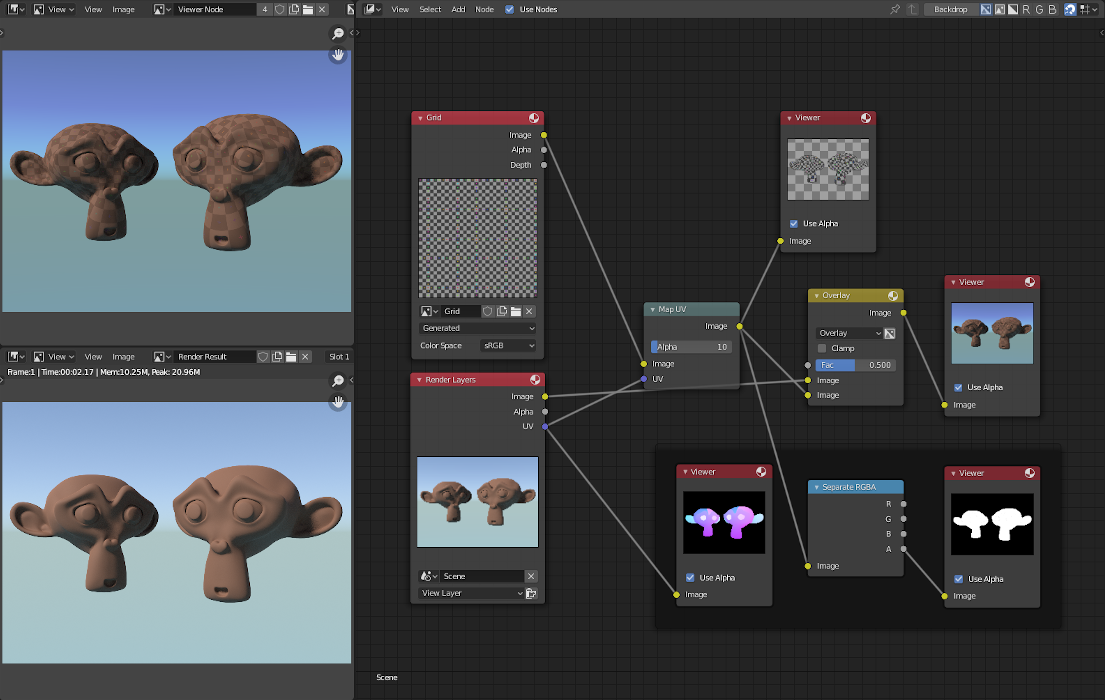
Додання ґратчастих UV текстур для відстеження руху.
У наступному прикладі ми накладаємо логотип поверх сіті, скомпонованої з двох кубів, що перетинаються, і ми переконуємося, що Увімкнули кнопку передмноження Alpha на вузлі Mix. Логотип використовується як додаткова текстура UV поверх наявної текстури. Інші приклади включають можливість того, що під час початкової анімації було використано недозволену продуктову коробку, і її необхідно замінити на іншу від іншого спонсора після рендерингу.
Підказка
Через обмеження для цього вузла не рекомендується поспішати робити перед-виробничий рендеринг під умовою «виправлення його пізніше».
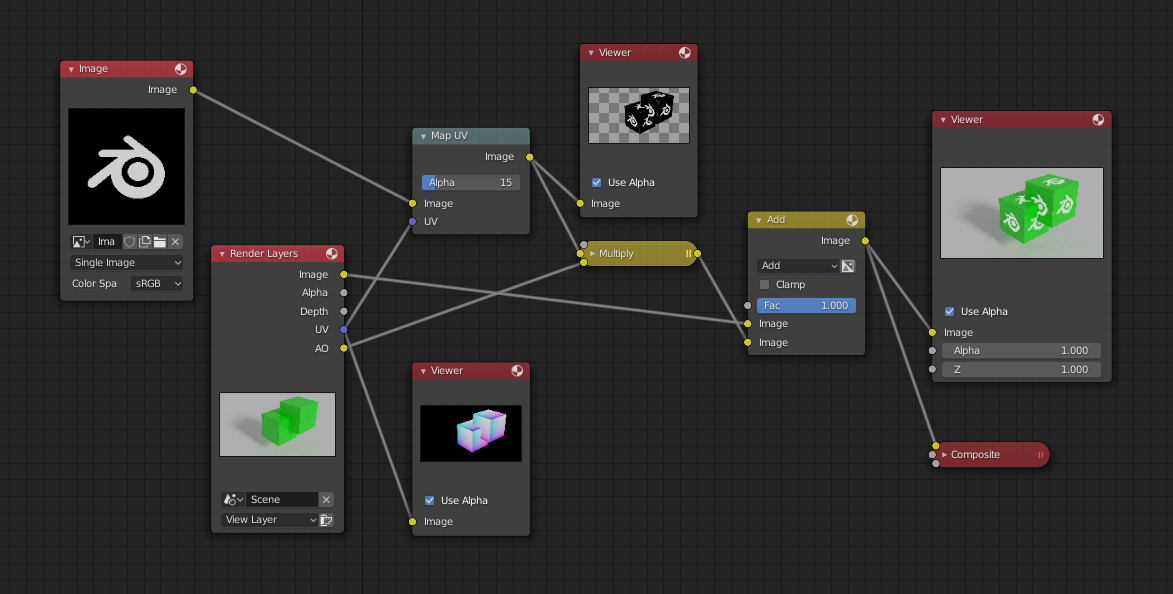
Додання текстур UV на етапі після-виробництва.