Камери
A camera is an object that provides a means of rendering images from Blender. It defines which portion of a scene is visible in the rendered image.
Cameras are invisible in renders, so they do not have any material or texture settings. However, they do have Object and Editing setting panels available which are displayed when a camera is the active object.
Дивись також
3D Viewport Camera Navigation щодо документації про управління камерами в оглядвікні.
Властивості
Посилання
- Режим:
Режим Об’єкта
- Editor – Редактор:
«Властивості > Камера» –
Lens – Об’єктив
Тип
Опції об’єктива камери керують способом, яким 3D об’єкти представляються на 2D зображенні.
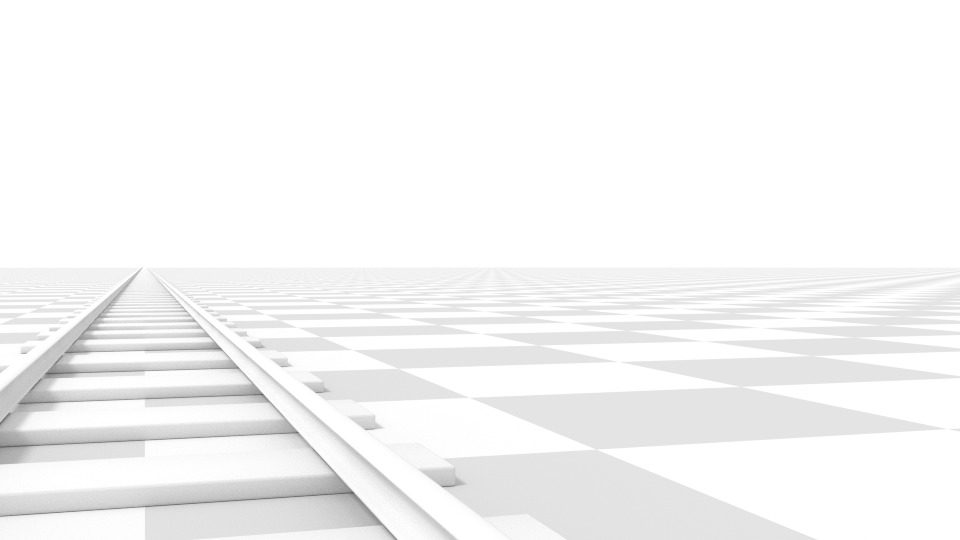
- Perspective – Перспектива
This matches how you view things in the real world. Objects in the distance will appear smaller than objects in the foreground, and parallel lines (such as the rails on a railroad) will appear to converge as they get farther away.
- Фокусна Відстань/Поле Зору – Focal Length/Field of View
The Focal Length controls the amount of zoom, i.e. the amount of the scene which is visible all at once. Longer focal lengths result in a smaller FOV (more zoom), while short focal lengths allow you to see more of the scene at once (larger FOV, less zoom).
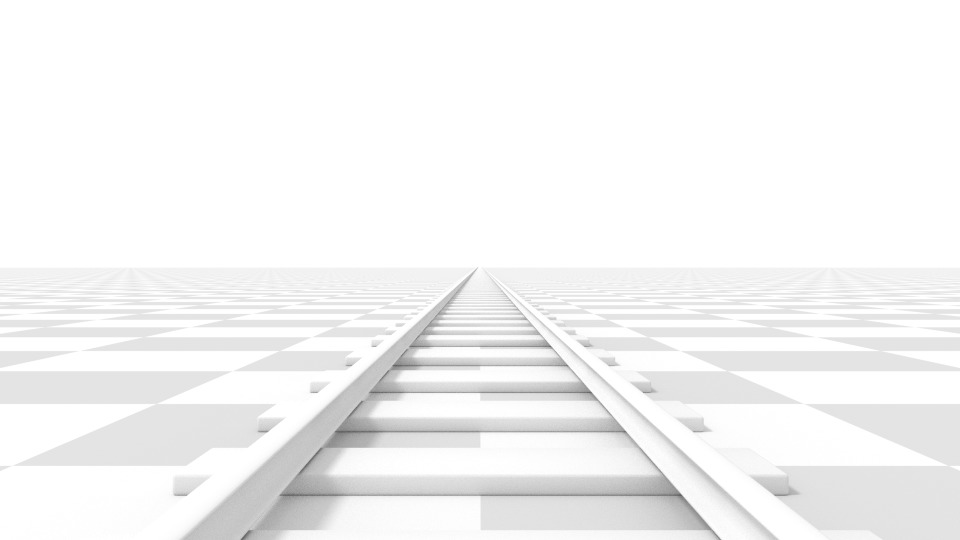
Перспективна камера з фокусною відстанню 35 мм.
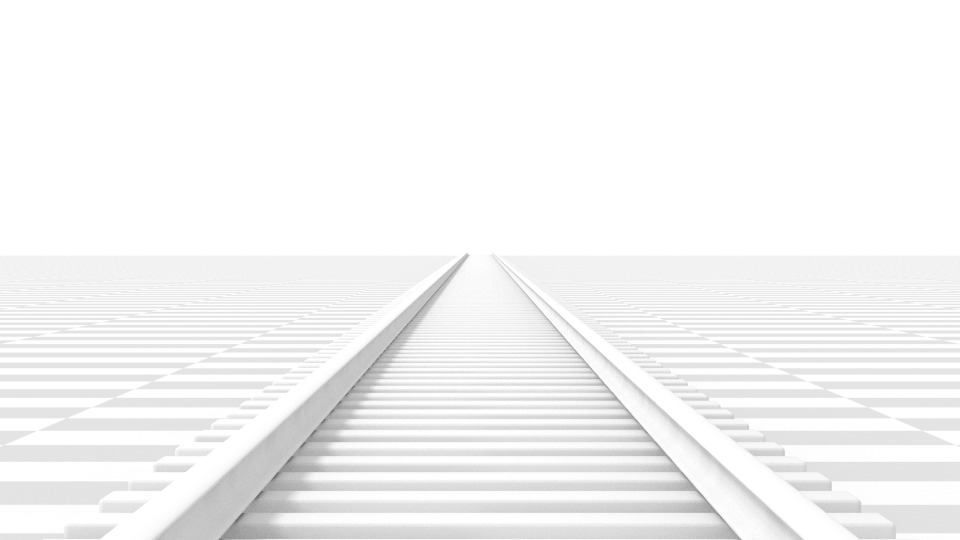
Перспективна камера з фокусною відстанню 210 мм замість 35 мм.
- Одиниця Об’єктива – Lens Unit
Фокусна відстань може бути задана у міліметрах або у градусах як фактичний кут Поля Зору – Field of View.

Підказка
При переміщенні камери у напрямку об’єкта властивість Focal Length може зменшуватися для продукування ефекту камери «Зумування Везенням» – Dolly Zoom, або цей ефект навпаки, рух від об’єкта та збільшення фокусної відстані.
This video демонструє ефект камери Dolly Zoom.
- Orthographic – Ортогонально
With Orthographic perspective objects always appear at their actual size, regardless of distance. This means that parallel lines appear parallel, and do not converge like they do with Perspective.
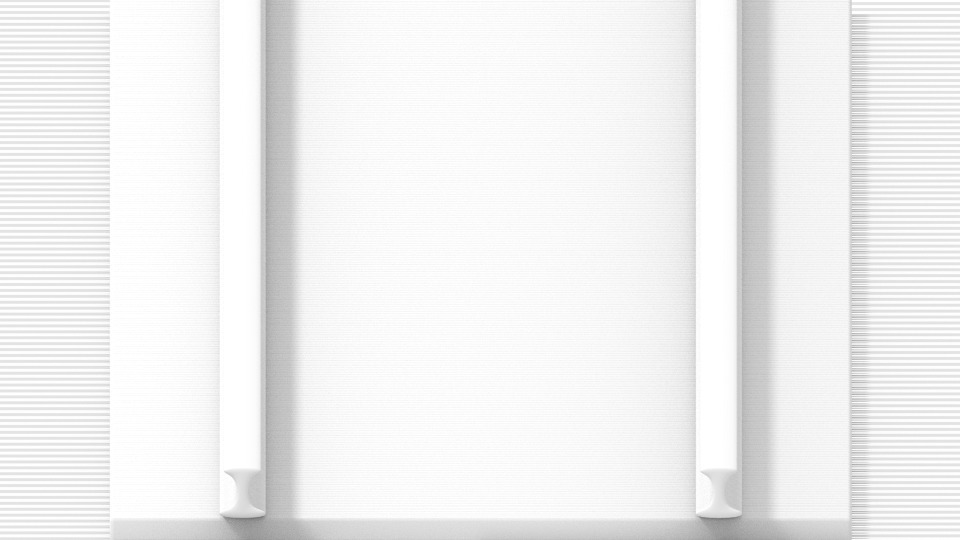
Рендер тієї, що й вище сцени колії, але типом об’єктива Orthographic.
- Ортогональний Масштаб – Orthographic Scale
Це керує видимим розміром об’єктів, що проектуються на зображення.
Note that this is effectively the only setting which applies to orthographic perspective. Since parallel lines do not converge in orthographic mode (no vanishing points), the lens shift settings are equivalent to translating the camera in the 3D Viewport.

- Panoramic Cycles Only
This type covers a variety of panoramic projections. See the Cycles panoramic camera settings for more information.
- Custom Cycles Only
Custom cameras enable user-defined behavior through the use of OSL code. See the Cycles custom camera documentation for more information.
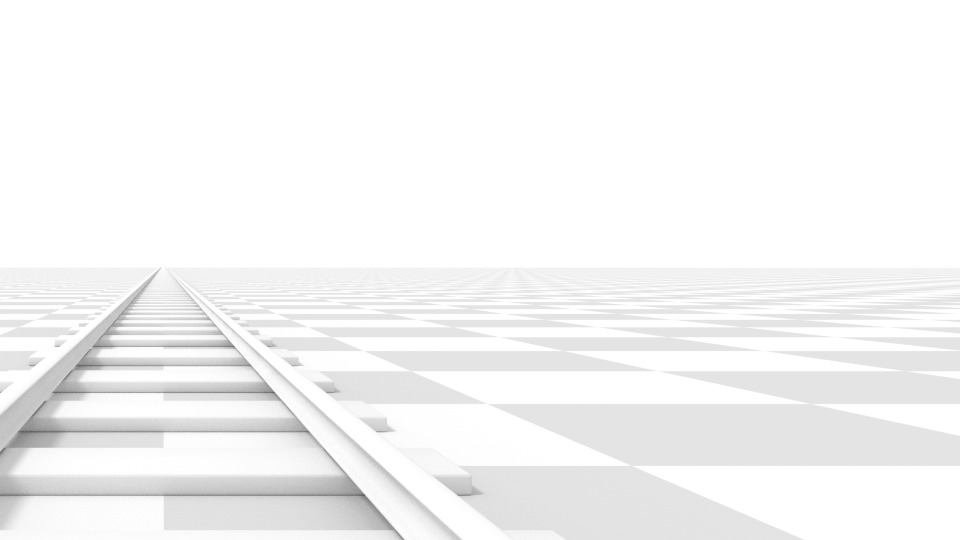
- Зсув – Shift
Allows for the adjustment of vanishing points. Vanishing points refer to the positions to which parallel lines converge. In these render examples, the most obvious vanishing point is at the end of the railroad.
Зверніть увагу, як горизонтальні лінії залишаються ідеально горизонтальними при використанні зсуву об’єктива та отримують перекіс при обертанні об’єкта камери.
Примітка
Використання зсуву об’єктива є еквівалентом рендерингу зображення з більшим Полем Зору – FOV та обрізуванням його від центру.
- Clip Start, End
The interval in which objects are directly visible. Any objects outside this range still influence the image indirectly, as further light bounces are not clipped.
Примітка
For viewport rendering, setting clipping distances to limited values is important to ensure sufficient rasterization precision. Ray tracing renders do not suffer from this issue so much, and as such more extreme values can safely be set.
Порада
When Show – Limits in the Viewport Display panel is enabled, the clip bounds will be visible as two yellow connected dots on the camera’s line of sight.
Дивись також
Depth of Field – Глибина Різкості
Real-world cameras transmit light through a lens that bends and focuses it onto the sensor. Because of this, objects that are a certain distance away are in focus, but objects in front and behind that are blurred.
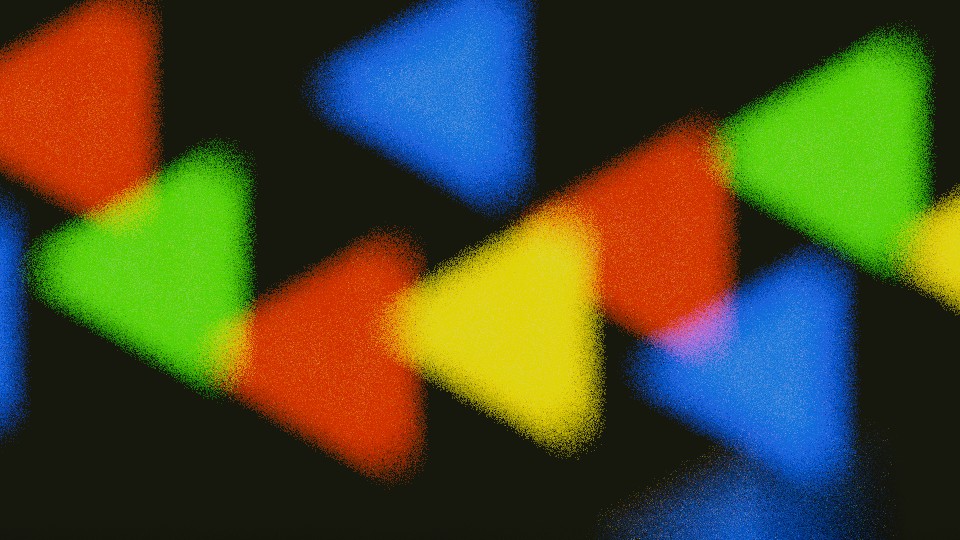
Приклад ефект боке на основі глибини різкості.
Ділянка у фокусі називається «фокусною точкою» – focal point та може задаватися як точне значення або за допомогою відстані між камерою та обраним об’єктом:
- Об’єкт Фокуса – Focus Object
Choose an object which will determine the focal point. Linking an object will deactivate the distance parameter.
- Відстань Фокуса – Focus Distance
Sets the distance to the focal point when no Focus Object is specified. This distance can be visualized in the 3D Viewport by enabling Show – Limits in the Viewport Display panel.
Підказка
Use the eyedropper icon or hover the mouse over the Focal Distance property and press E to enable the depth Depth Picker. Then LMB on a point in the 3D Viewport to sample the distance from that point to the camera.
Aperture – Апертура
- F-Stop – Д-Число (діафрагмове число)
F-Stop ratio that defines the amount of blurring. Lower values give a strong depth of field effect.
- Пелюстки – Blades
Total number of polygonal blades used to alter the shape of the blurred objects in the render, and render preview. As with the viewport, the minimum amount of blades to enable the bokeh effect is 3, resulting in a triangular-shaped blur.
- Обертання
Обертає сторони багатобічника навколо вказувальної на камеру осі за або проти годинникової стрілки.
- Ratio – Пропорція
Change the amount of distortion to simulate the anamorphic bokeh effect. A setting of 1.0 shows no distortion, where a number below 1.0 will cause a horizontal distortion, and a higher number will cause a vertical distortion.
Camera – Camera
These settings adjusts properties that relate to a physical camera body. Several Presets can be chosen to match real-world cameras.
- Припасування Датчика – Sensor Fit
Adjusts how the camera’s sensor fits within the outputs dimension adjusting the angular field of view.
- Авто:
Calculates a square sensor size based on the larger of the Resolution dimensions.
- Horizontal – Горизонтально:
Manually adjust the Width of the sensor, the Height is calculated based on the aspect ratio of the output’s Resolution.
- Vertical – Вертикально:
Manually adjust the Height of the sensor, the Width is calculated based on the aspect ratio of the output’s Resolution.
- Size / Width, Height
This setting is an alternative way to control the field of view, as opposed to modifying the focal length. It is useful to match a camera in Blender to a physical camera and lens combination, e.g. for motion tracking.
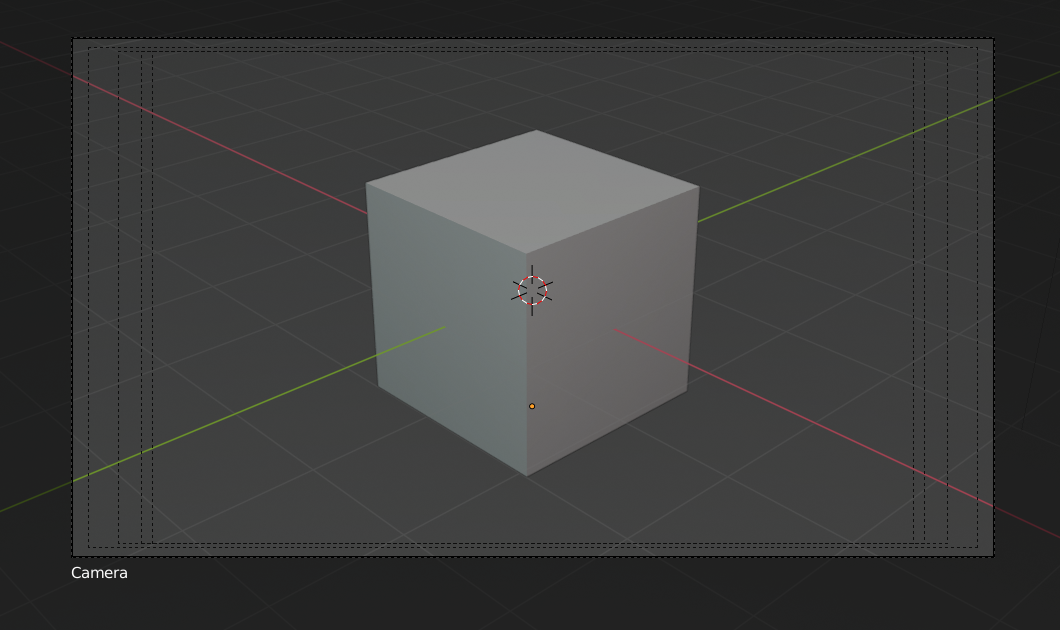
Області Безпеки – Safe Areas
Області безпеки – це напрямні рамки, що використовуються для розміщення елементів, щоб гарантувати, що найбільш важливі частини вмісту будуть видимі на всіх екранах.
Different screens have varying amounts of Overscan (especially older TV sets). That means that not all content will be visible to all viewers, since parts of the image surrounding the edges are not shown. To work around this problem TV producers defined two areas where content is guaranteed to be shown: action safe and title safe.
Modern LCD/plasma screens with purely digital signals have no Overscan, yet safe areas are still considered best practice and may be legally required for broadcast.
У Blender’і області безпеки можуть бути задані для оглядів Камери – Camera та Секвенсера – Sequencer.
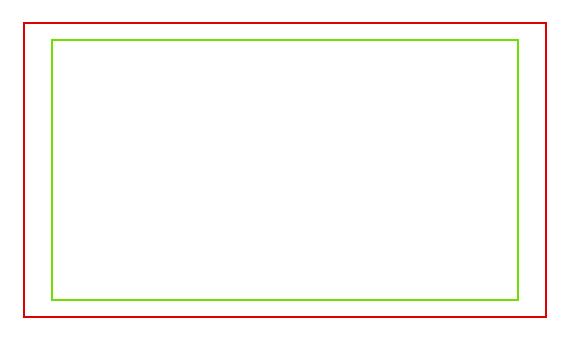
Red line: Action safe. Green line: Title safe.
The Safe Areas can be customized by their outer margin, which is a percentage scale of the area between the center and the render size. Values are shared between the Video Sequence editor and camera view.
- Title Safe Margins X, Y
Also known as Graphics Safe. Place all important information (graphics or text) inside this area to ensure it can be seen by the majority of viewers.
- Action Safe Margins X, Y
Make sure any significant action or characters in the shot are inside this area. This zone also doubles as a sort of «margin» for the screen which can be used to keep elements from piling up against the edges.
Порада
Each country sets a legal standard for broadcasting. These include, among other things, specific values for safe areas. Blender defaults for safe areas follow the EBU (European Union) standard. Make sure you are using the correct values when working for broadcast to avoid any trouble.
Центровано-Обрізані Області Безпеки – Center-Cut Safe Areas
Center-cuts are a second set of safe areas to ensure content
is seen correctly on screens with a different aspect ratio.
Old TV sets receiving 16:9 or 21:9 video will cut off the sides.
Position content inside the center-cut areas to make sure the most important elements
of your composition can still be visible in these screens.
Стандарти Blender показують пропорцію 4:3 (квадрат) всередині 16:9 (широкий екран).
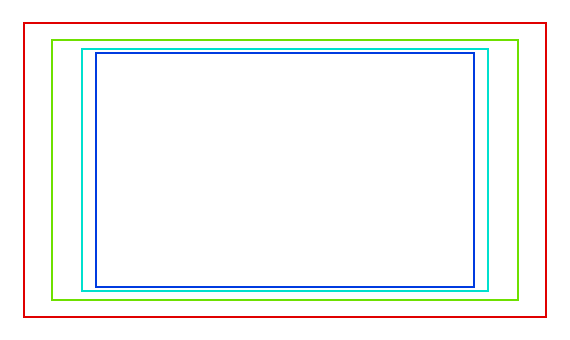
Cyan line: action center safe. Blue line: title center safe.
Фонові Зображення – Background Images
Фонова картинка у вашому 3D Огляді – 3D View може бути дуже корисна у багатьох ситуаціях: моделювання є очевидним, але вона також корисна при малюванні (наприклад, ви маєте орієнтувальні картинки облич при малюванні текстур безпосередньо на вашій моделі…) або анімуванні (коли використовуєте відео як фон) тощо.
- Джерело Фону – Background Source
Джерело фонового зображення.
- Image – Зображення:
Використовується зовнішнє зображення, послідовність зображень, відеофайл або генерована текстура.
- Movie Clip – Відеокліп:
Використовується один з блоків даних відеокліпів.
- Активний Кліп
Display a Movie Clip from the scene’s Active Clip.
- Render Undistorted – Рендер Неспотворено
Display the background image using undistorted proxies when available.
- Proxy Render Size – Розмір Рендера Замісника
Select between full (non-proxy) display or a proxy size to draw the background image.
Дивись також
To build a proxy, the Movie Clip Editor Proxy settings have to be used. Otherwise the proxy settings here have no effect.
- Color Space – Колірний Простір
The color space the image or video file uses within Blender.
- View as Render – Огляд як Рендер
Apply the color management settings when displaying this image on the screen.
- Opacity – Безпрозорість
Керує прозорістю фонового зображення.
- Depth – Глибина
Вибирає, чи буде це зображення показуватися позаду усіх об’єктів, чи спереду перед усіма.
- Метод Кадру
Керує, як зображення буде розміщене в огляді камери.
- Розтяг:
Змушує розміри зображення відповідати межам камери (може змінювати пропорцію боків).
- Припасування:
Зменшує масштаб зображення, щоб воно припасовувалося в огляд камери без зміни пропорції боків.
- Обрізка:
Масштабує зображення, щоб воно заповнювало повністю огляд камери, але без зміни пропорції боків (деякі із зображень буде обрізано).
- Зсув X, Y – Offset X, Y
Позиціює фонове зображення, використовуючи ці зсуви.
In orthographic views, this is measured in the normal scene units. In the camera view, this is measured relative to the camera bounds (0.1 will offset it by 10% of the view width/height).
- Обертання
Обертає зображення навколо його центра.
- Масштаб
Збільшує або зменшує масштаб зображення від його центра.
- Flip – X
Перевертає зображення так, що ліва сторона стає правою, а права - лівою.
- Flip – Y
Перевертає зображення так, що верхня сторона стає нижньою, а нижня - верхньою.
Примітка
Movie Clips or images with view as render are only visible behind objects when film transparency is enabled or the scene world is disabled in the viewport.
Viewport Display – Показ Оглядвікна
Огляд камери з показом області безпеки, датчика та імені.
- Розмір
Size of the camera visualization in the 3D Viewport. This setting has no effect on the render output of a camera. The camera visualization can also be scaled using the standard Scale S transform key.
- Show – Limits
Shows an orange line indicating the Clip Start and End values, as well as a yellow cross indicating the Focus Distance. If 3D Viewport’s Відстань Фокуса – Focus Distance is enabled, this cross can also be dragged with the mouse to adjust the distance.
- Show – Mist
Toggles viewing of the mist limits on and off. The limits are shown as two connected white dots on the camera line of sight. The mist limits and other options are set in the World panel, in the Mist section.
- Show – Sensor
Показує пунктирну рамку датчика в огляді камери.
- Show – Name
Перемикається показ імені цієї камери в її огляді.
- Паспарту – Passepartout
Ця опція затемняє область поза полем зору камери. The opacity of the passepartout can be adjusted using the value slider.
Порада
If the Passepartout is fully opaque, Blender will make optimizations to speed up the rendering of areas inside the camera view.
Напрямні Композиції – Composition Guides
Composition Guides – напрямні композиції вмикають накладки на показі камери, що можуть допомагати при кадруванні знімка.
- Третини – Thirds
Додає лінії, що ділять кадр на третини вертикально і горизонтально.
- Center – Center
Додає лінії, що ділять кадр навпіл по вертикалі та по горизонталі.
- Center – Diagonal
Додає лінії, що з’єднують протилежні кути кадру.
- Golden – Ratio
Divides the width and height into golden proportions (about 0.618 of the size from all sides of the frame).
- Golden – Triangle A
Показує діагональну лінію з нижнього лівого до верхнього правого кута, потім додає перпендикулярні лінії, що проходять через верхній лівий та нижній правий кутки.
- Golden – Triangle B
Рисує лінії так само, як і версія А, але з протилежних кутів.
- Harmony – Triangle A
Показує діагональну лінію з нижнього лівого у верхній правий куток, далі лінії з верхнього лівого та нижнього правого кутків у 0.618 довжин протилежних сторін.
- Harmony – Triangle B
Рисує лінії так само, як і версія А, але з протилежних кутів.
- Колір
Sets the display color and opacity (alpha) used for all composition guide overlays. Useful for adjusting visibility depending on the brightness or contrast of the underlying shot.