Grab – Захоп
Посилання
- Режим:
Режим Редагування
- Tool – Засіб:
«Засобосмуга > Захоп» –
The Grab tool moves UVs around.
Tools Settings – Устави Засобів
- Розмір
This option controls the radius of the brush, measured in pixels. F allows you to change the brush size interactively by dragging the mouse and then LMB. Typing a number then enter while using F allows you to enter the size numerically.
- Strength – Сила
Controls how much each application of the brush affects the UVs. You can change the brush strength interactively by pressing Shift-F in the 3D Viewport and then moving the brush and then LMB. You can enter the size numerically also while in Shift-F sizing.
- Спад
The Falloff allows you to control the Strength falloff of the brush. The falloff is mapped from the center of the brush (left part of the curve) towards its borders (right part of the curve). Changing the shape of the curve will make the brush softer or harder. Read more about using the Віджет Кривої – Curve Widget.
- Передустава Кривої – Curve Preset
- Кастомне – Custom:
You can choose how the strength of the falloff is determined from the center of the brush to the borders by manually manipulating the control points within the curve widget. There are also a couple of preset custom curves displayed at the bottom of the curve widget that can be used on their own or as a starting point for tweaking.
- Smooth – Згладження:
The center strength, the border strength, and the falloff transition between them are evenly distributed.
- Згладженіше – Smoother:
Similar to Smooth but produces a wider center point of the brush before tapering off.
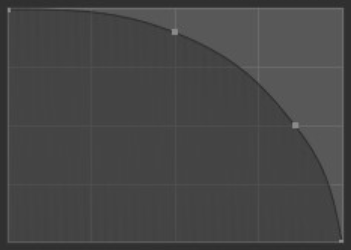
- Sphere – Сфера:
The strength of the brush is predominately at its strongest point with a steep falloff near the border of the brush.
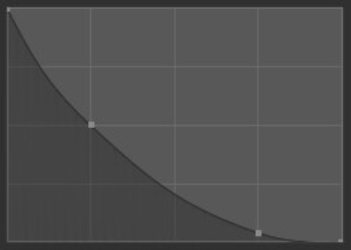
- Корінь – Root:
Similar to a Sphere but the center is a more concentrated point.
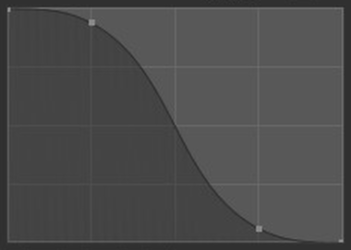
- Sharp – Гостро:
The center of the brush is the strongest point then exponentially tapers off to a lower strength, creating a fine point.
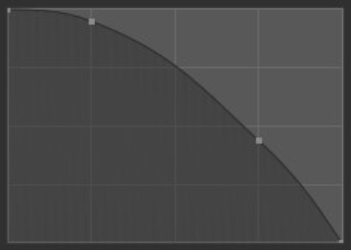
- Linear – Лінеарно:
With the center being the strongest, the strength will consistently weaken as it reaches the border of the brush.
- Sharper:
Similar to Sharp but the center point is more condensed.
- Inverse Square:
A hybrid between Smooth and Sphere.
- Constant – Константно:
The strength of the brush remains unified across the entire brush. This will create a sharp edge at the border of the brush.
- Опції
- Блокувати Границі – Lock Borders
Locks the boundary of UV islands from being affected by the brush. This is useful to preserve the shape of UV islands.
- Ліпити Всі Острови – Sculpt All Islands
Редагуються усі острови, а не тільки острів, найближчий до центра пензля, від якого почато штрих ліплення.